The Respond module
The Respond module enables partners to create customizable rules that trigger automated actions to minimize risk when certain conditions are met. It allows for faster reactions to real time events managed by SaaS Alerts.
Requirements
- SaaS Alerts MSP Admin privileges.
- Sign in with Microsoft, K1, or Google OAuth, or Enable MFA in SaaS Alerts user settings.
- Accept all Respond module security permissions.
- A global admin account that is specific to the organization domain to connect to Respond.
NOTE Make sure you disable MFA if you choose to use Google, K1, or Microsoft authentication.
IMPORTANT If the global admin account used to create a Respond connection has its permissions diminished, password changed, or sign-in blocked, the Respond connection will break and have to be re-established once the account is restored to global admin and sign-in is unblocked for that account.
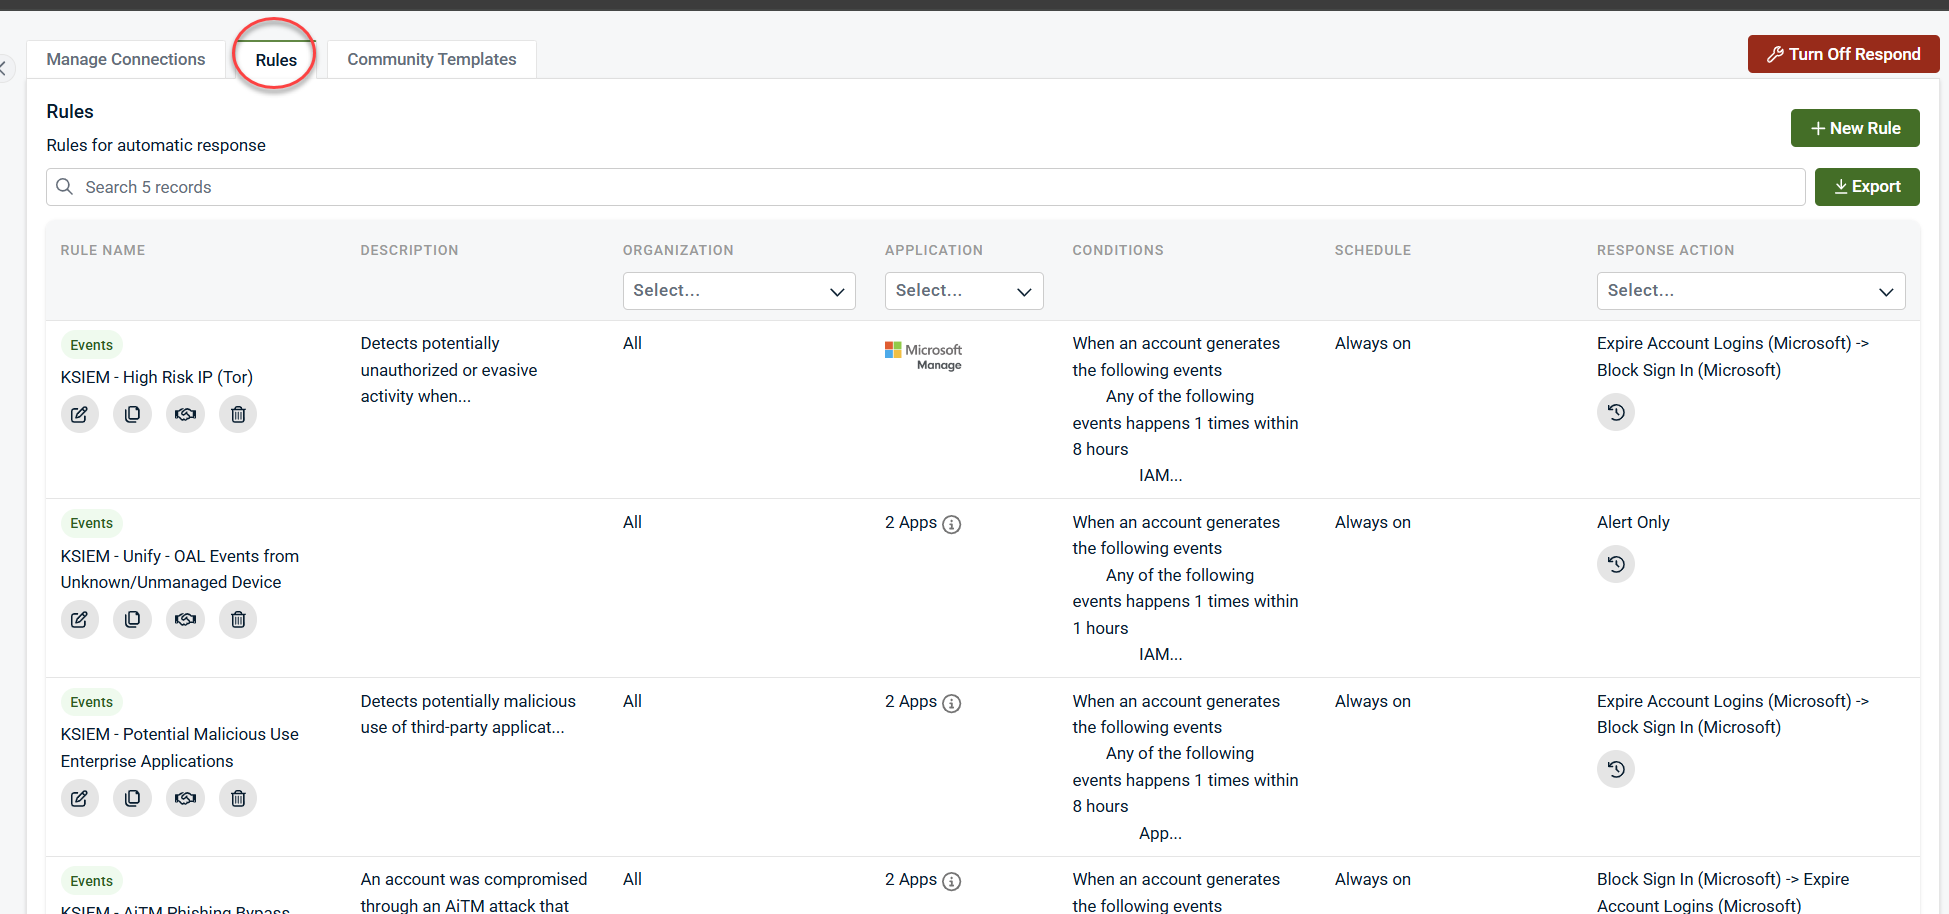
Rules
On the Rules tab, you will be able to create a new rule, manage existing rules, or turn off the Respond module completely.
Creating a rule
Before creating a rule, it's important to understand how rules are structured. Rules apply to one or more organizations, at least one account (typically a user account), and must be listening for at least one event. Rules can then have responses, or actions, that are taken if the rule conditions are observed triggering the response. It is possible to select a "no-action" which is the equivalent of creating a new SaaS Alerts event. The anatomy of a rule can be described as observed event(s) for customer organization(s) and SaaS Application account(s) that trigger actions selected by the MSP Admin to perform automated response(s).
Steps for creating a rule
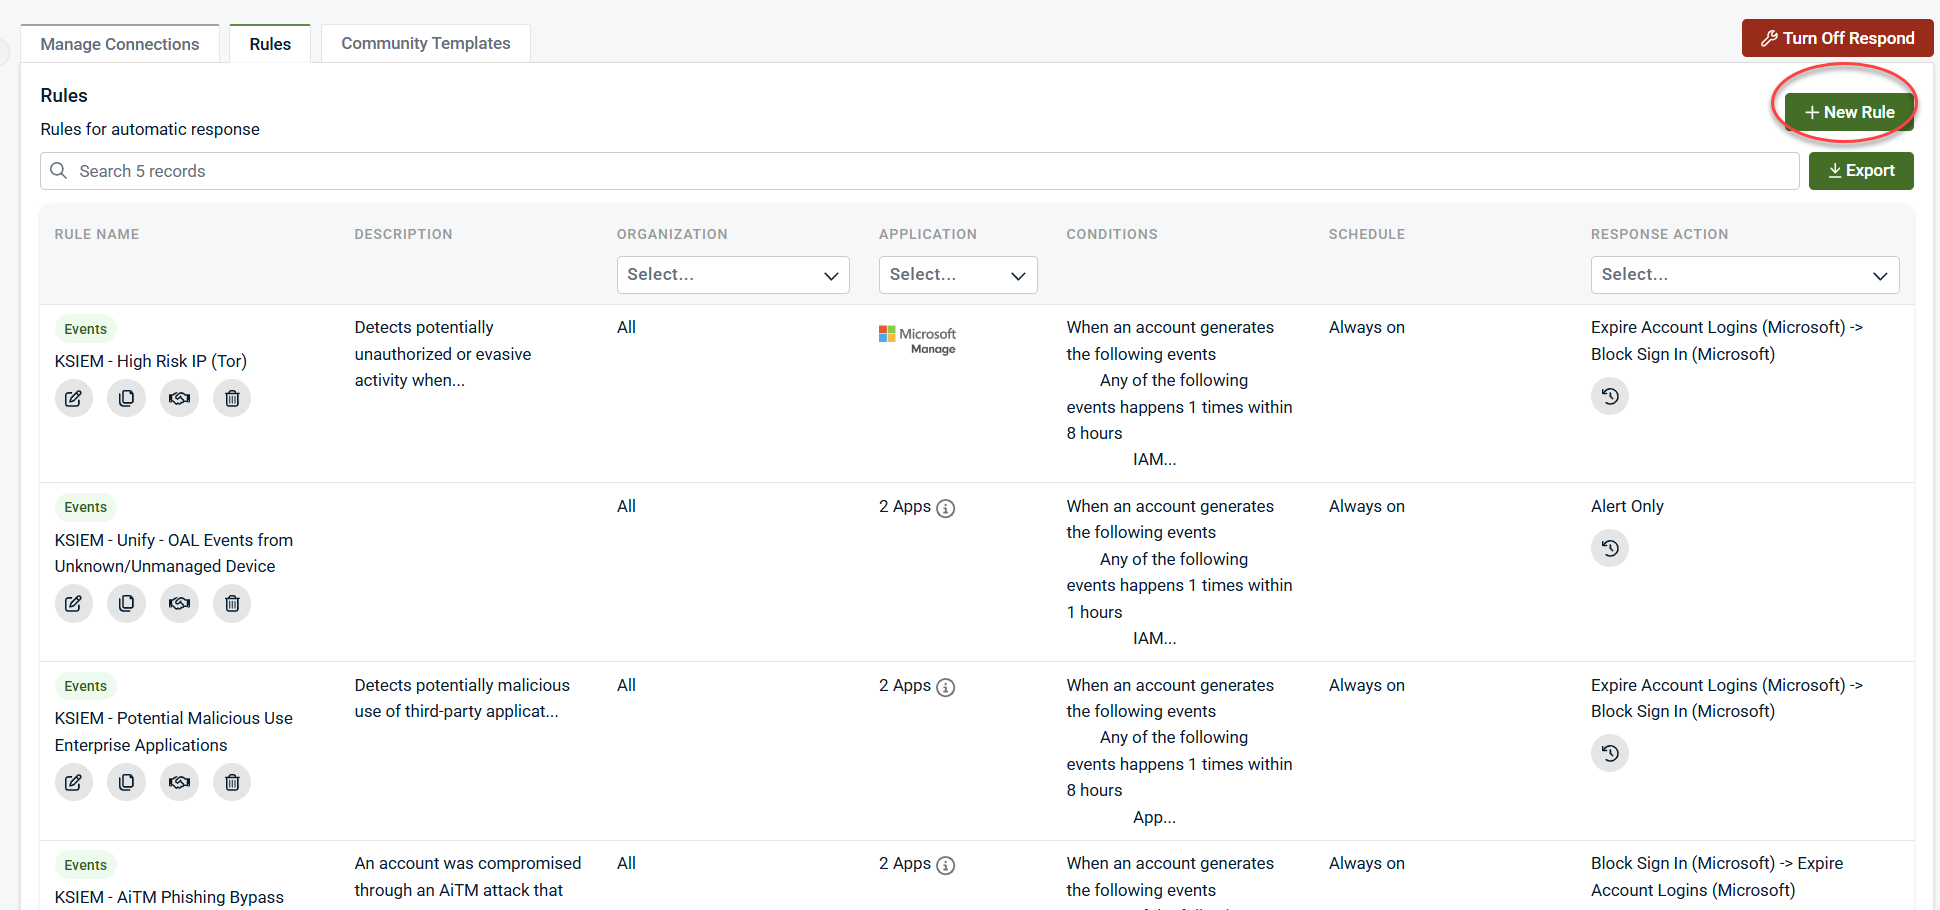
1. From the Rules page, click + New Rule.
2. Click Untitled Rule to edit the name of the new rule.
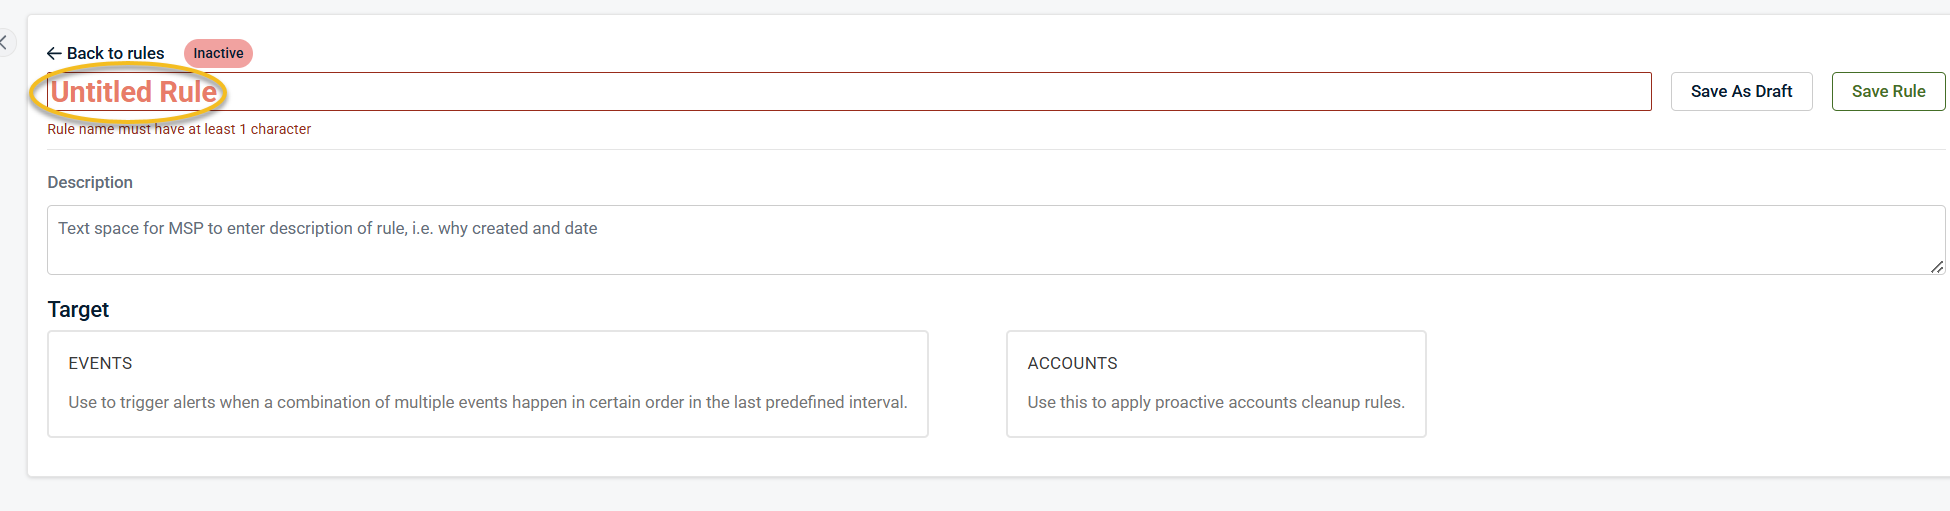
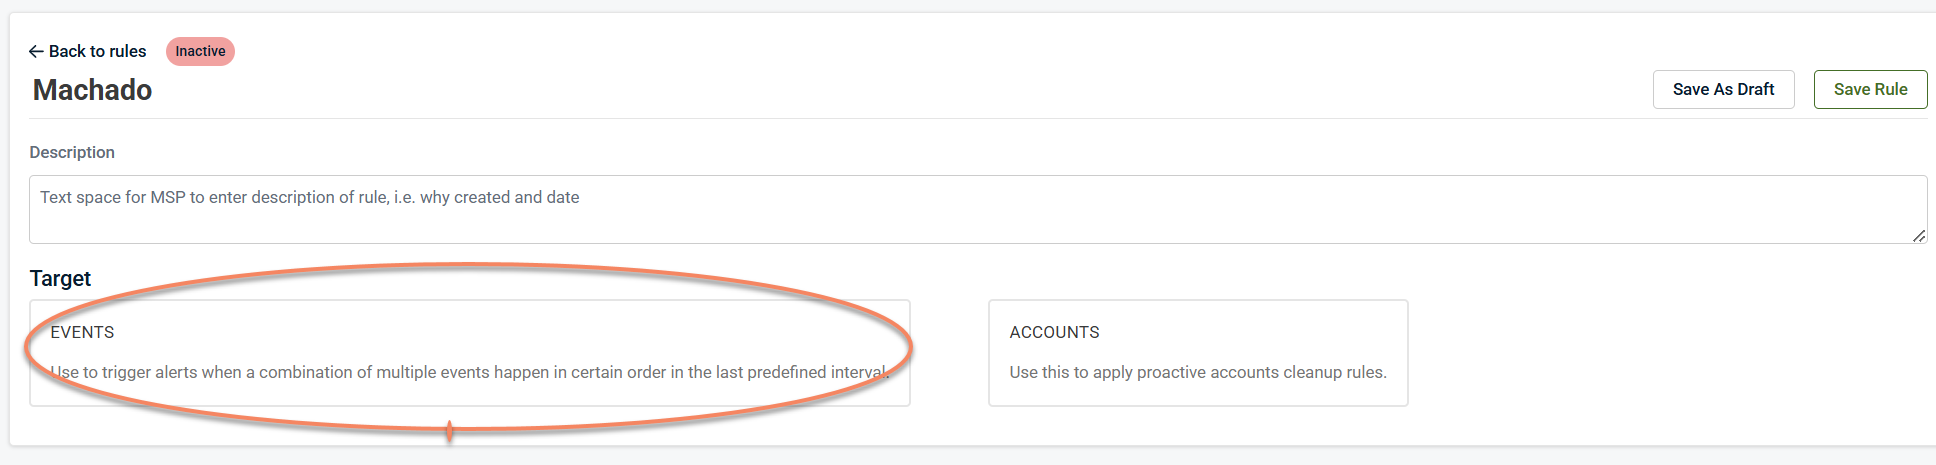
3. Click Events to create the Respond rule.
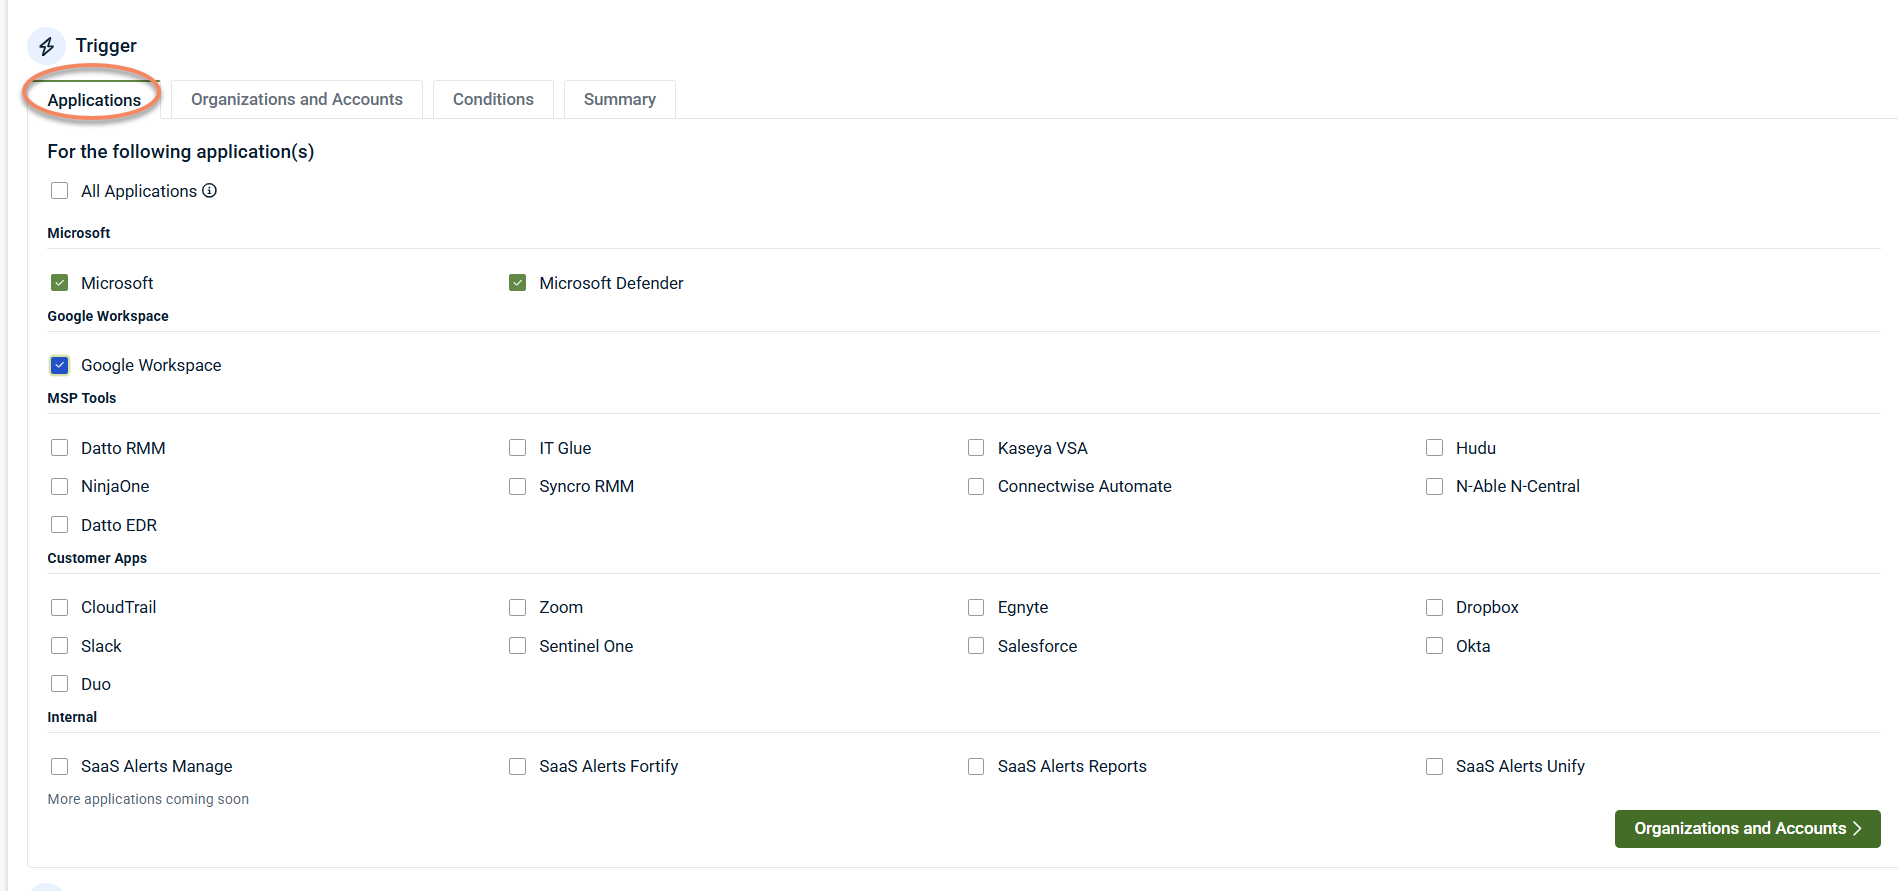
4. Under the Trigger section, in the Applications tab, select the application that you want to monitor.
5. Click Organizations and Accounts

6. Select the organizations and accounts to be monitored. Partners can choose one, all, or multiple organizations and accounts.
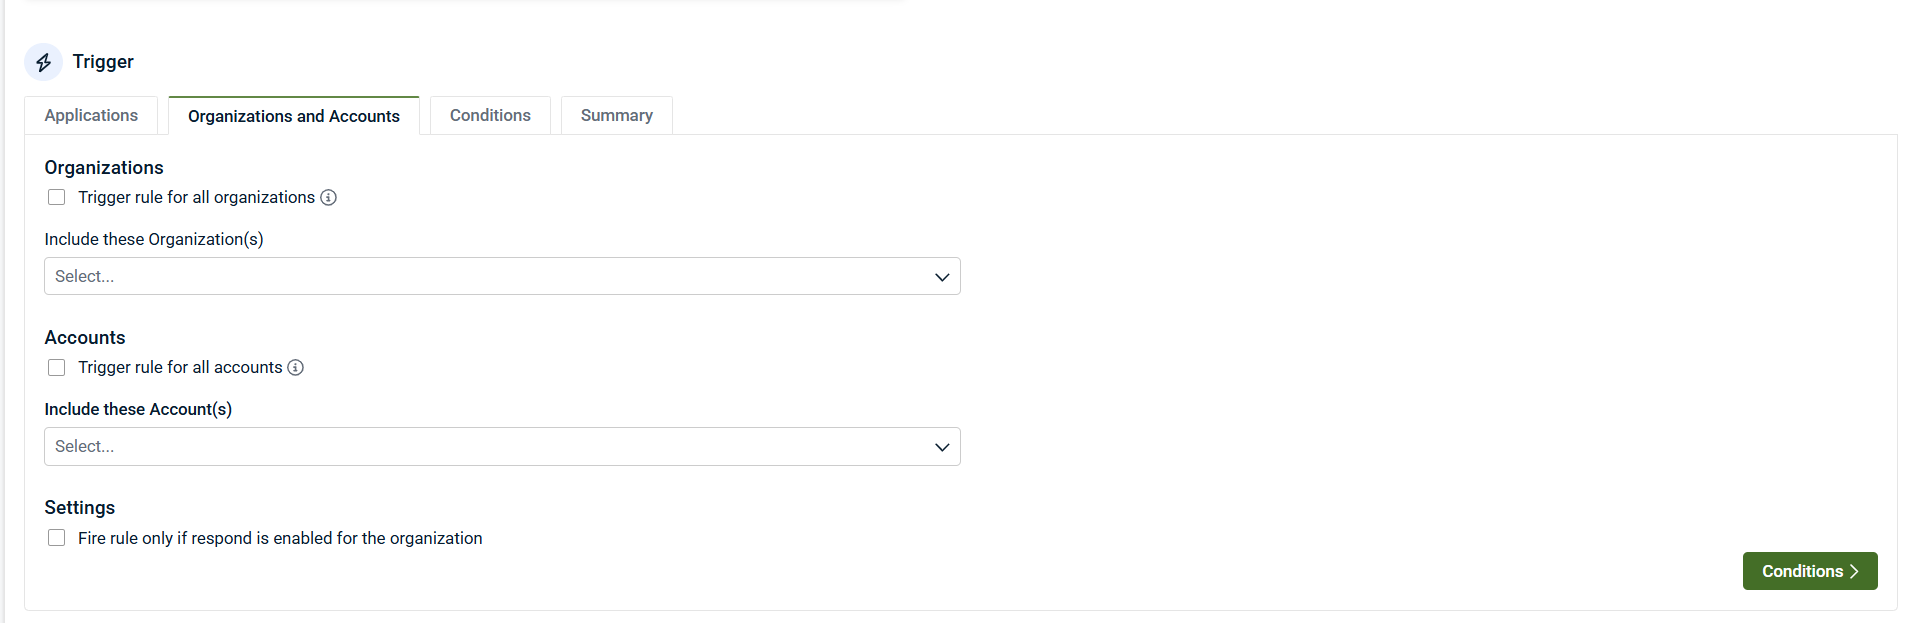
NOTE If the option Trigger rules for all organizations or Trigger rules for all accounts is active, it will apply to all current and future organizations and accounts. By selecting the Trigger rule for all organizations checkbox, you will also have the ability to exclude specific organizations.
When the Fire rule only if respond is enabled for the organization setting is unselected and a customer has not been connected to Respond, the rule will still trigger.
However, no actions will be completed and the remediation will fail unless there is a Respond connection. This option is useful for alert notifications, for when the rule actions has been set to Do nothing.
If the Fire rule only if respond is enabled for the organization setting is selected, then only organizations with a Respond connection will trigger the rule.
6. Click Conditions to go to the next page.
Here, you can select the event or Alert Description that needs to occur for this rule to be triggered. Set the number of occurrences and the time frame. The minimum occurrence is 1, and the minimum time frame is 15 minutes. Partners will also have the option to add multiple events with equal or different parameters with the ability to combine them, as well. Logical OR and AND operators are available to create complex event monitoring flows.
NOTE Respond scans happen every five minutes and check for the occurrence of events set in the rule.
Filters
For each event selected within the rule, a filter may be applied. Filters allow for additional criteria to be set based on a subset of event details. As an example, Country Contains US or Country does not contain US. This will then include or exclude instances of an event depending upon the filter.
Two specific operators, ‘Matches Pattern’ and ‘Does not match pattern’, are powerful tools designed to enhance text search capabilities in the UI. These operators within a filter allow users to include or exclude results based on patterns defined using wildcard characters. Currently they are only available for File Name and Description Details filters.
Key Features
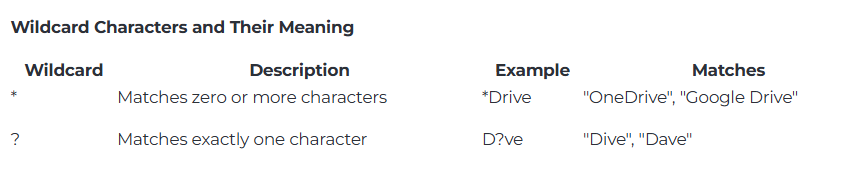
- Wildcards Supported: ‘*’ or ‘?’
- Flexible Matching: Easily find or exclude text patterns in fields to suit your search requirements.
- Enhanced Usability: Quickly narrow down search results by defining specific text patterns.
Matches Pattern
The Matches Pattern filter retrieves fields containing text that matches the specified pattern. Below are examples of how to use this filter effectively:
Match text containing a specific term:
-
Pattern: --OneDrive
-
Description: Matches any field where "--OneDrive" appears anywhere in the text.
-
Example Matches: "--OneDrive File Sharing", "Introduction to --OneDrive", "Manage Your --OneDrive Files"
Match text ending with a specific term:
-
Pattern: *OneDrive
-
Description: Matches any field where the text ends with "OneDrive."
-
Example Matches: "Shared with OneDrive", "Export to OneDrive"
Match text starting with a specific term:
-
Pattern: OneDrive*
-
Description: Matches any field where the text starts with "OneDrive."
-
Example Matches: "OneDrive Files Management", "OneDrive Account Settings"
Does Not Match Pattern
The Does Not Match Pattern filter excludes fields containing text that matches the specified pattern. This is useful for eliminating unwanted results from your search.
Exclude text containing a specific term:
-
Pattern: OneDrive
-
Description: Excludes any field where "OneDrive" appears anywhere in the text.
-
Example Matches: "OneDrive File Sharing", "Manage Your OneDrive Files"
Exclude text ending with a specific term:
-
Pattern: *OneDrive
-
Description: Excludes any field where the text ends with "OneDrive."
-
Example Matches: "Shared with OneDrive", "Export to OneDrive"
Exclude text starting with a specific term:
-
Pattern: OneDrive*
-
Description: Excludes any field where the text starts with "OneDrive."
-
Example Matches: "OneDrive Files Management", "OneDrive Account Settings"
Wildcard searches are case-sensitive, depending on the field configuration. Use these filters judiciously, as patterns with leading wildcards (e.g., *OneDrive) can impact performance for large datasets.
7. Click Summary to review the Trigger section. If you want to add, change, or remove any of the Trigger settings, click the edit pencil or the numbers to go back to the previous page. If everything looks correct, scroll down and advance to the Response section.
8. In the Response section, select the response for the trigger previously set. Then, select the Action Approval Type , where you can choose if the response for the trigger will execute automatically or a manual approval by the MSP Admin is needed.
NOTE If the rule is set to manual approval and the admin has not approved the remediation within the first 15 minutes, then a reminder will be send every 15 minutes. After the third reminder, the rule will be set to auto-ignored if no action is taken.
9. Click Alert Configuration to go to the next page.
10. On the Alert Configuration page, partners can customize the alert severity, such as critical, medium, or low, for the created event. Refer to Customizing alert severity. Additionally, you can configure the Event Alert Assignment. This will allow you to customize how events are assigned in event reports in SaaS Alerts.
11. The Alert Notifications page allows an MSP Admin to provide a phone number, email address, or opt in to receive push notifications via the mobile app. This enables the admin to receive notifications when a rule is triggered. Multiple phone numbers and email addresses can be added.
The initial step includes a brief explanation of the notifications that will be received and features a checkbox that requires approval.
Once the checkbox is confirmed, you can enter phone numbers and emails.
NOTE For SMS: When a number is entered for the first time, you will receive a prompt to send the Opt-In message to that phone number.
After the opt-in message is sent, the wording next to the phone number will change to indicate that the Opt-In has been completed, along with a notification message in the upper-right corner.
If a user opts out on their mobile device, their phone number will show as Opted Out.
If users have opted out, you can send them an email that directs them to this article. To opt back in, users must reply with START to the original text message, or they can text +1 (910) 765-8953 if they are in the US.
12. Click Summary to review the Response section. If you want to add, change or remove any of the Response settings, click the edit pencil icon or the numbers to go back to the previous screen. You can also double-check the Schedule.
13. In the Schedule section, you can set a schedule to limit the time where the Rule will be active. It can be set to Always On and the Rule will remain active 24/7.
14. Partners can set it to a Specific Time and Duration with a start and end date.
15. It can be also set to Recurring where partners have the option to run the rule on a daily, weekly, or monthly basis.
16. Now that you have specified the Trigger, configured the Response, and added the Schedule, click Save Rule. If you choose to continue working where you left it later, then click Save As Draft.
Important notes
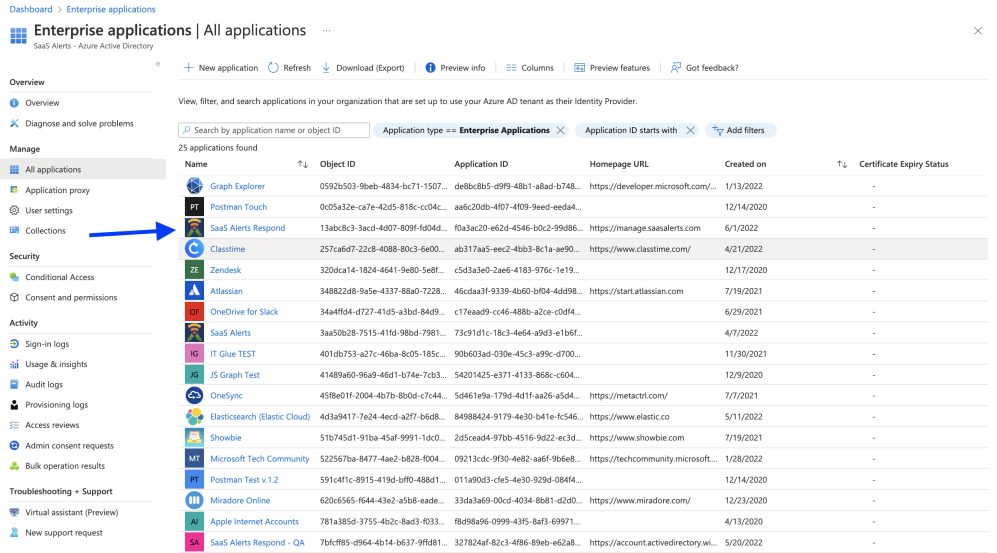
SaaS Alerts Respond is a separate Enterprise App from the original SaaS Alerts Enterprise App. This design choice was made to provide additional security features:
- When you connect Respond to a customer organization, a new Enterprise App will be added to the tenant. Without this Enterprise App, Respond cannot function. Each customer organization must be individually authenticated and connected to Respond.
- Respond can be disconnected at any time by selecting Turn off Respond in the SaaS Alerts control panel or by deleting the Enterprise App from the Azure AD / Enterprise Apps control page.
FAQ and updates
We have recently completed an update to Respond concerning how it tracks events in conjunction with the trigger criteria. This redesign of rule triggers brings several improvements listed below:
- Reduce rule trigger noise: Each rule will only trigger once when the conditions match instead of every 5 minutes.
- Catch possibly missed rule triggers with the previous 4 hour cooldown period per rule per account being removed.
- Enhance the tracking of events related to a rule by:
- adding Pending Rule Reminders. These reminders will be limited to 4 reminders every 15 minutes.
- adding Remediation Failed Reminders. These reminders will be limited to 4 reminders every 15 minutes.
- ability for the MSP admin to mark the rule trigger as Ignored or Remediated Manually
- when reminders are still not addressed after the fourth, automatically setting a rule trigger to Ignored
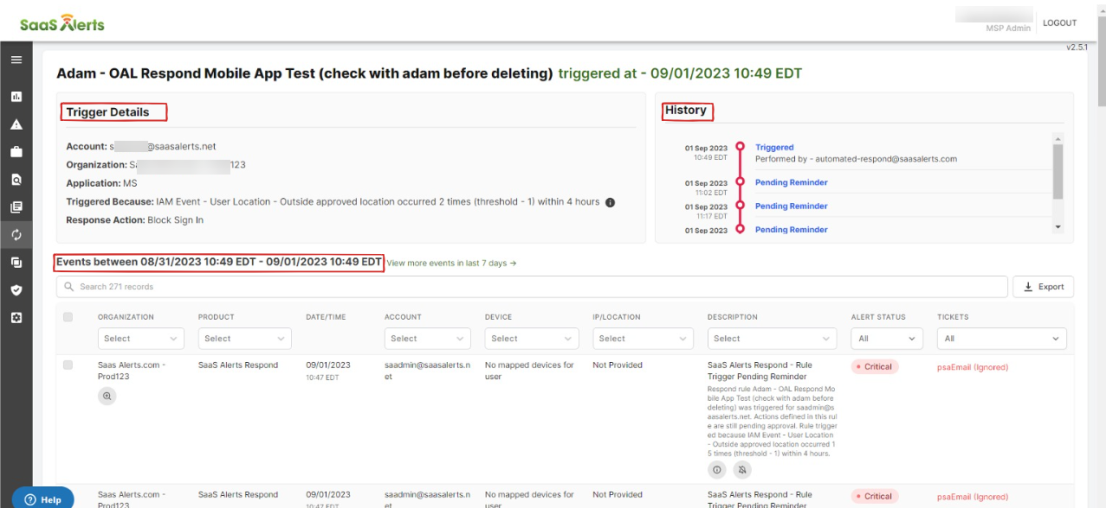
- Clear status of a rule with a History of the events associated with each rule trigger on the rule trigger page as an audit trail. The Rule Trigger details page will have three sections:
- Trigger Details: outlines the criteria of the rule
- History Details: a time-lapse view of the trigger statuses
- Events Between: a table of the events associated with the rule trigger
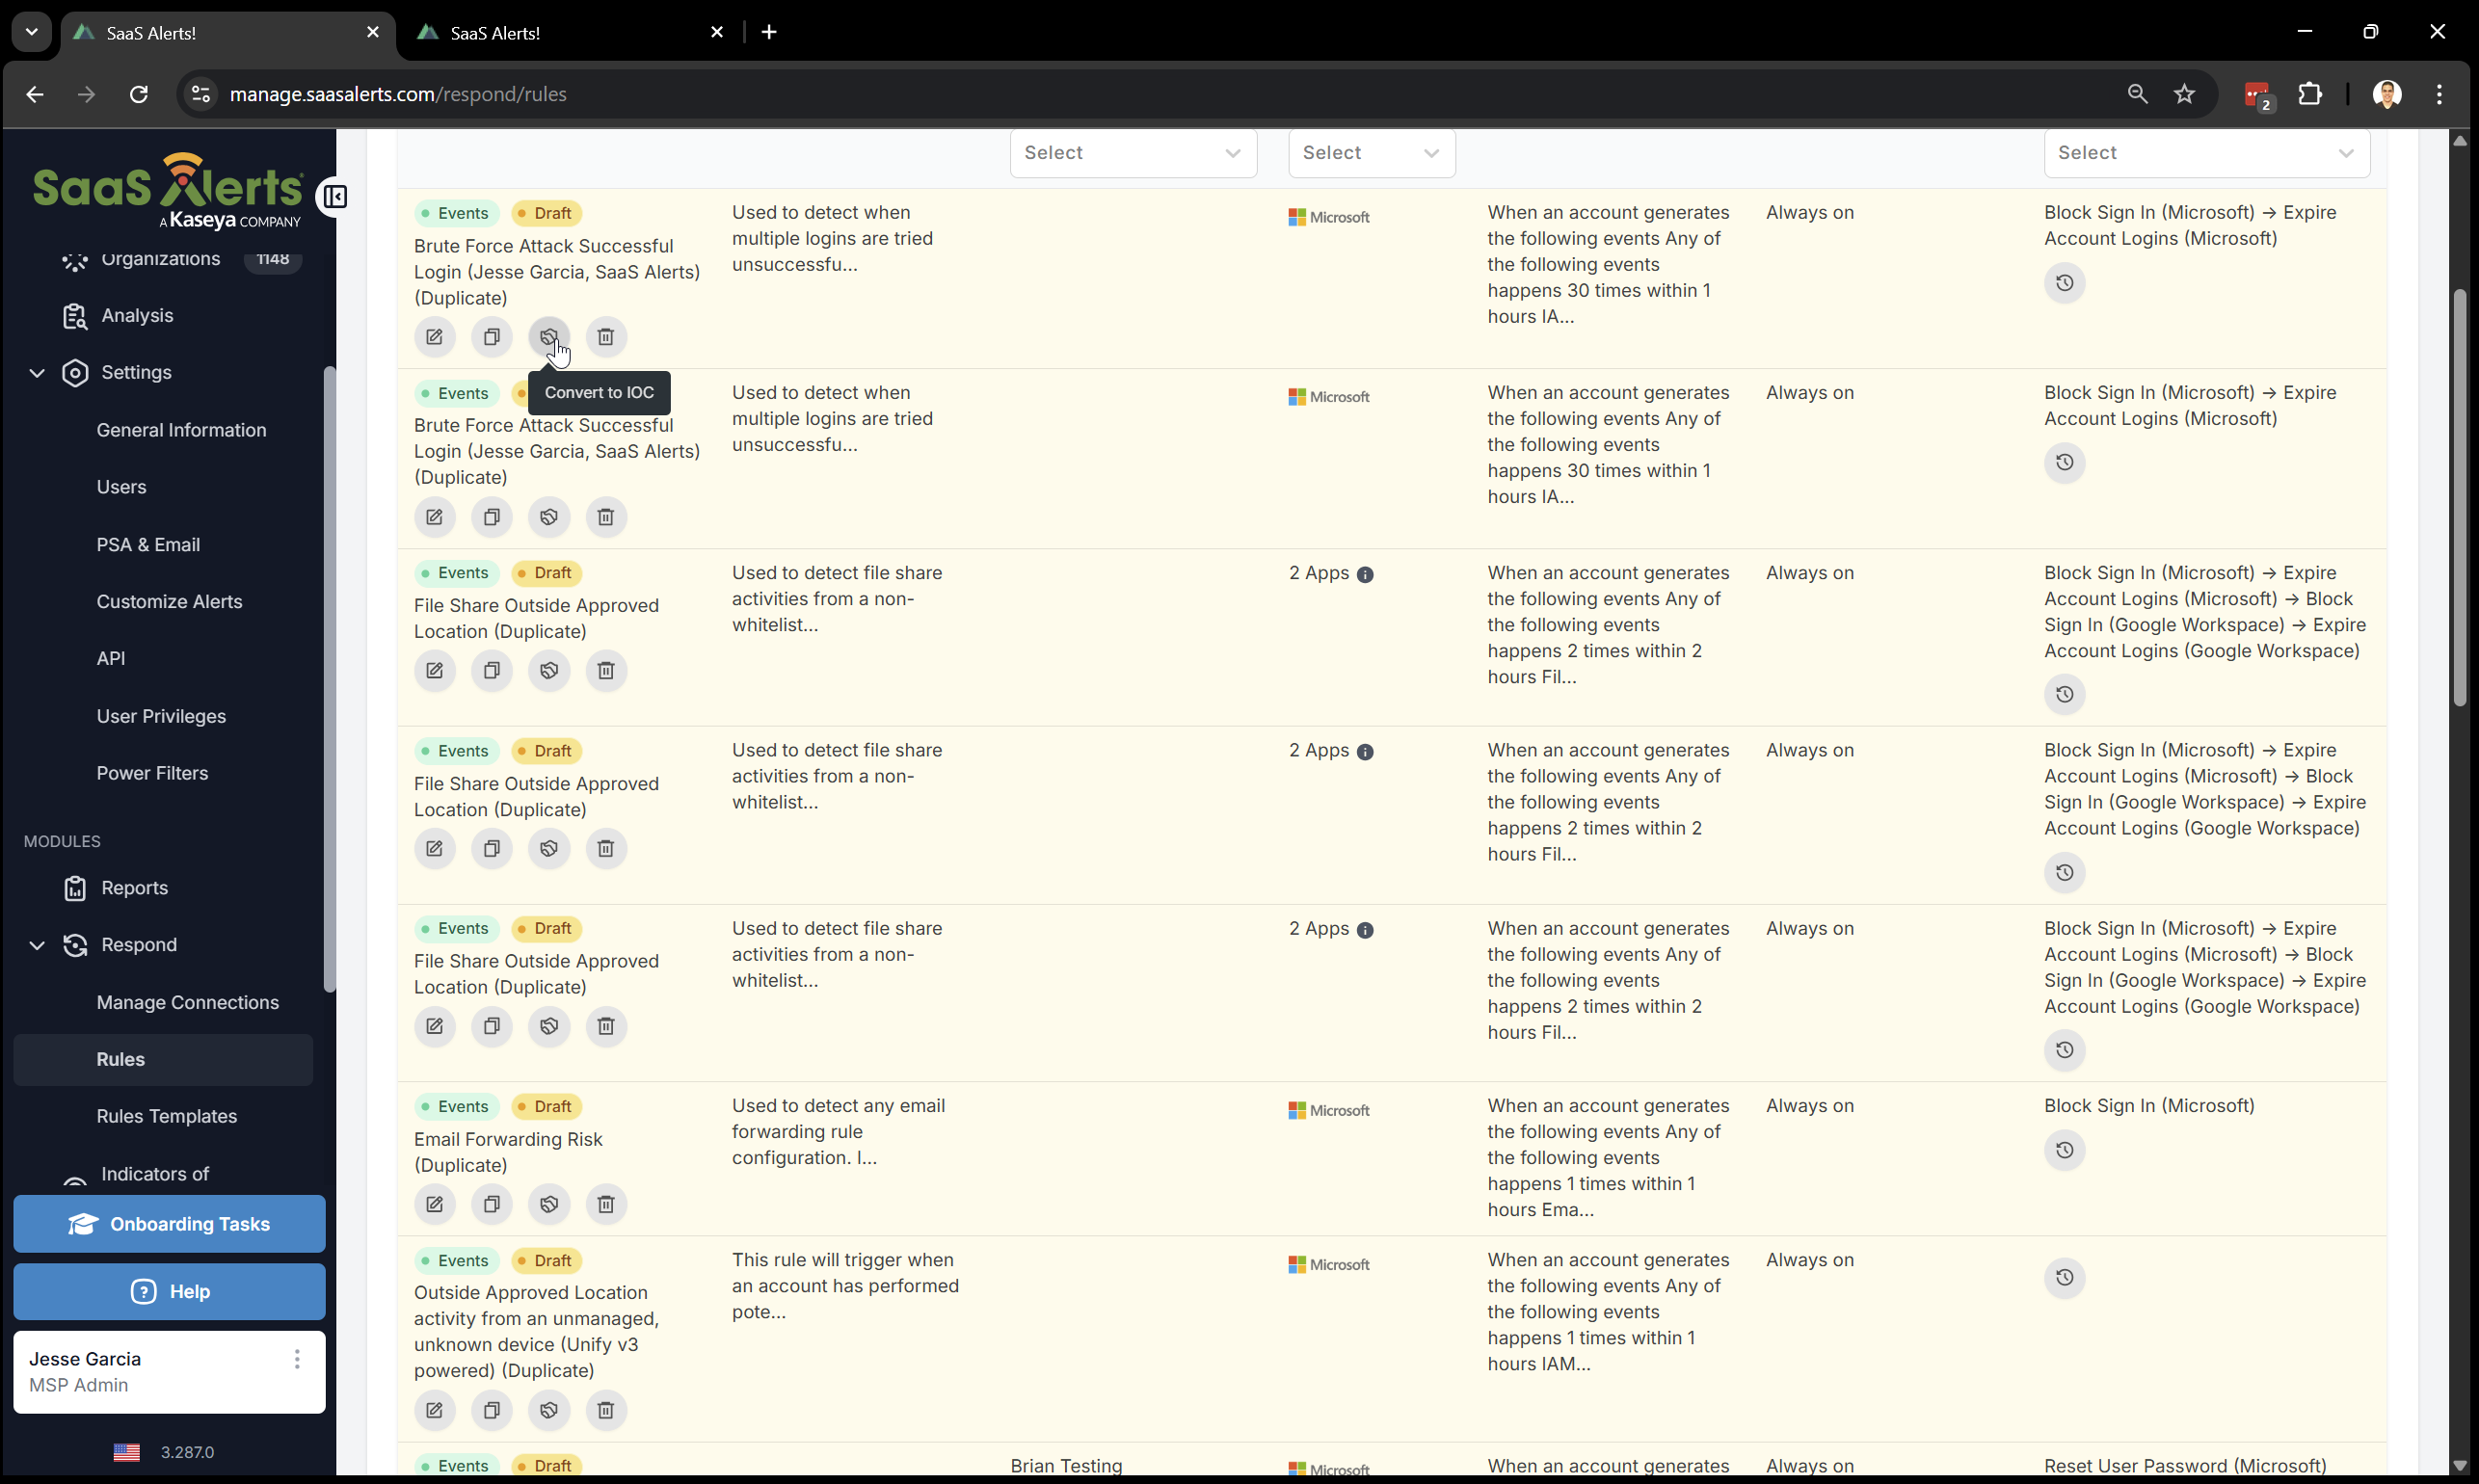
Can Respond Rules be converted into an IoC?
Yes, by simply clicking Convert to IOC.
Use the following links for video examples of various Respond rules being created.
VIDEO Set up a Respond rule to alert for VPN logins.
VIDEO Set up a Respond rule to alert for file events based on file name.
VIDEO Set up a Respond rule to alert for unusual login methods.
VIDEO Set up a Respond rule to alert for applications being downloaded.


