Customizing alert severity
VIDEO Learn how to customize alert severity.
Overview
When onboarding with SaaS Alerts, one of the first things you’ll notice is the overwhelming volume of alerts generated throughout the day. This is especially true if PSA integration is enabled too early. Out of the box, Medium and Critical alerts can quickly overwhelm your help desk, generating hundreds—or even thousands—of tickets and emails before the system has been tuned.
For this reason, we strongly recommend customizing alert severities before enabling PSA integration. This article walks through a proven method to:
-
Understand which alerts would create PSA tickets
-
Reduce unnecessary noise
-
Tune alerts to match what actually matters to your organization
-
Use correlation rules to surface high‑confidence security events
Why alert tuning matters
By default:
-
Medium and Critical alerts generate emails and PSA tickets
-
Many alerts are informational and not actionable on their own
-
Excessive alerting leads to alert fatigue and missed real threats
Proper alert tuning ensures your team focuses on meaningful, actionable events, not routine system activity.
NOTE Changing the severity of an event only affects future alerts. Past alerts retain their original severity.
Step 1: Analyze current alert volume
The Analysis module is the easiest way to see what alerts would have generated tickets or emails.
Recommended settings
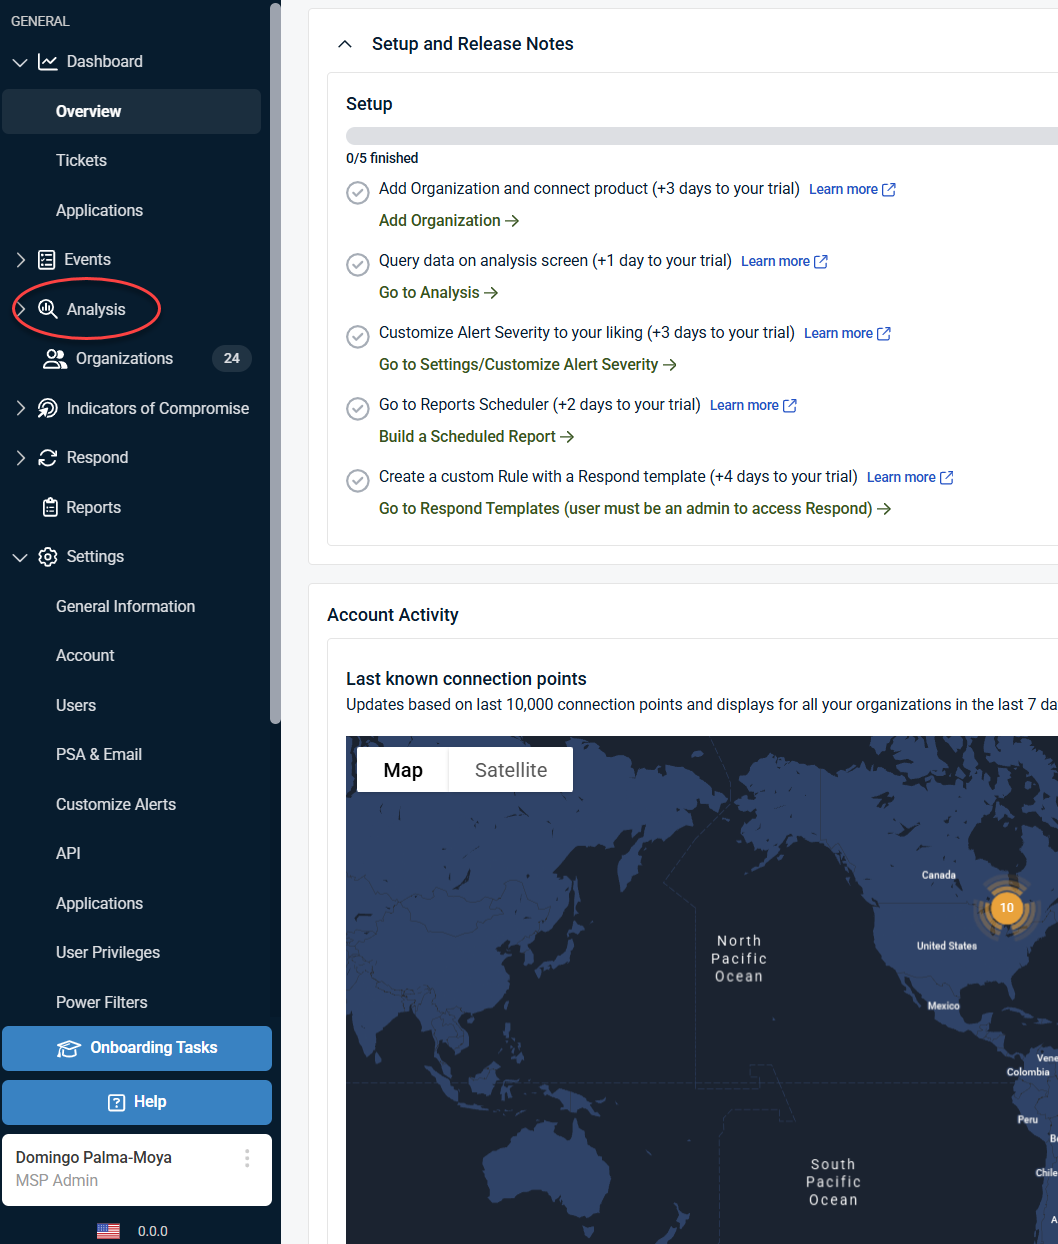
1. Click Analysis in the side navigation menu.
2. Select a date range
-
Recommended: 1–2 weeks up to today

3. Filter by event status
-
Medium
-
Critical
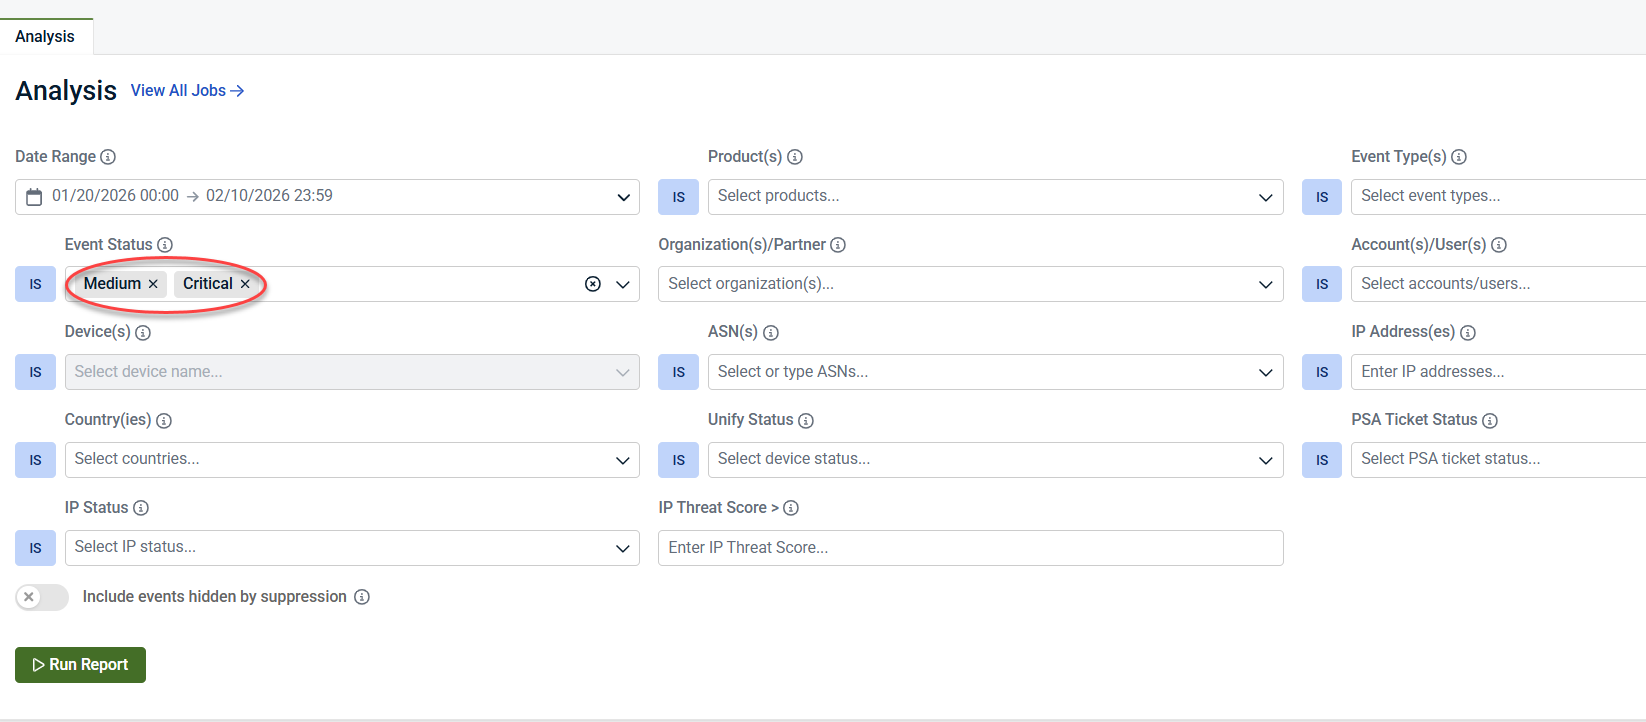
4. Scope the report to:
-
All accounts
-
All users
5. Click Run report.
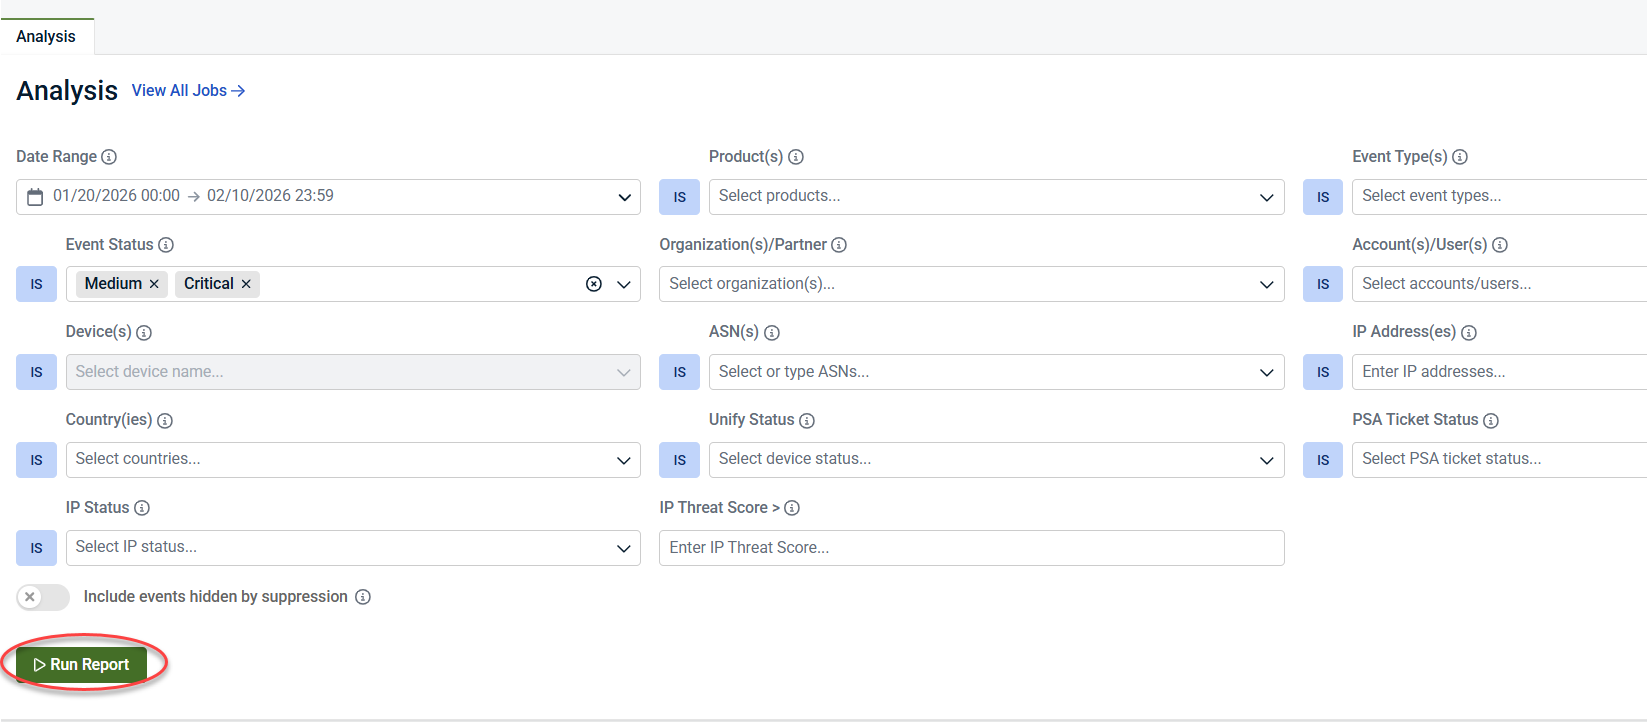
This report shows how many alerts would have created tickets if PSA integration were enabled. It’s common to see hundreds or thousands of potential tickets in just a short period.
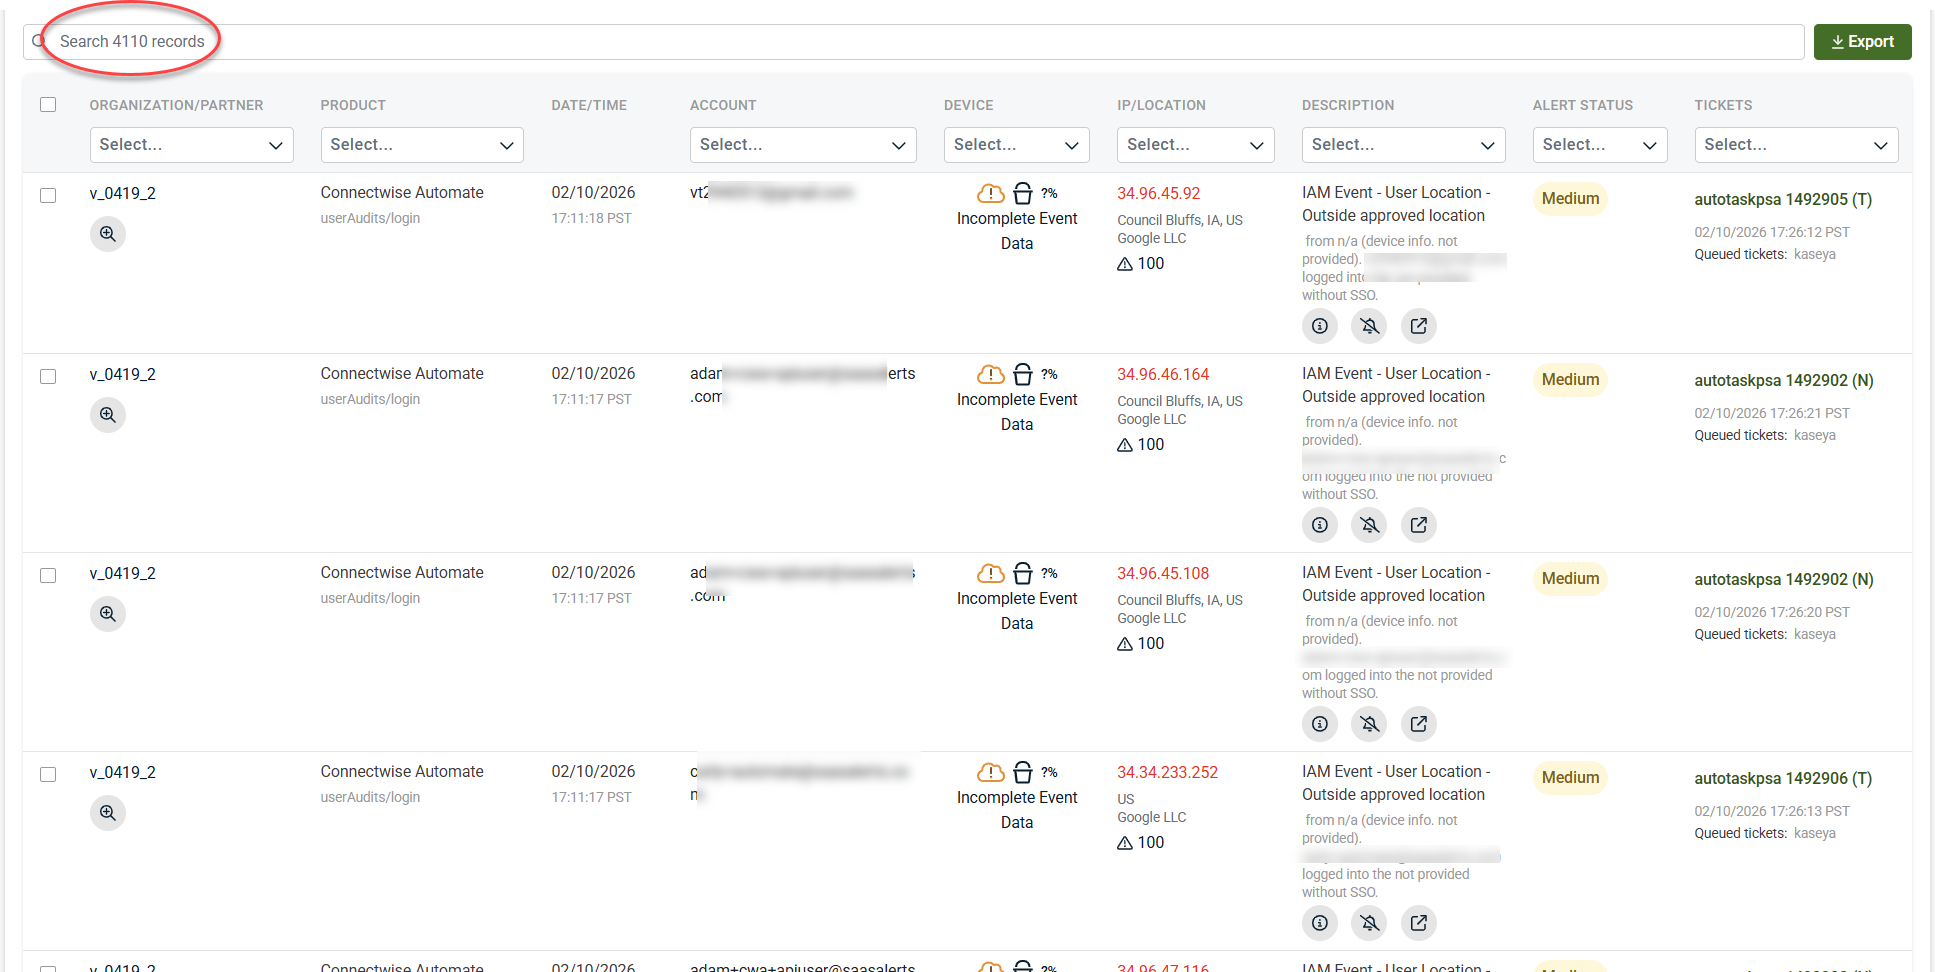
This data helps answer one key question: Which alerts do I actually care about?
Step 2: Identify noisy or low‑value alerts
Review the results and look for alerts that are:
-
High‑frequency
-
Informational
-
Not actionable on their own
Common examples
-
User Logged In
-
Account Locked
-
Other routine authentication or system events
These alerts may be useful for auditing but are often too noisy to generate tickets.
Step 3: Customize alert severity
IMPORTANT Your account must have Administrator privileges in SaaS Alerts to change alert severity.
Recommended workflow
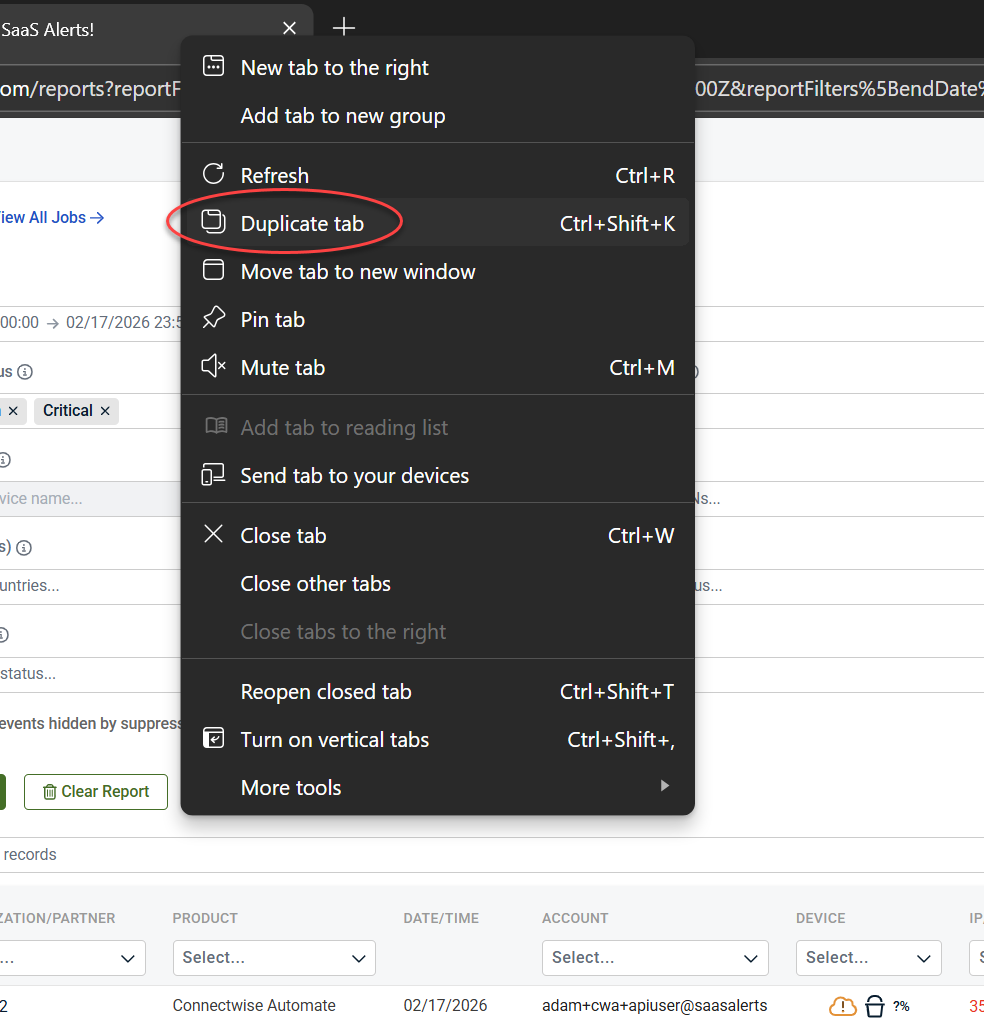
1. (Optional) Duplicate your browser tab so you can reference Analysis results while tuning alerts
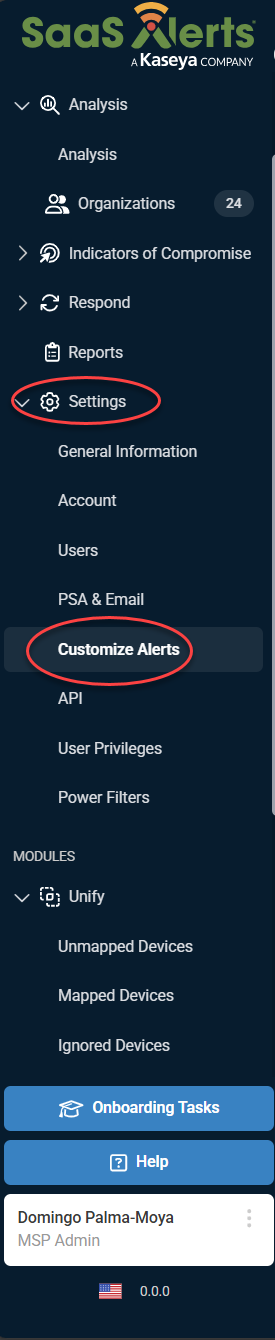
2. In the side navigation menu, go to Settings
3. Select Customize Alerts
This allows you to compare alert volume with severity settings as you make adjustments.
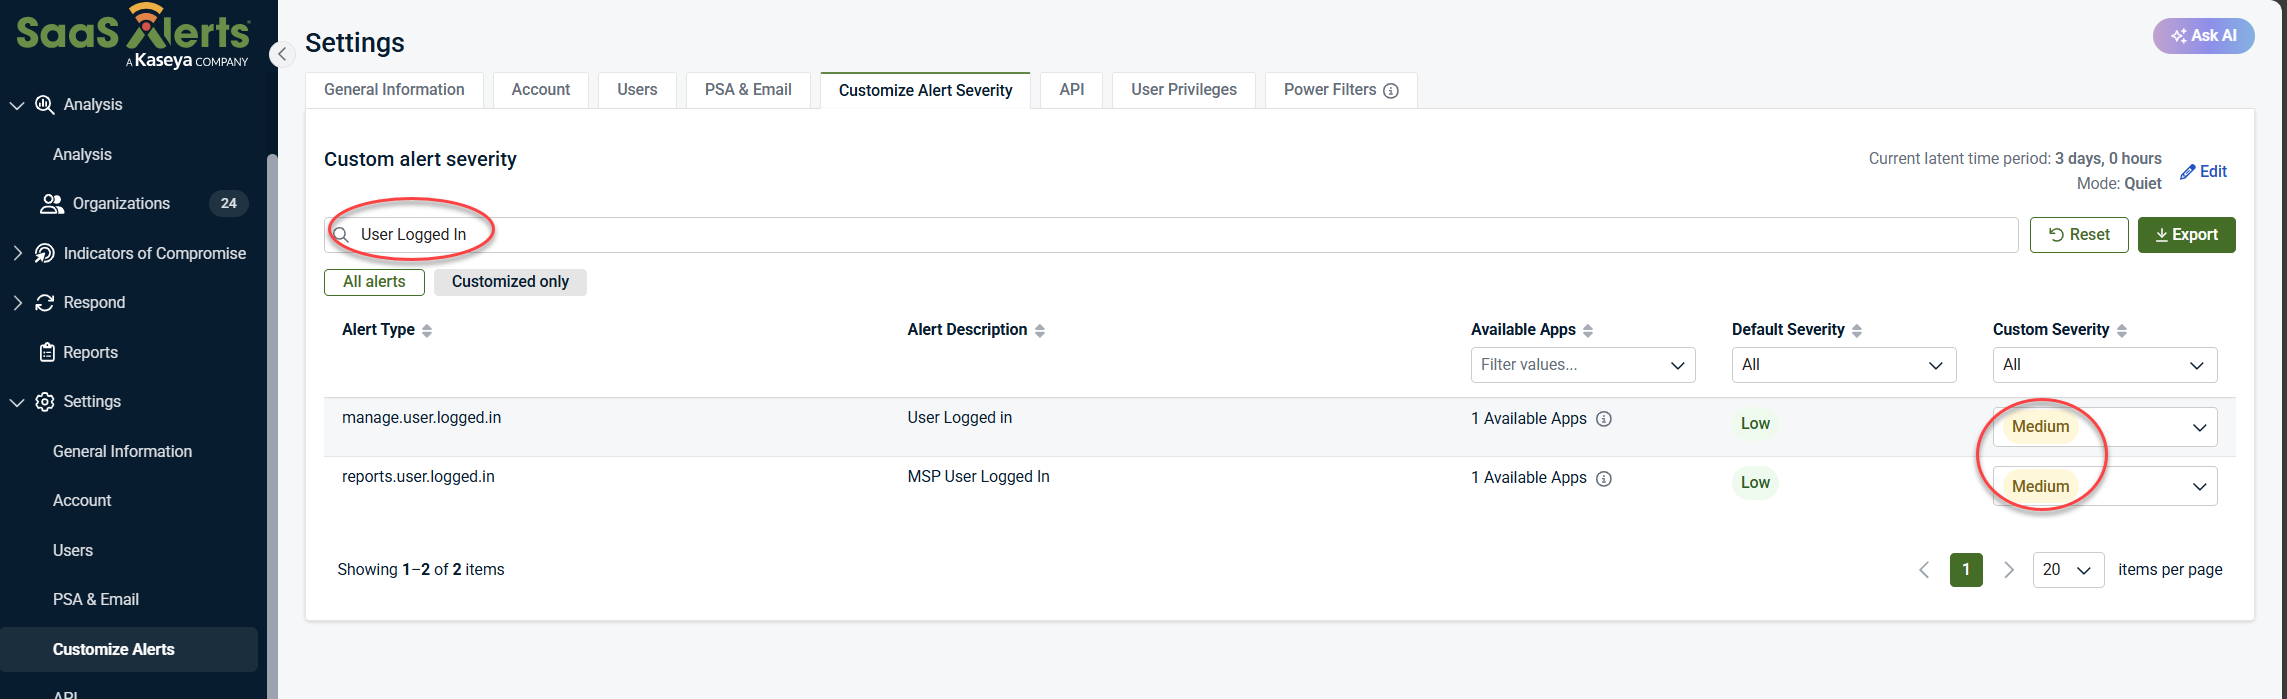
Example: User Logged In
-
Custom Severity may be set to Medium
-
Medium severity triggers tickets and emails
-
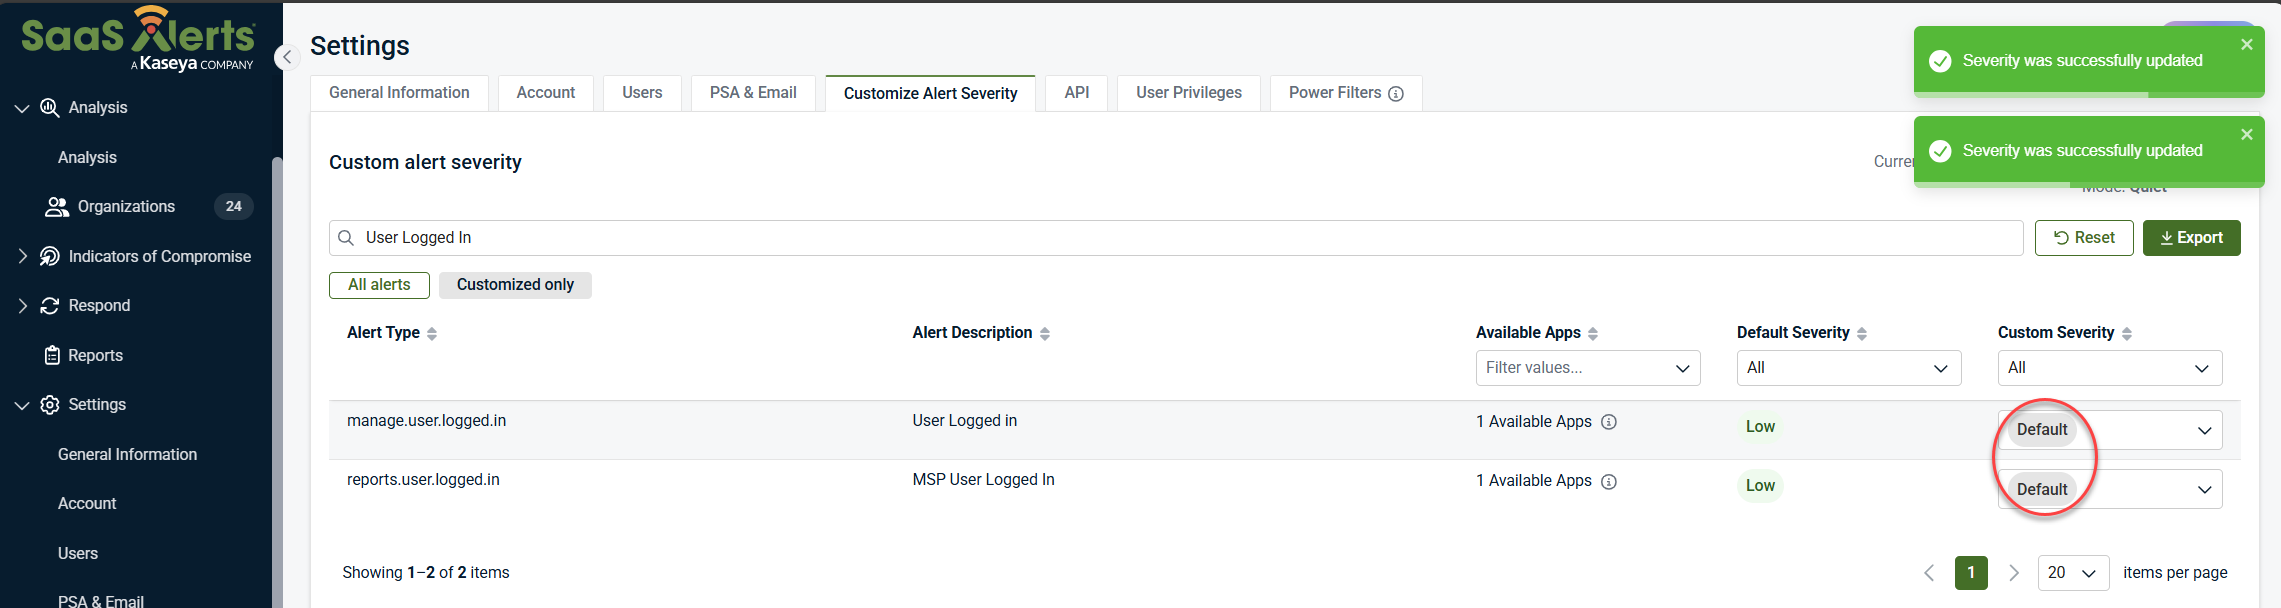
If you don’t need alerts for every login:
-
Change Custom Severity to Default (Default Severity is Low)
-
Low‑severity alerts:
-
Still appear in logs
-
Do not create PSA tickets or email notifications
Example: Account lockouts
-
Custom Severity: Medium
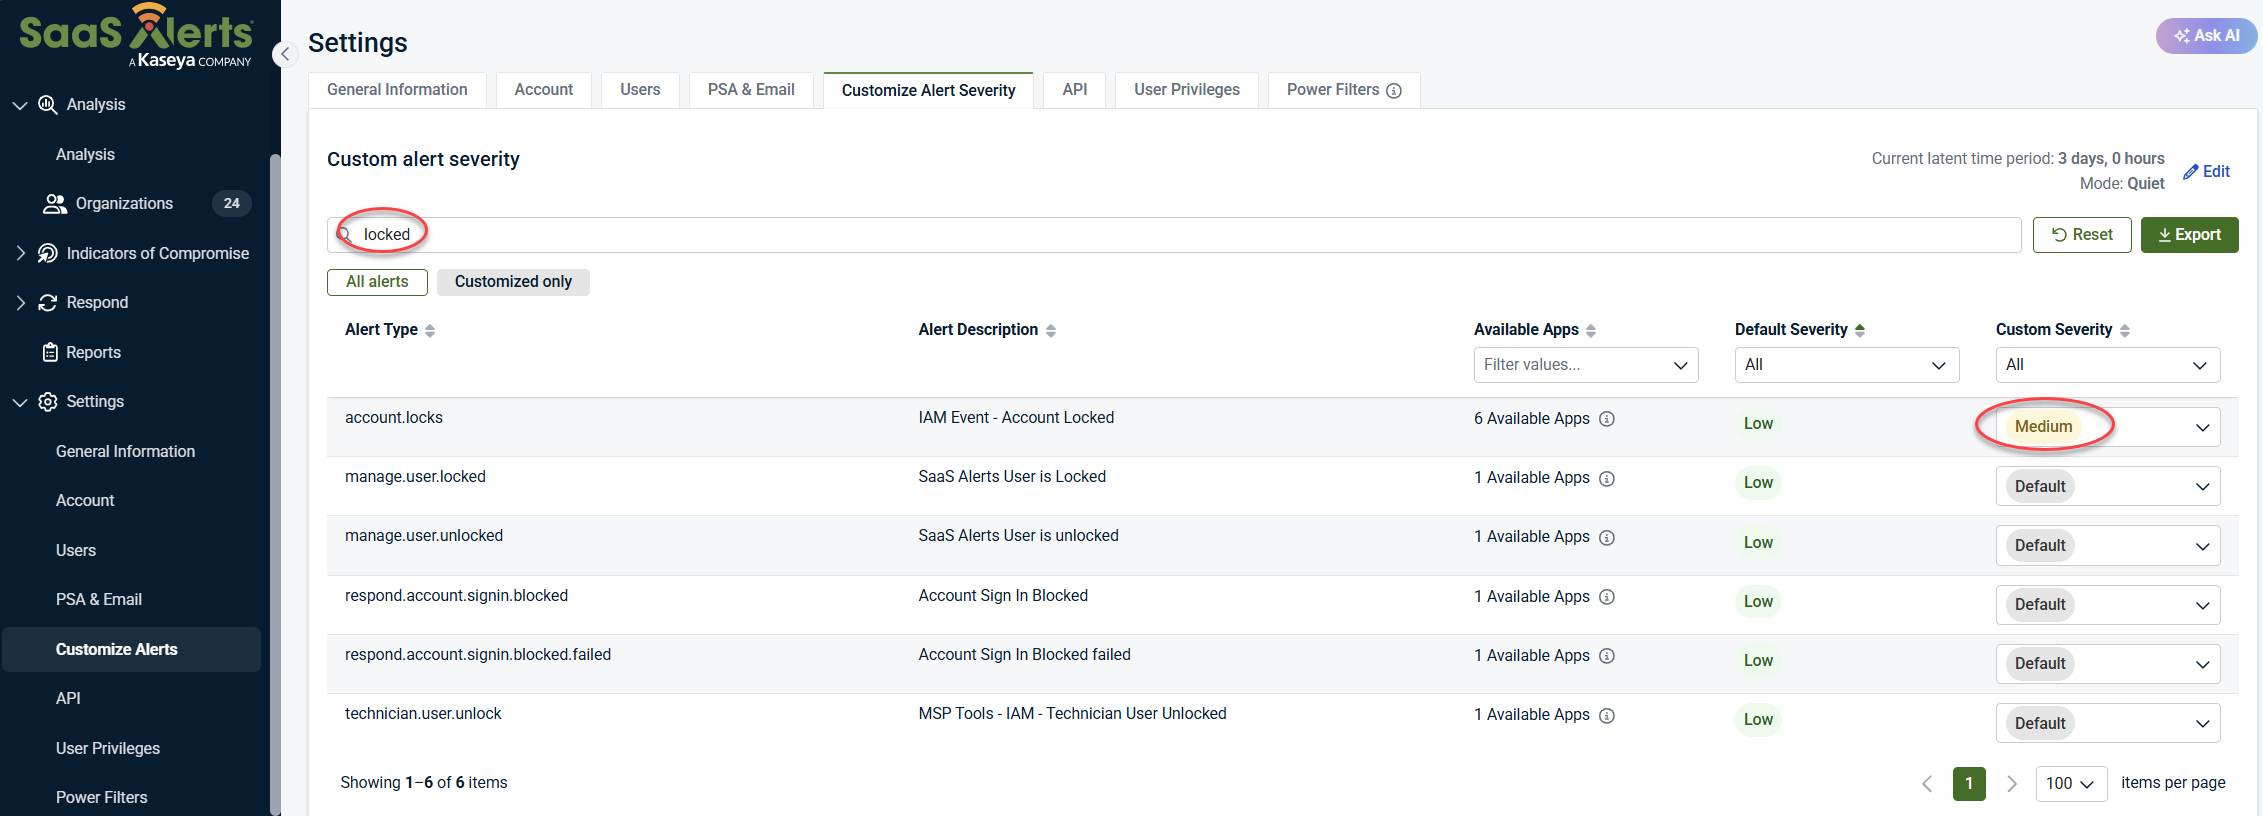
-
If account lockouts are frequent and expected:
-
Change Custom Severity to Default (Default Severity is Low)
To set the File Alert Severity or any other alert severity back to default, click Reset Item next to the alert you want to restore, or click Reset All Items at the top of the Customize Alert Severity table to set all the alerts back to default.
-
This reduces unnecessary ticket creation while preserving visibility.
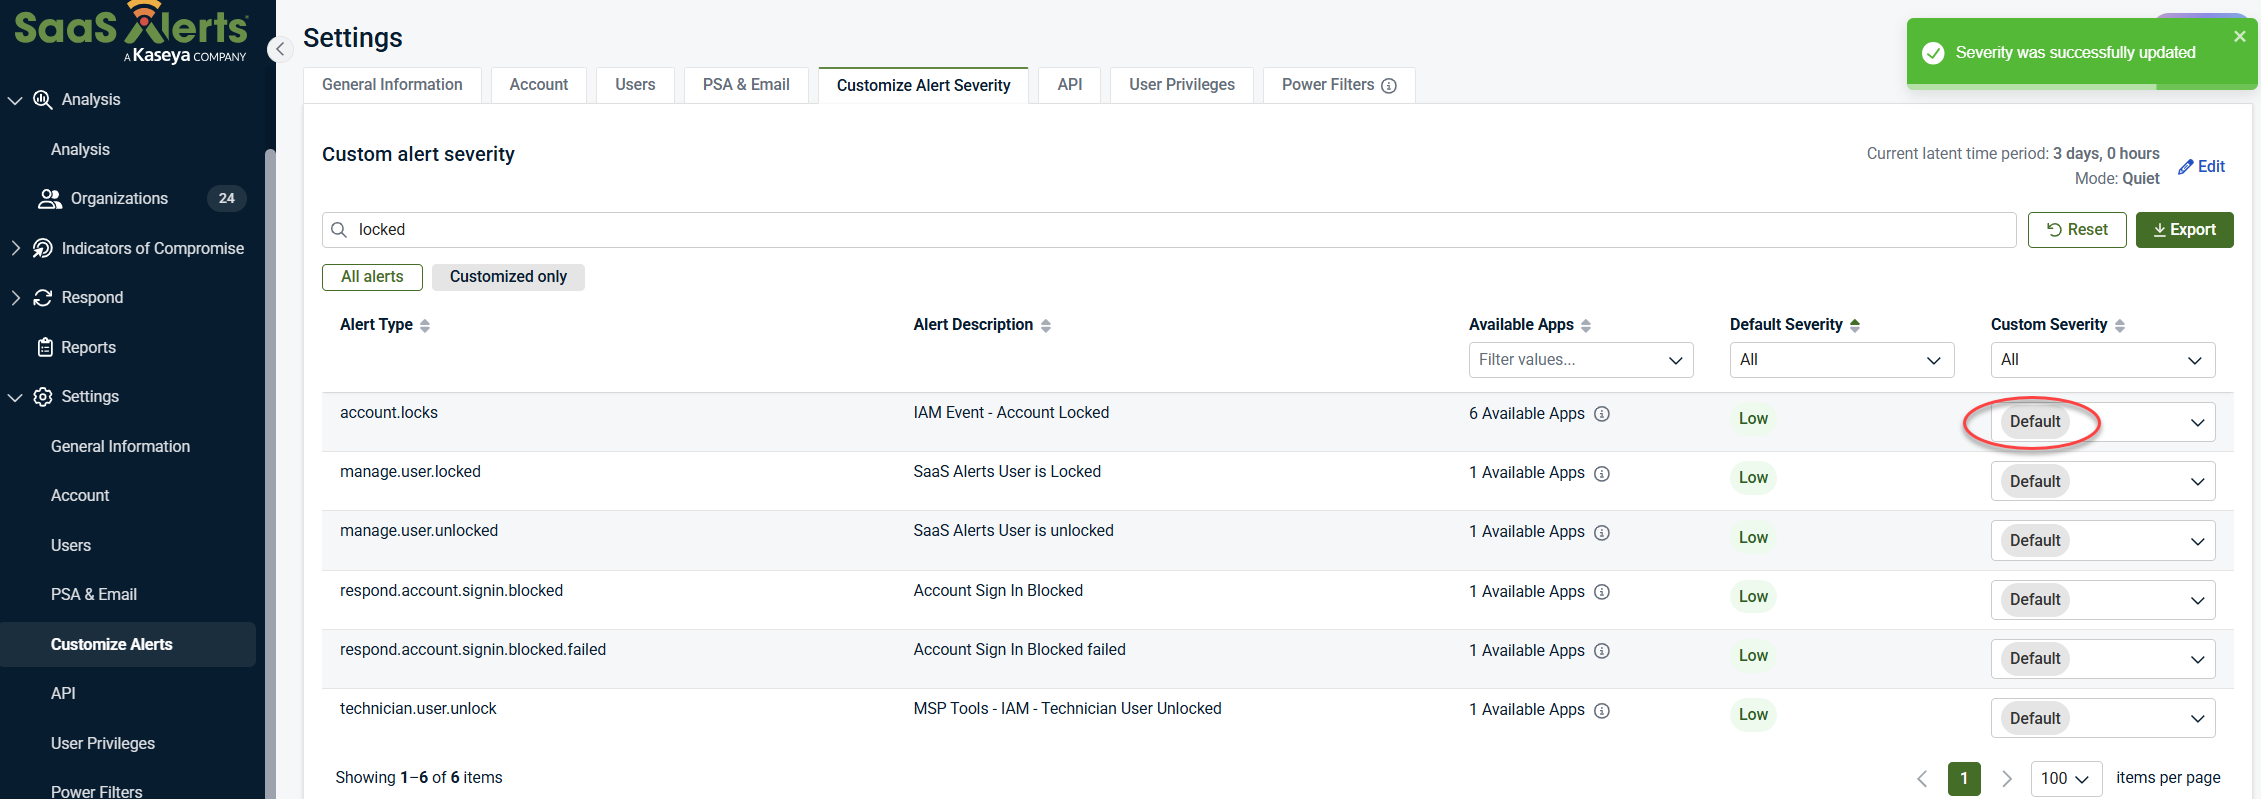
Restoring default severity
To restore alert severity to default:
-
Click Reset at the top of the table to restore all alerts
-
Step 4: Repeat and refine
Alert tuning is an iterative process:
-
Review what’s generating noise
-
Decide what’s meaningful to your organization
-
Adjust severity accordingly
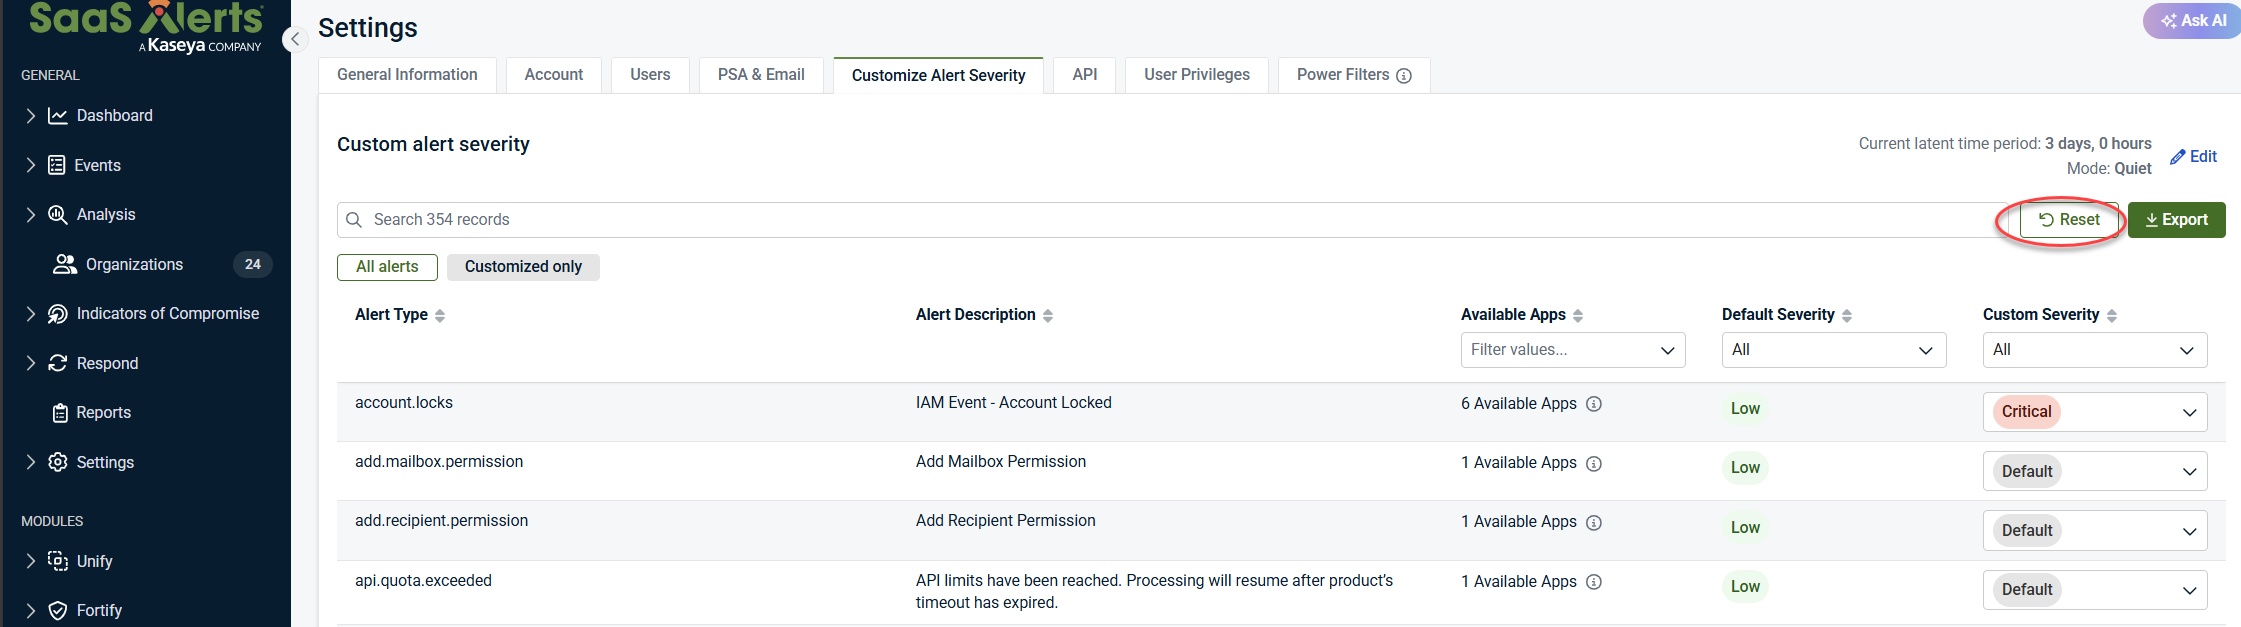
Use the search bar in Customize alert severity to quickly find specific alert types. You can also use browser search (Ctrl+F / Cmd+F) to locate alerts by keyword (for example, limit or file).
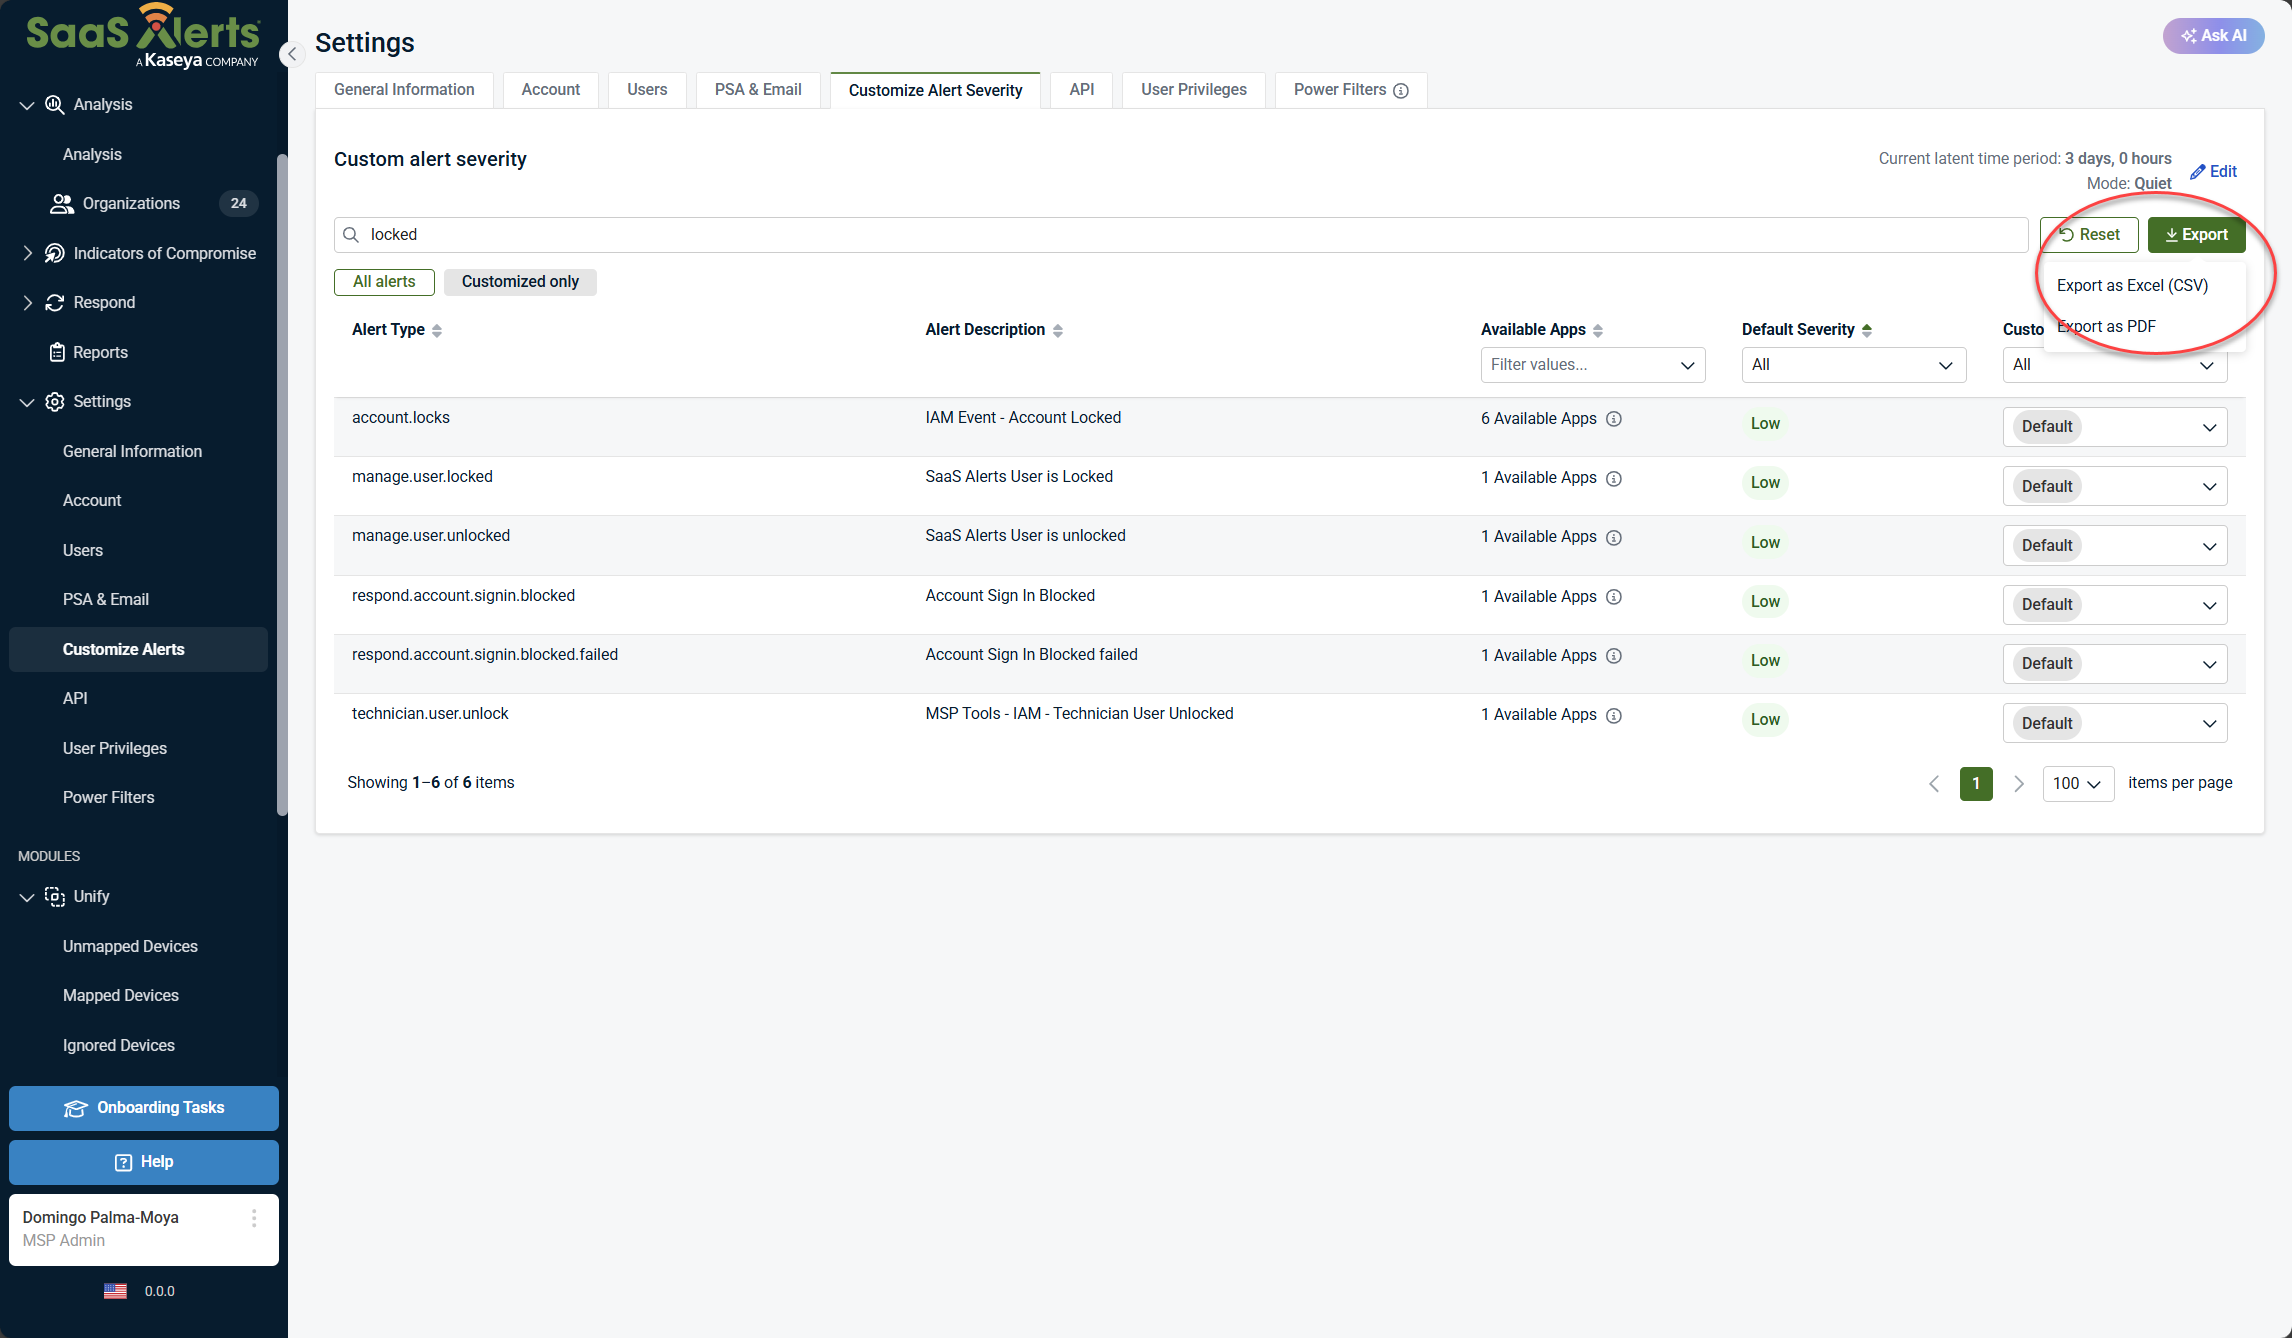
Exporting alerts for easier review
Click Export to generate a CSV or PDF containing:
-
All alert types
-
Alert descriptions
-
Associated products
-
Current severity levels
This is especially useful if:
-
You do not use every supported product (e.g., NinjaOne)
-
You want to avoid tuning alerts for products you don’t run
-
You want to review and plan changes in Excel
Using Respond rules for smarter alerting
Global alert tuning reduces noise—but Respond rules let you create high‑confidence alerts based on correlated behavior.
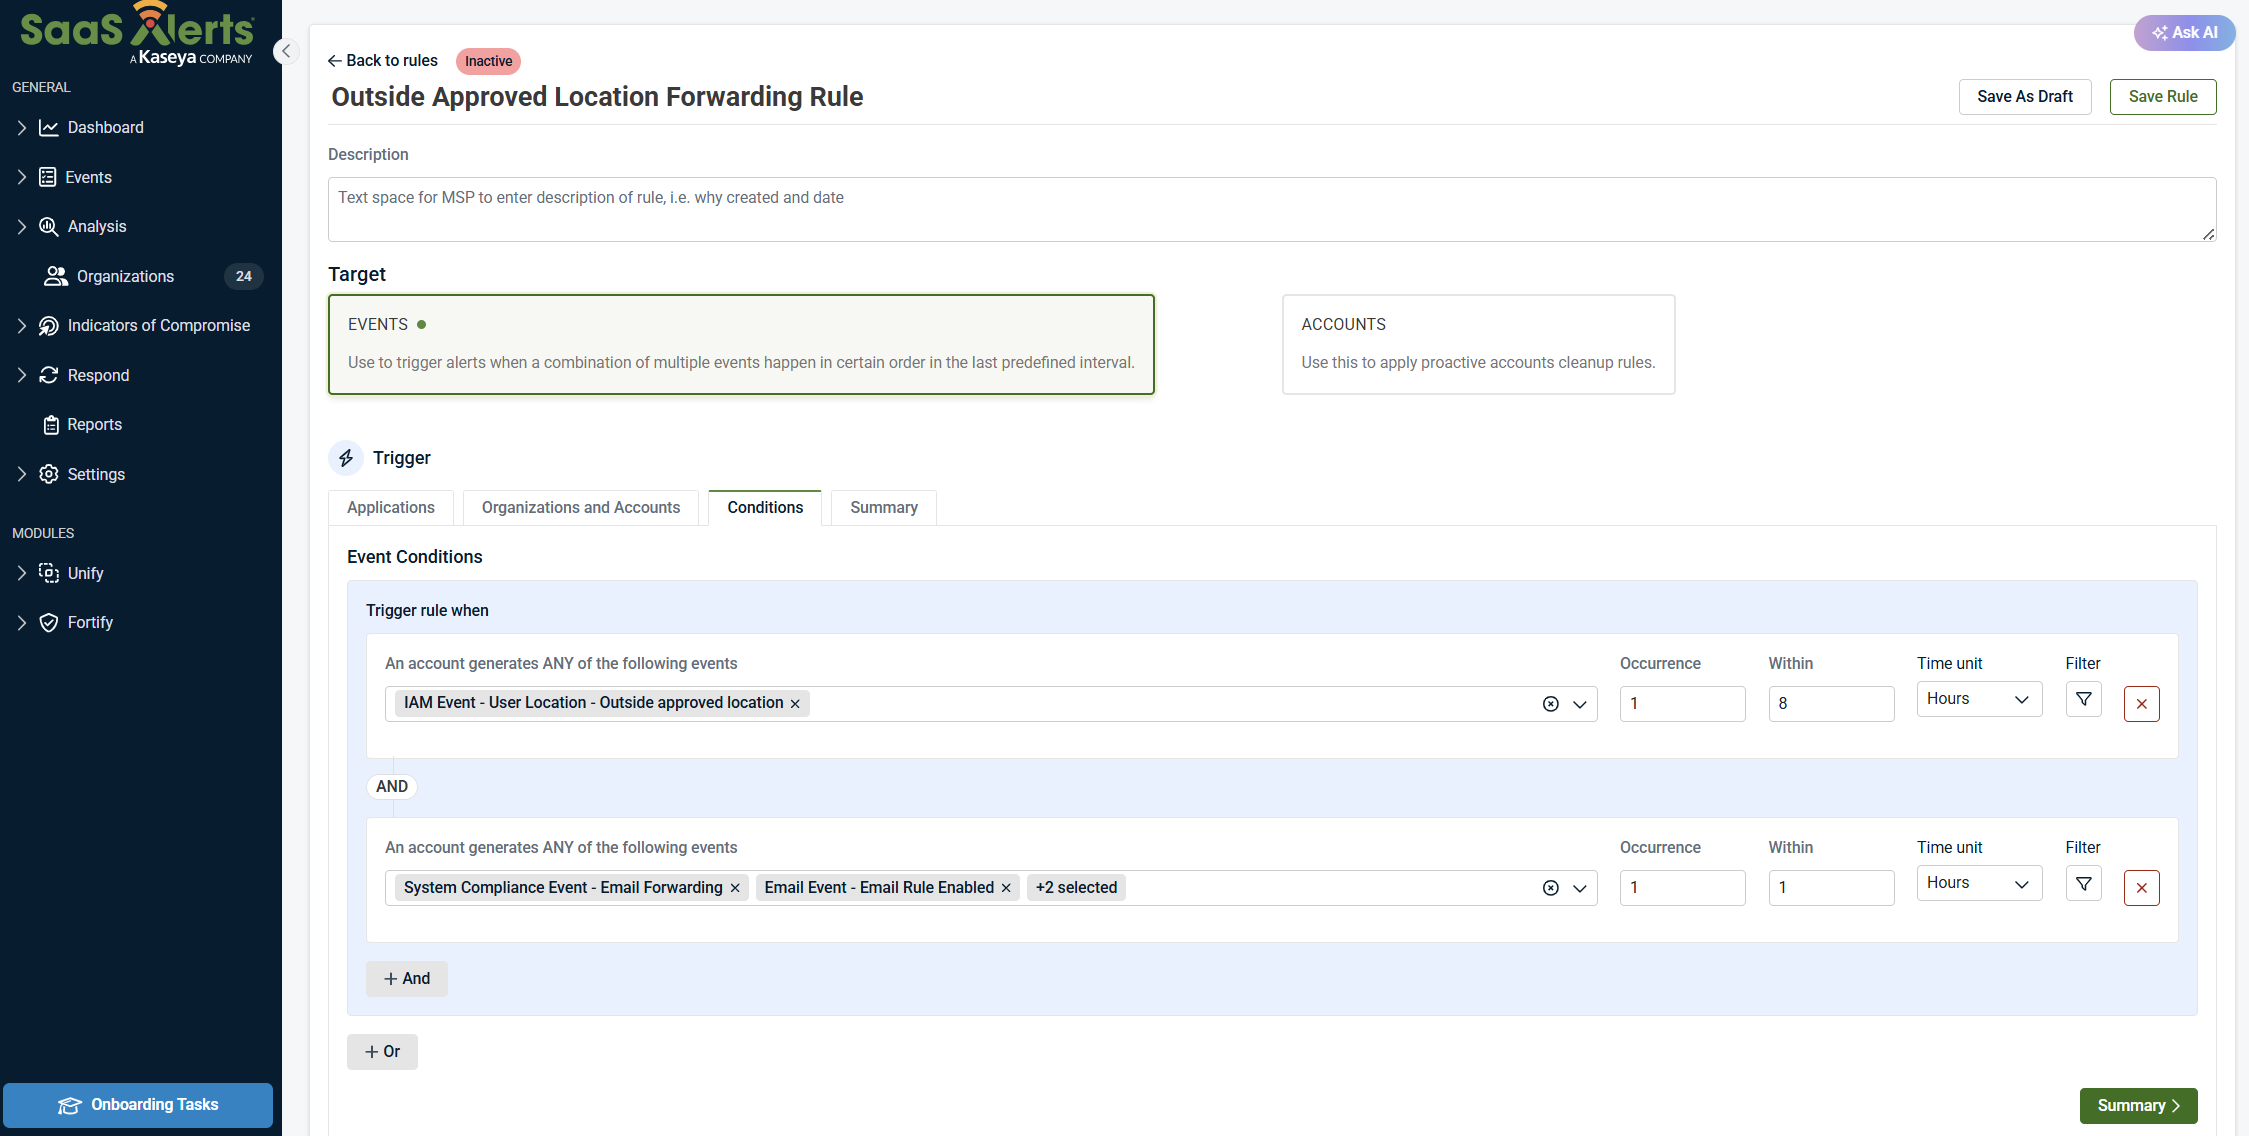
Example: Suspicious mail forwarding
You may not care about these events individually:
-
Authentication from outside an approved location
-
Mail forwarding rule creation
But together, they may indicate compromise.
Sample rule logic
Trigger an alert if:
-
Authentication Successful – Outside Approved Location
-
Followed by Mail Forwarding Rule Created
-
Within 1 hour
Optional additions:
-
Email rule enabled
-
Email rule changed
-
Email rule deleted
The alert only fires when multiple conditions are met, reducing false positives.
Respond actions
The Response section defines what happens after a Respond rule’s conditions are met. This includes whether the rule takes automated action, generates an alert only, or requires approval before execution.
Actions tab
When the rule conditions are met, SaaS Alerts evaluates the Actions configuration.
Alert Only
When Alert Only is enabled, no automated response actions are taken.

The rule will generate an alert based on the configured severity. This option is commonly used when:
-
You want visibility without enforcement
-
The event requires investigation before remediation
-
You are monitoring correlated activity for awareness
NOTE If no action is taken, the trigger will be marked as Auto‑Ignored after triggering three times within a 15‑minute period. The rule will trigger again the next time the conditions are met.
Automated Response actions
If Alert Only is not selected, you can configure one or more automated actions.
From the Respond with the following action(s) drop-down menu:
1. Select the Application
-
Example: Microsoft
2. Select the action
-
Example actions include:
-
Block Sign In
-
Expire Account Logins
-
3. Use + Add to include additional actions if needed
4. Use the X icon to remove an action
Actions are executed in the order they appear.
Response action approval type
At the bottom of the Actions section, choose how response actions are approved:
-
Approve Manually: Actions require administrator approval before execution
-
Approve Automatically: Actions execute immediately when the rule triggers
Automatic approval is typically used for high‑confidence scenarios, while manual approval is recommended during testing or onboarding.
Alert severity
Select Alert Severity to define how the alert is categorized:
-
Critical
-
Medium
-
Low
Severity determines whether the alert:
-
Generates email or PSA notifications
-
Appears only as a logged event
Quiet mode and default alert severity
Due to the continued growth of the SaaS Alerts library, SaaS Alerts provides Quiet Mode, an updated default severity model designed to reduce alert noise while preserving visibility.
Quiet Mode:
-
Reduces default alert noise
-
Assigns default severity based on real‑world alert volume and relevance
-
Encourages use of Unify, Fortify, and Respond to tighten controls and act on higher‑confidence threats
Quiet Mode does not override any existing customized alert severities. Any alerts you have manually adjusted will remain unchanged.
Configuring Quiet mode
Quiet Mode is configured from Settings > Customize Alert Severity.
At the top of the page, you can view and edit:
-
Current latent time period (for example: 3 days, 0 hours)
-
Mode
To change the mode:
-
Select Edit
-
From the Mode drop-down menu, choose:
-
Quiet: Reduced noise, safer defaults
-
Expert: Full alerting behavior with higher default sensitivity
-
Select Set to apply changes.
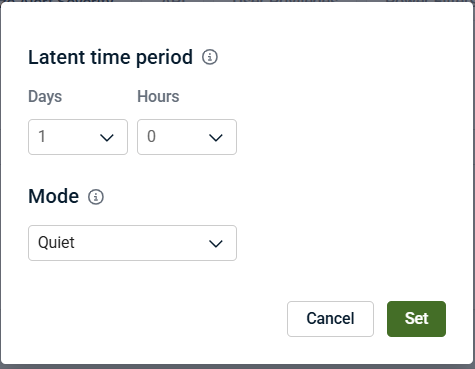
Latent time period
The latent time period defines how long SaaS Alerts observes alert behavior before applying default severity logic. This helps prevent excessive alerting during initial activity spikes or environmental changes.
Recommended usage
-
Quiet Mode is recommended for most environments to minimize alert fatigue
-
Expert Mode is best suited for mature security operations that want higher default sensitivity
-
Use Respond rules to create higher‑confidence alerts without increasing global noise
-
Partners are encouraged to review Quiet Mode defaults and adopt them where appropriate. Refer to Quiet mode default severity for alerts for additional detail.


