SaaS Alerts MSP Admin guide
SaaS Alerts has been designed for simple navigation. Clicking the expand icon ![]() opens the left navigation menu to show a full list of sections and subsections to navigate, each of which is labeled.
opens the left navigation menu to show a full list of sections and subsections to navigate, each of which is labeled.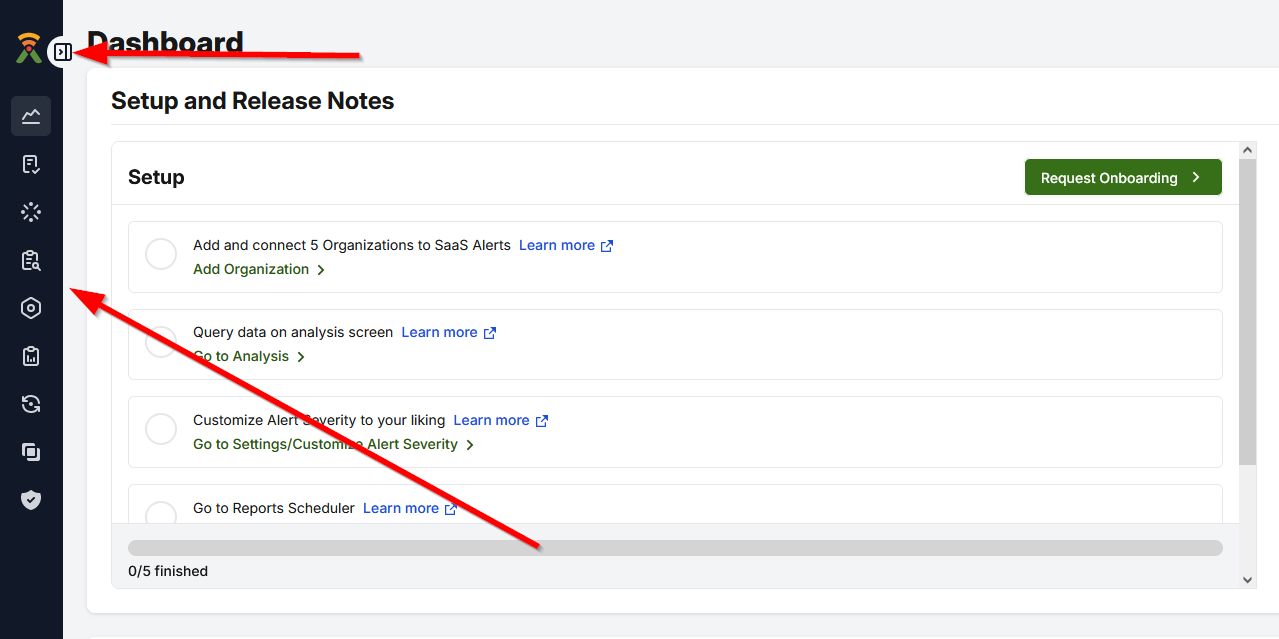
Expand the following sections to review the details of all features available from the left navigation menu:
Overview
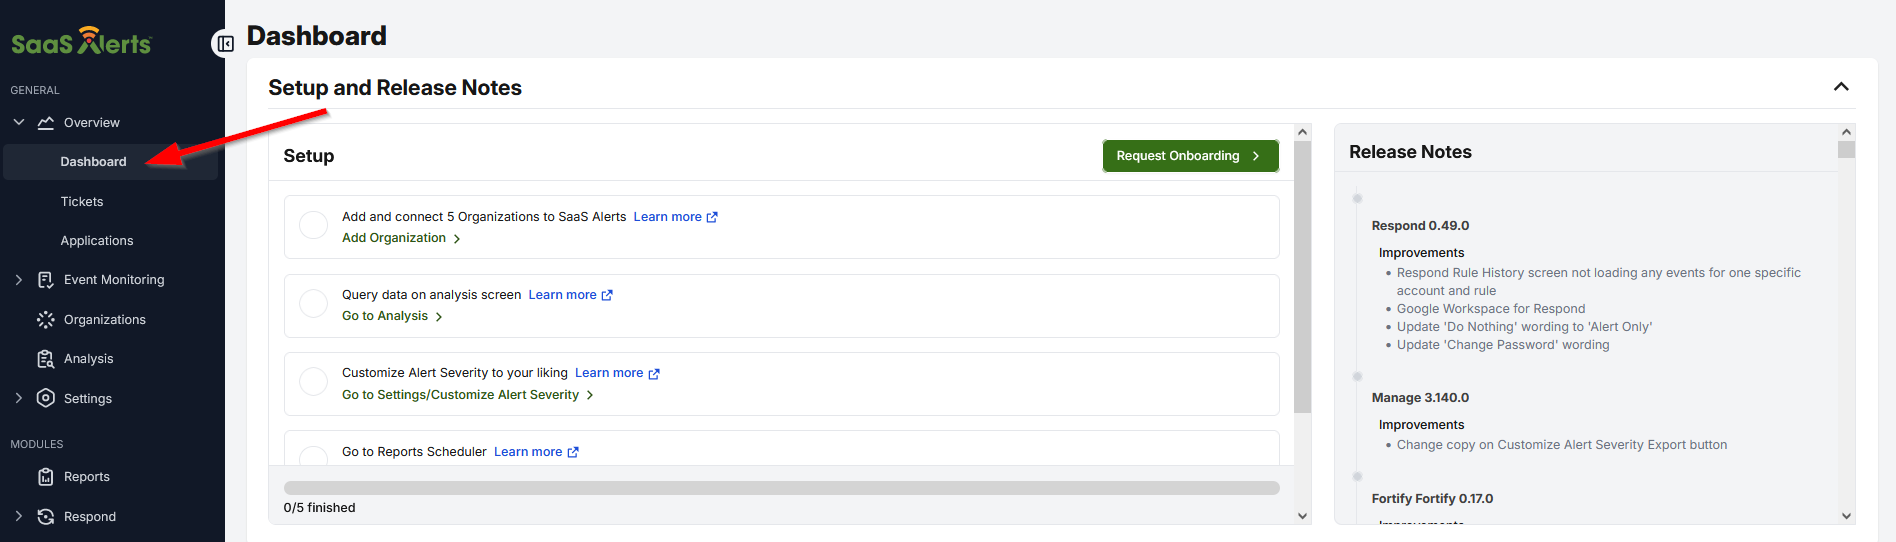
At the top of the Dashboard page, you will see Setup and Release Notes information.
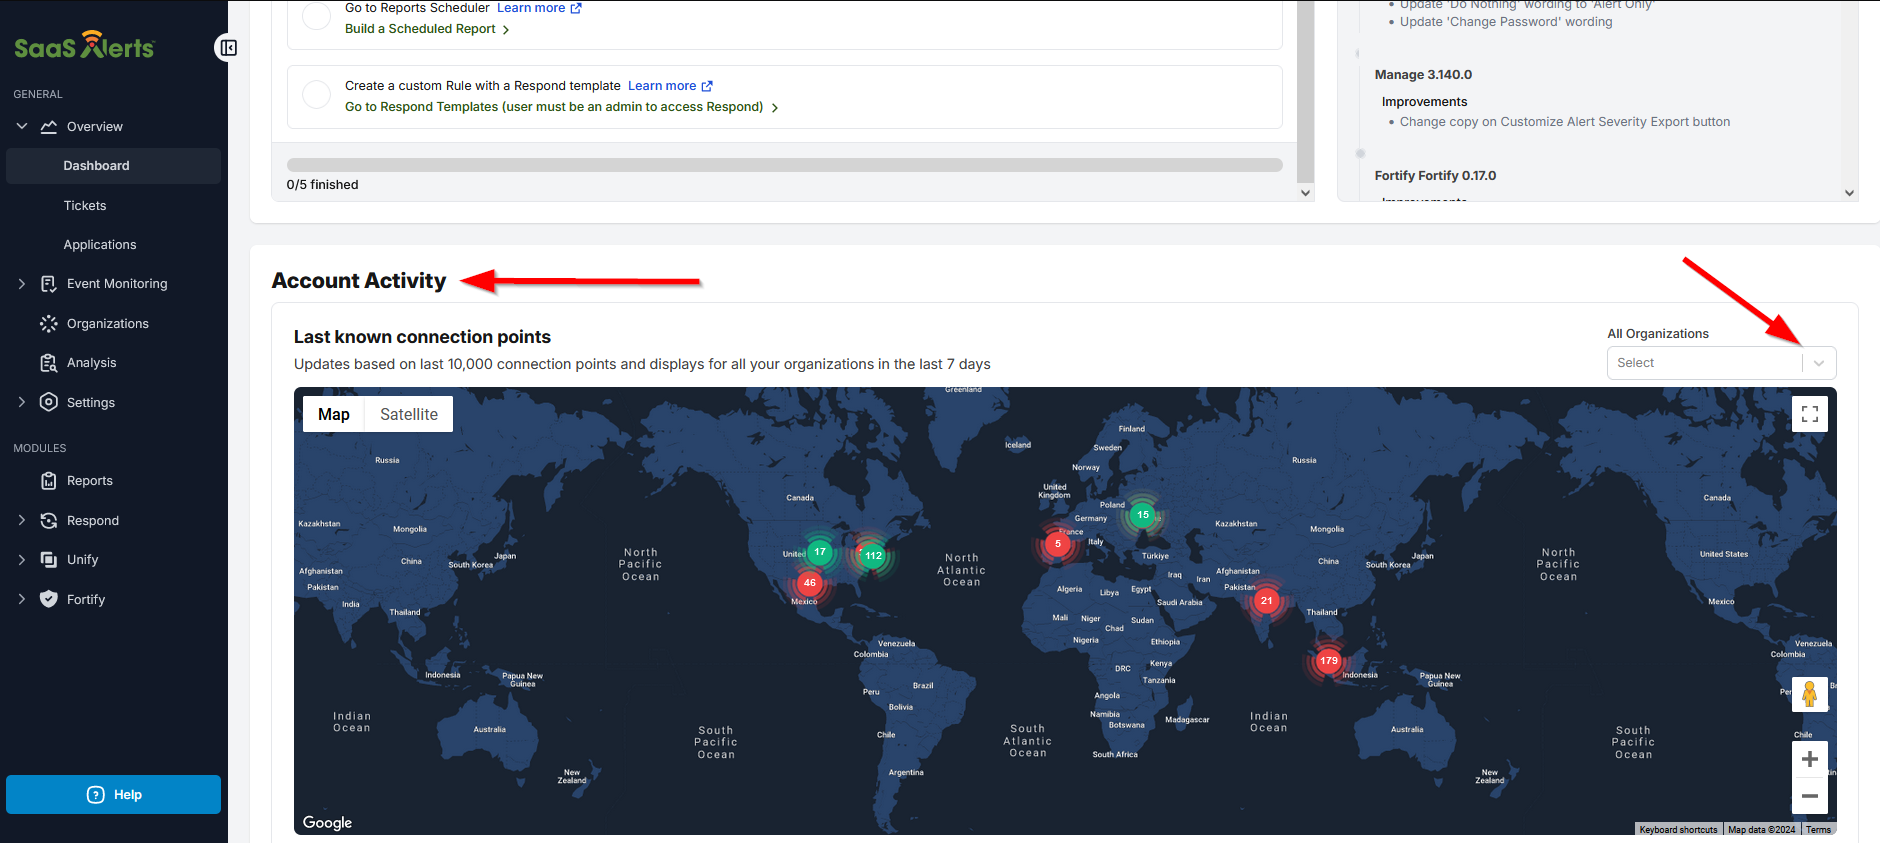
The bottom of the page displays a map showing the Last known connection points based on the last 10,000 connection points. The map represents all your organizations' activity in the last seven days.
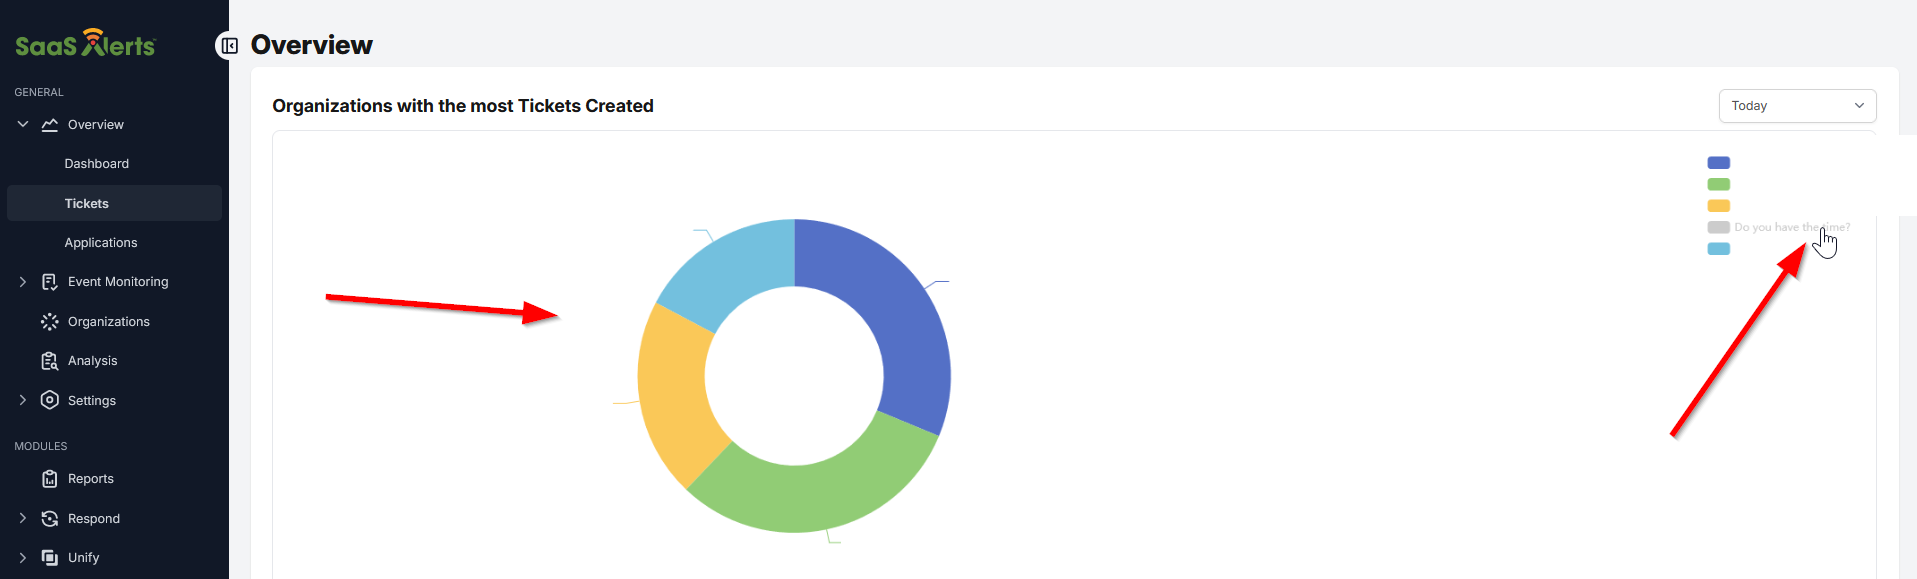
This page provides a quick overview of the organizations with the most tickets created.
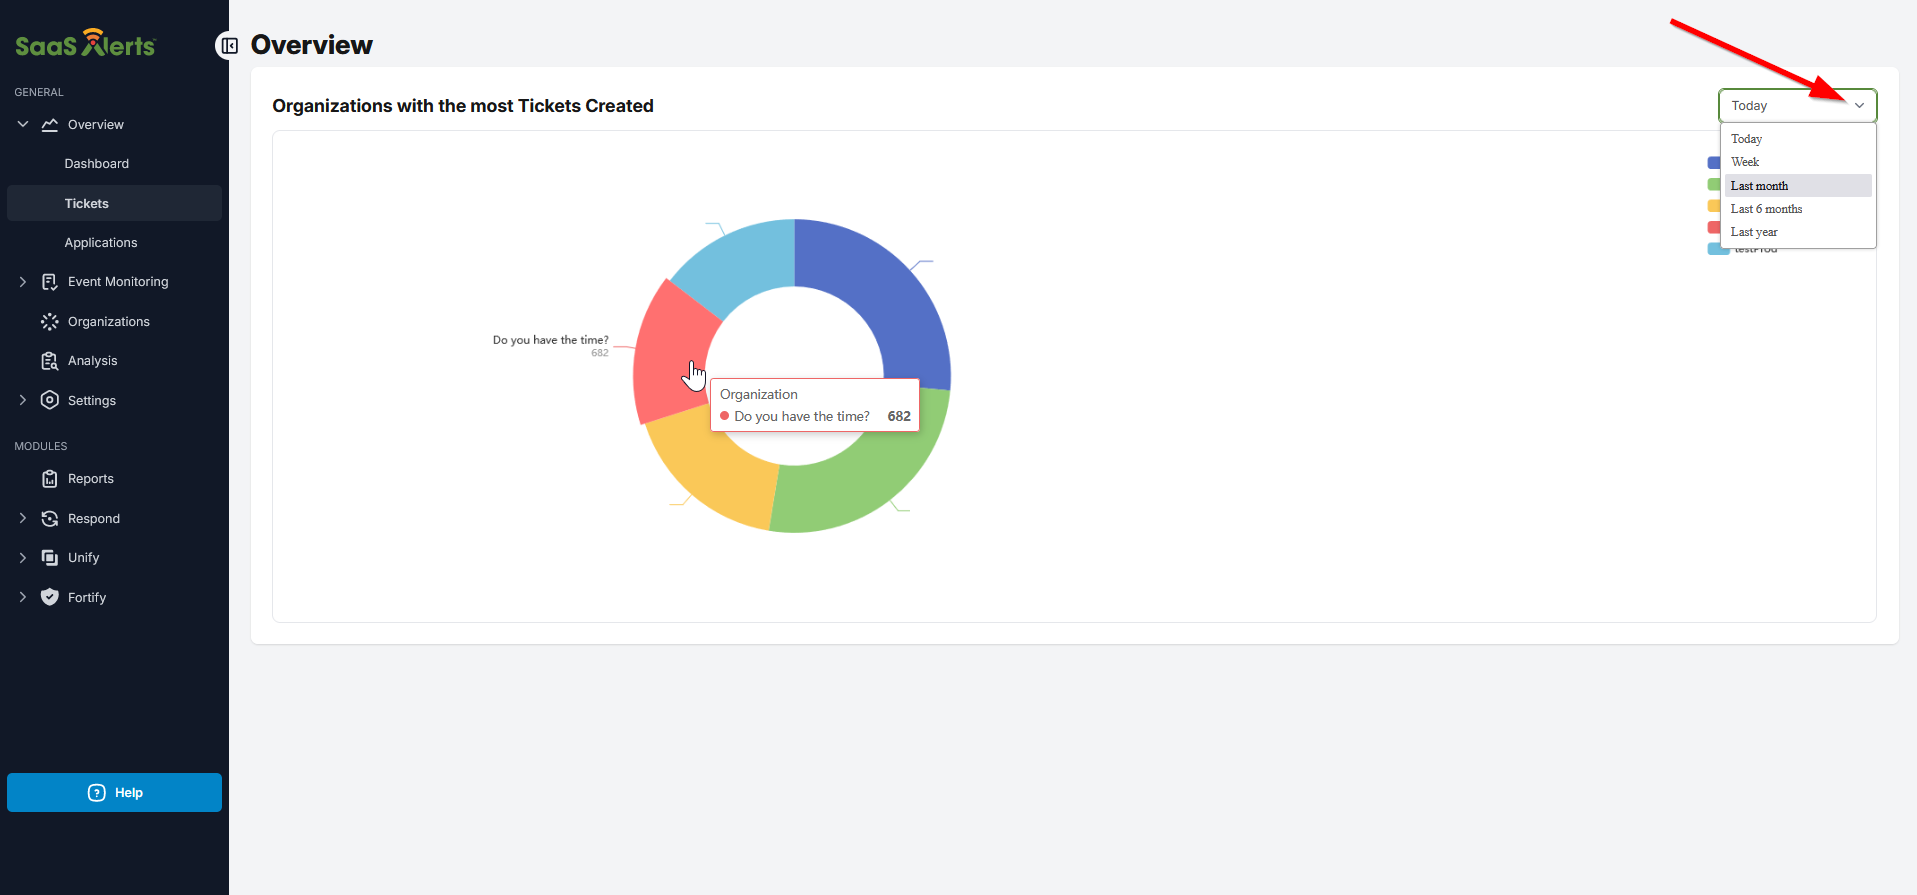
Selecting an organizations from the list will hide it from the chart.
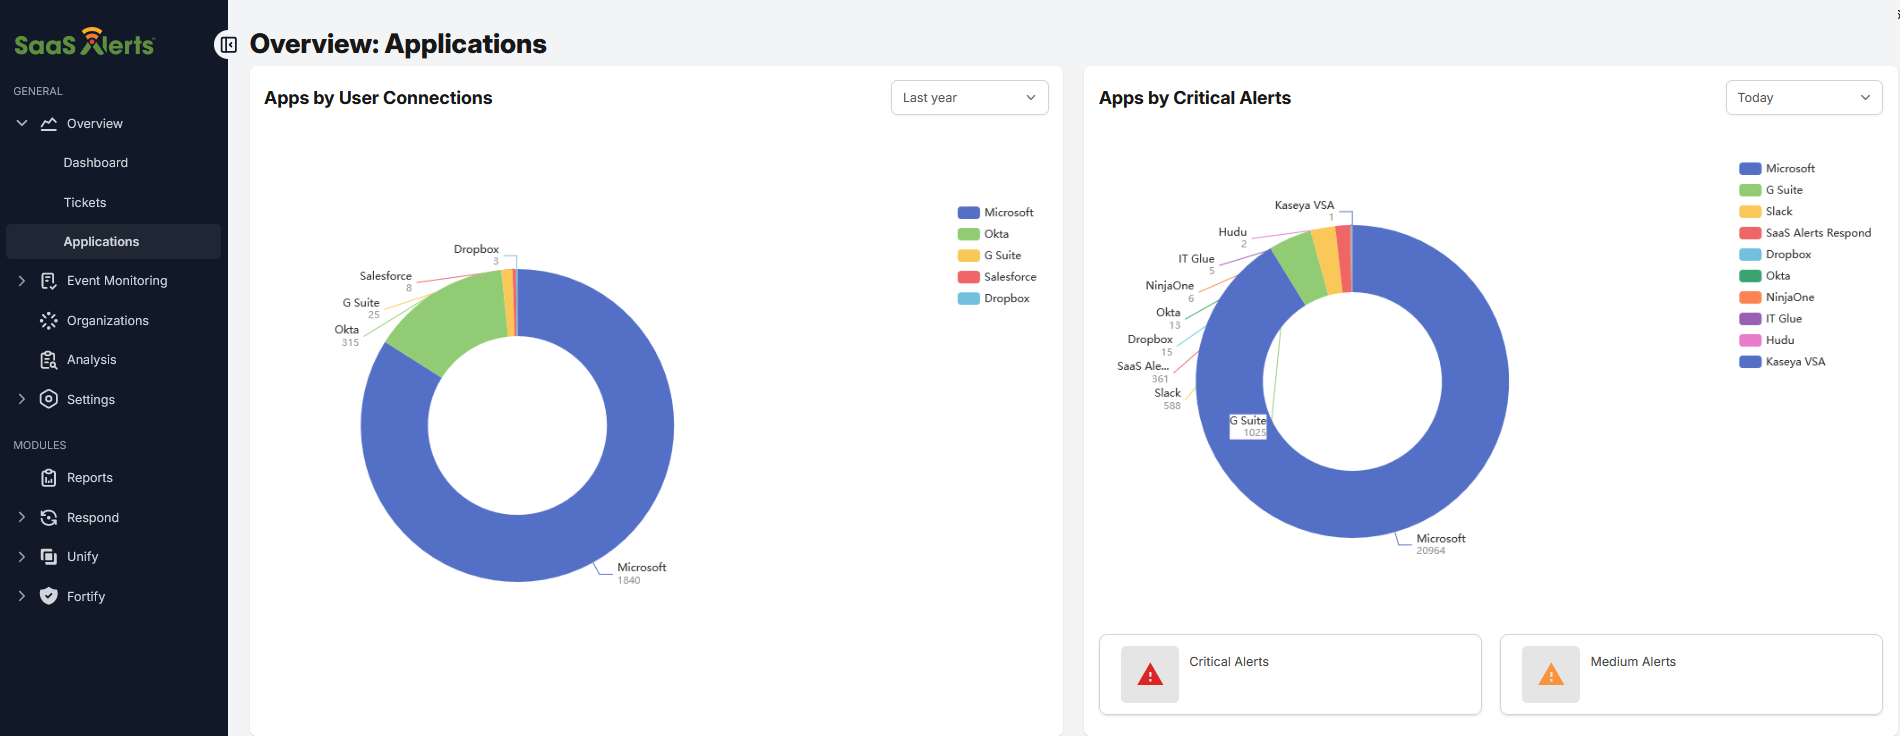
This page displays Apps by User Connections and Apps by Critical Alerts.
Event Monitoring
Here, you can view the most recent critical, medium, and low alerts. The list of the last 100 alerts is updated every 60 seconds. You can filter the results using the drop-down menus at the top of the page.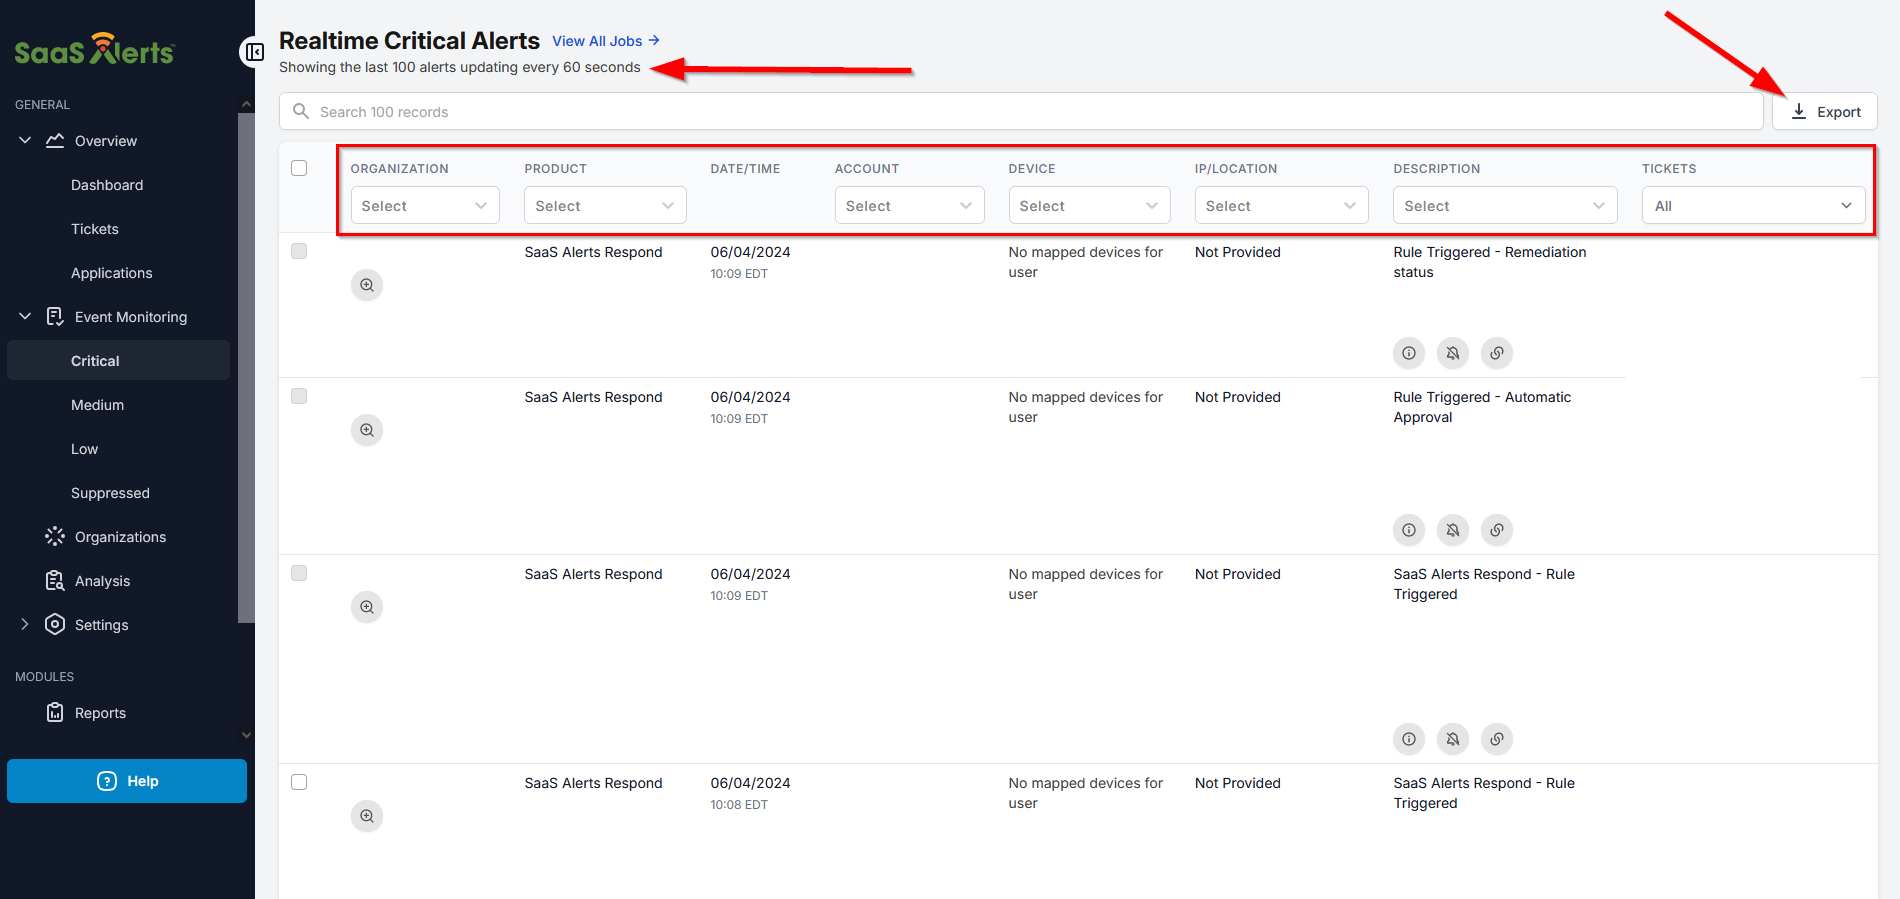
Here, you can search and view alerts that are suppressed. You can also view when a suppression expires as well as release a suppression.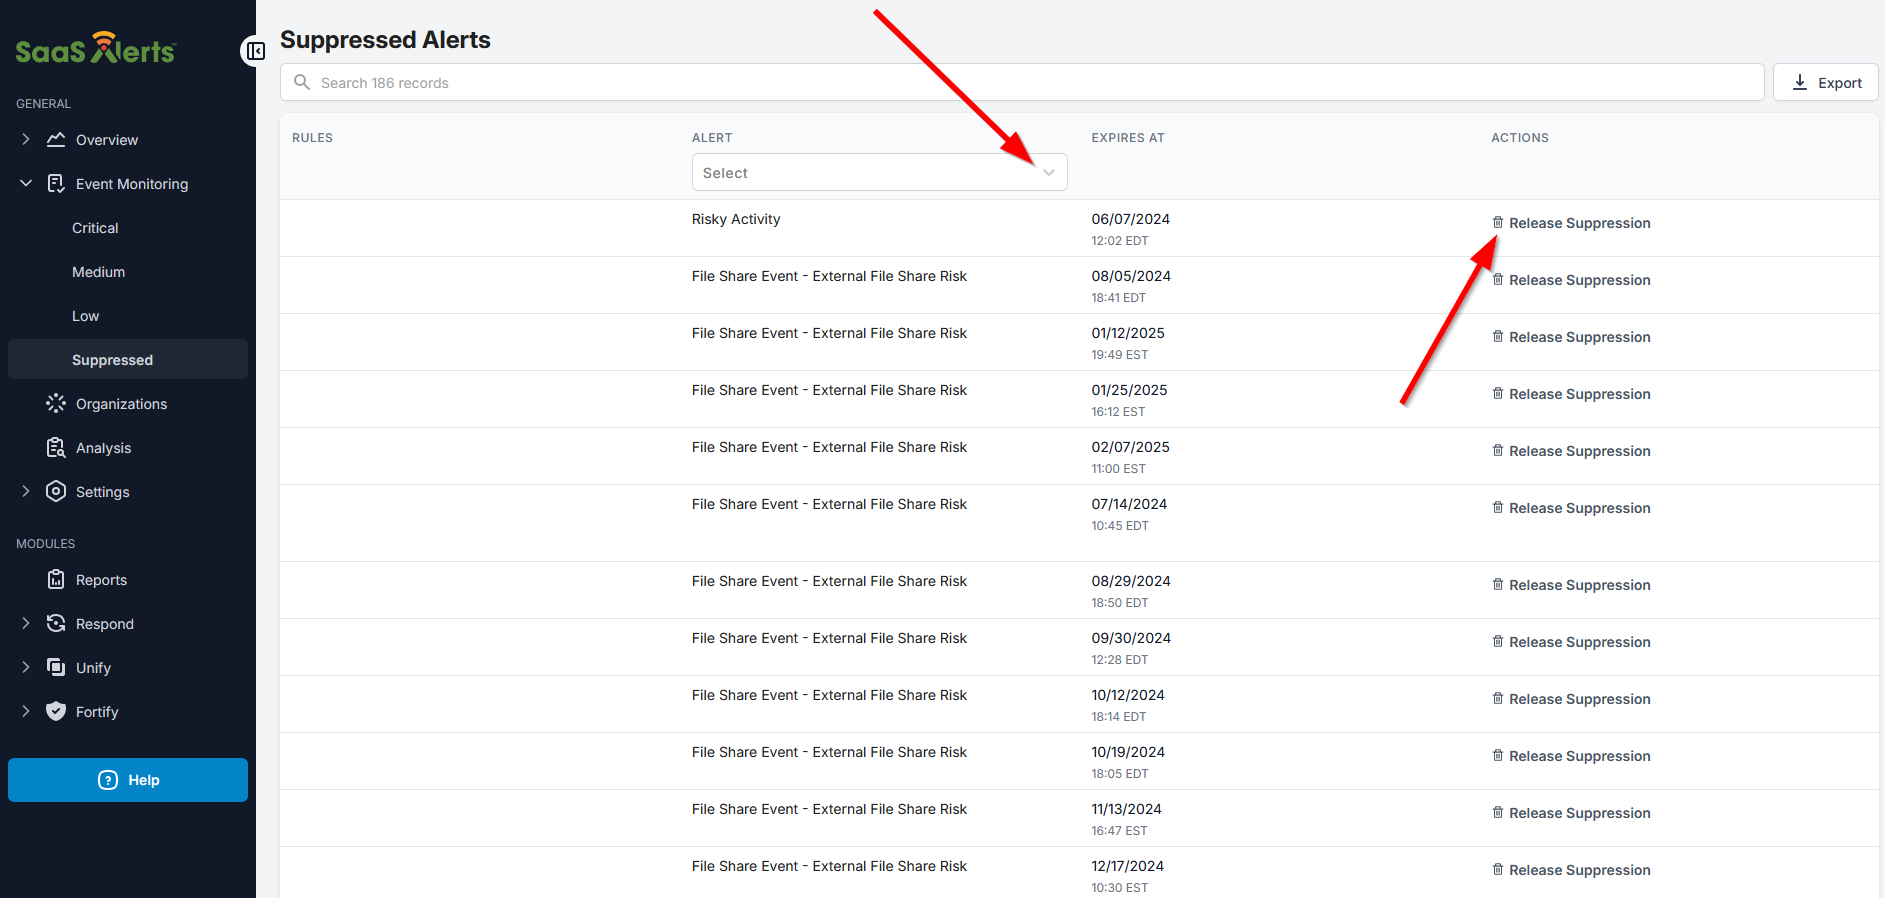
Organizations
This page lists all customers in alphabetical order, along with their group, additional alert recipients, PSA status, allowlisted countries, total/billable users, status, and applications being monitored.
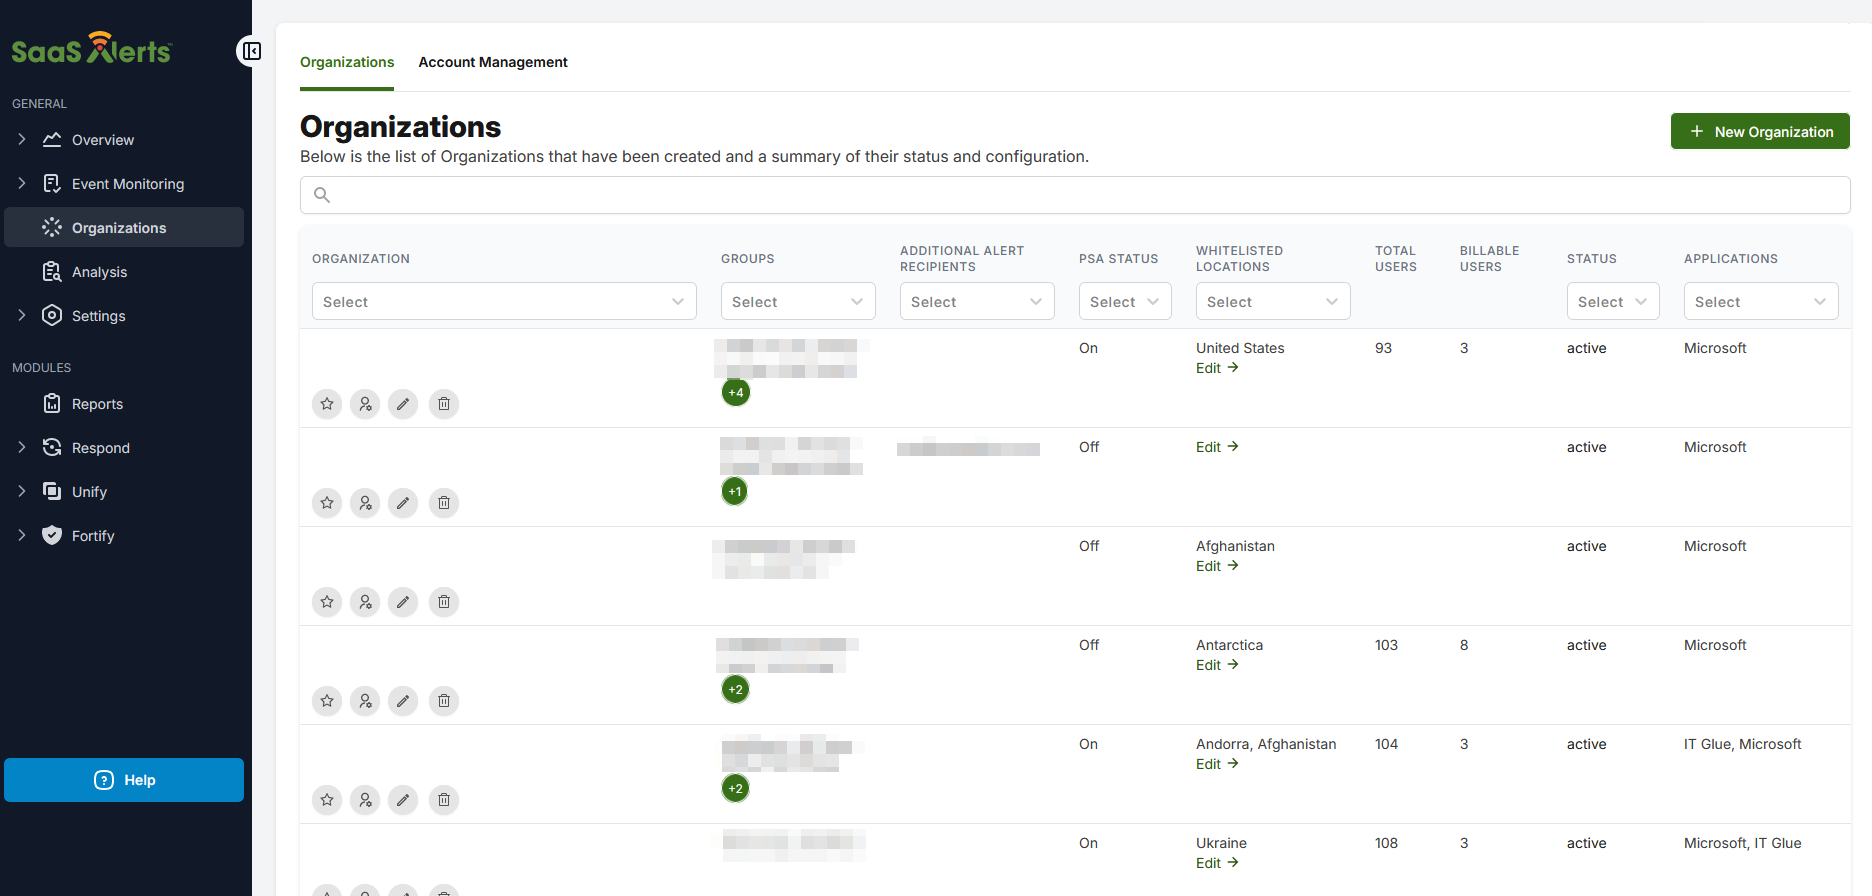
Page features and action icons
- Similar to other pages, the search bar allows you to find specific customers based on keywords (for example, the customer name or application).
- Clicking the Add to Favorites star icon
 stars the customer, moving them to the top of the list. Starred companies will appear in alphabetical order separately from the rest of the list.
 - Clicking the Go to Accounts person icon
 shows a list of accounts for that organization.
 - Clicking the Edit Organization pencil icon
 allows for editing the status and listed applications of the selected customer.
 - Clicking the trash icon
 deletes the selected customer.
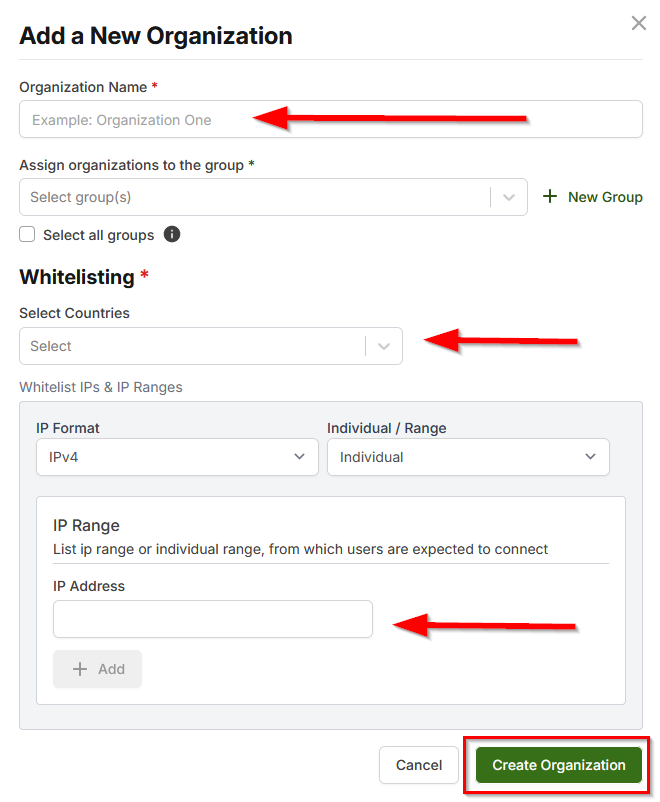
To add a new customer, click New Organization in the upper-right corner of the page.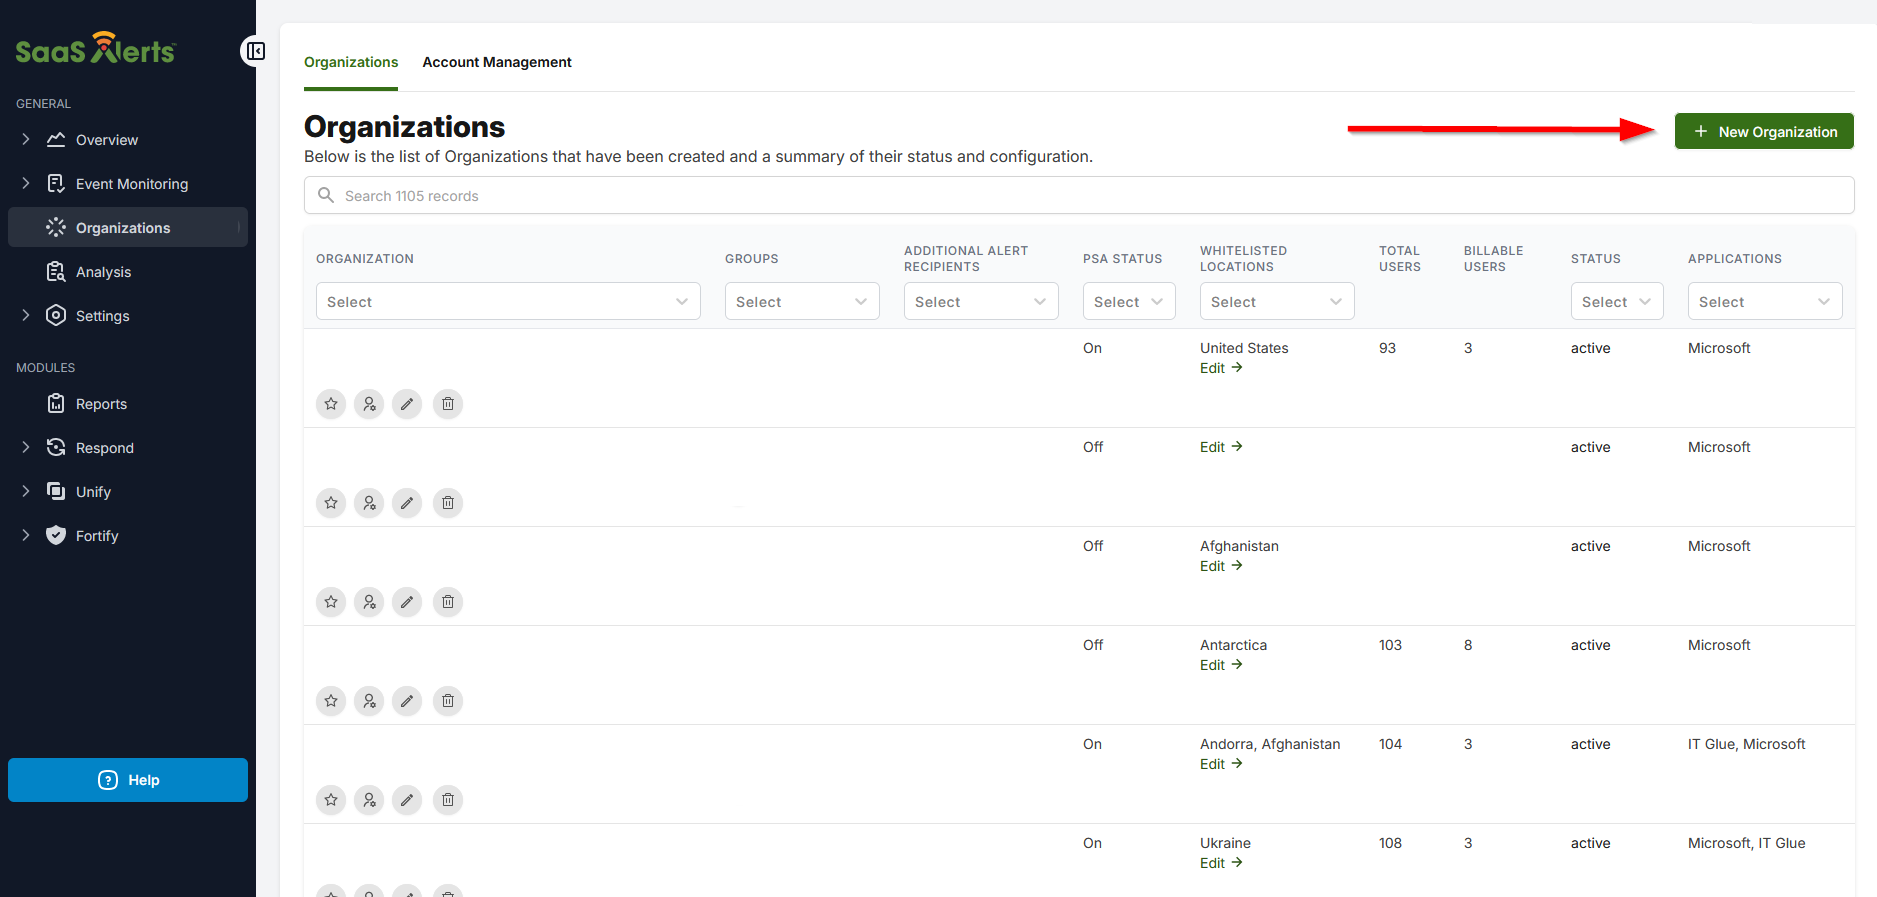
Fields with a red asterisk indicate required information. It is necessary to select at least one country, IP address, or range of addresses to successfully create an organization.
Click Add Application to begin the process of adding a SaaS application connection.

If you have the customer's global admin credentials, you can select I have customer's global admin credentials.
If you do not have credentials, select I want my customer to create the connection. This self-onboarding option provides the ability to either have SaaS Alerts email the domain admin or copy the link so the email can be sent personally.
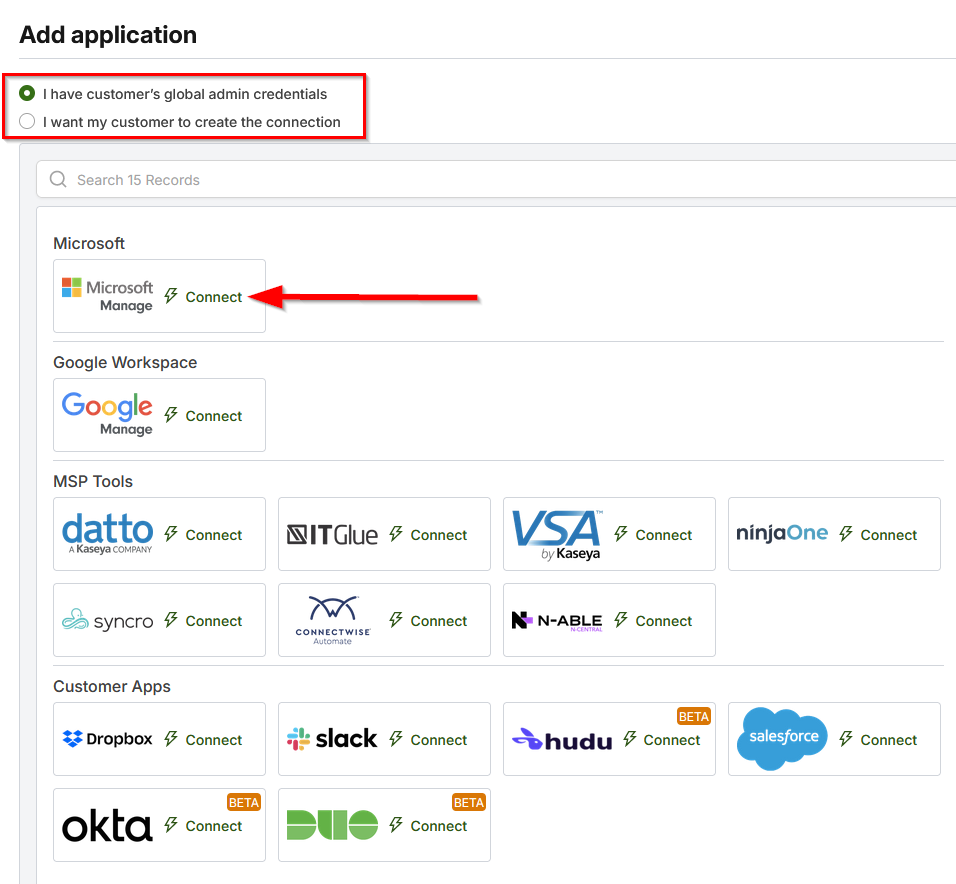
NOTE Disable pop-up blockers so SaaS Alerts can authenticate to each app being monitored.
Once these steps have been completed, the new customer will have been successfully added to the list.
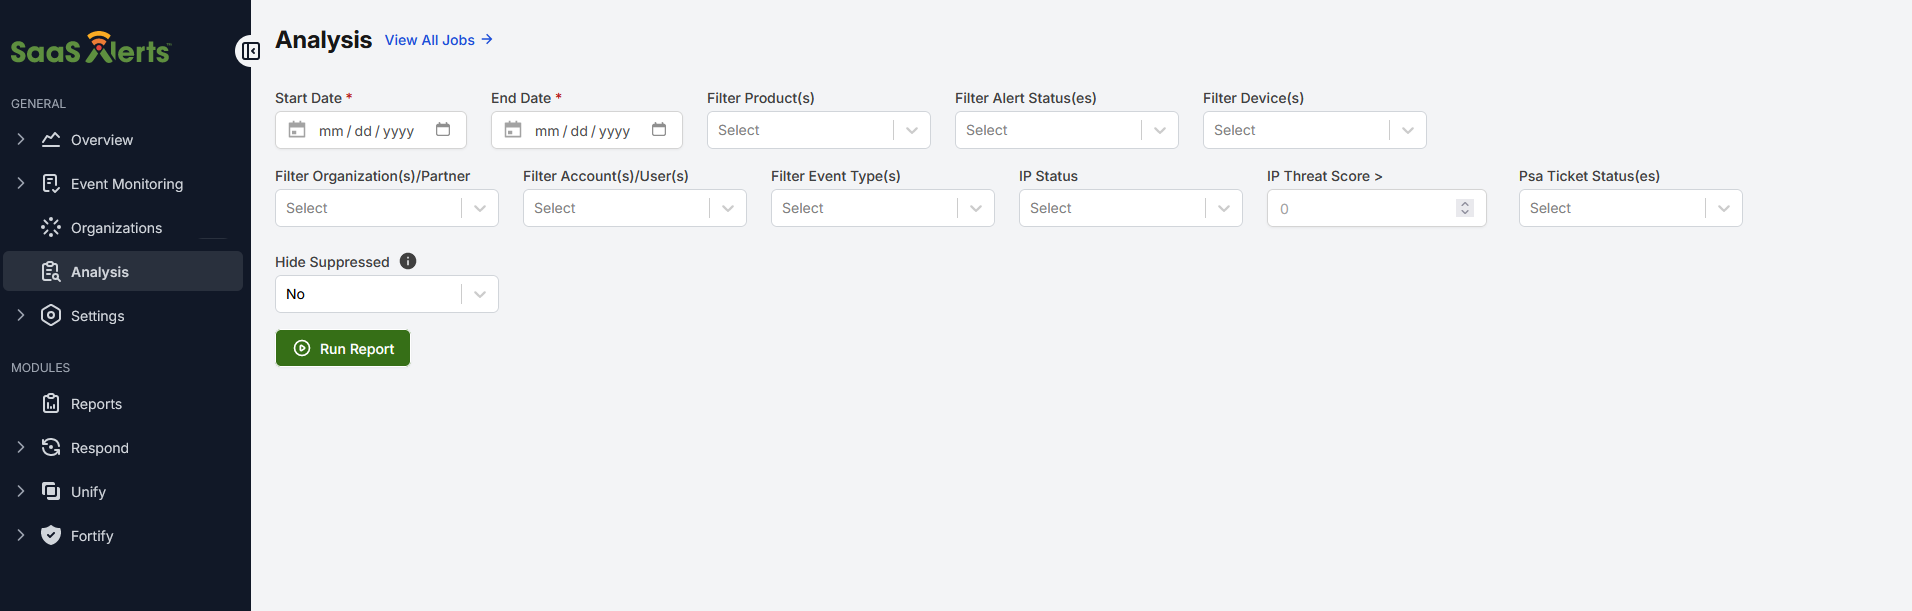
Analysis
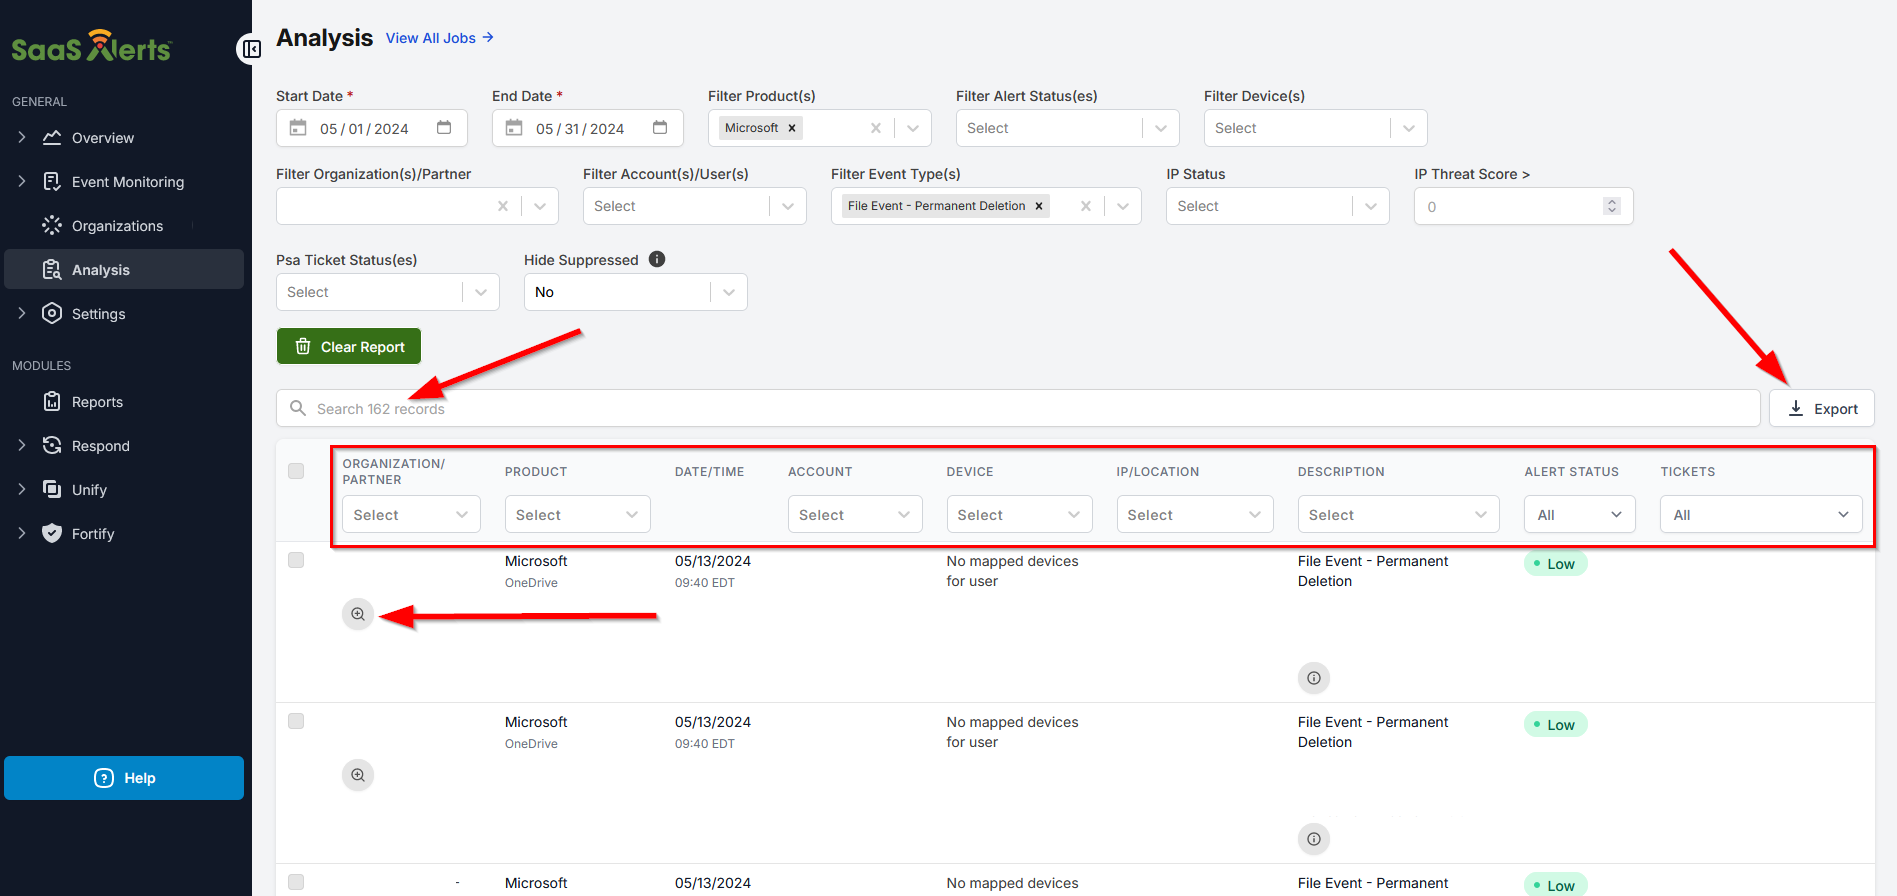
The Analysis page is where you can search for any logged event in SaaS Alerts. You can filter on organization, user account, event type, and other filters listed at the top of the page.
After you run a report, you can search or filter on the results using the drop-down menus. Clicking Export will display the data in CSV or PDF format.
The magnifying glass icon ![]() will show you additional information about an alert. This is the extent of the information provided by the API for an alert.
will show you additional information about an alert. This is the extent of the information provided by the API for an alert.
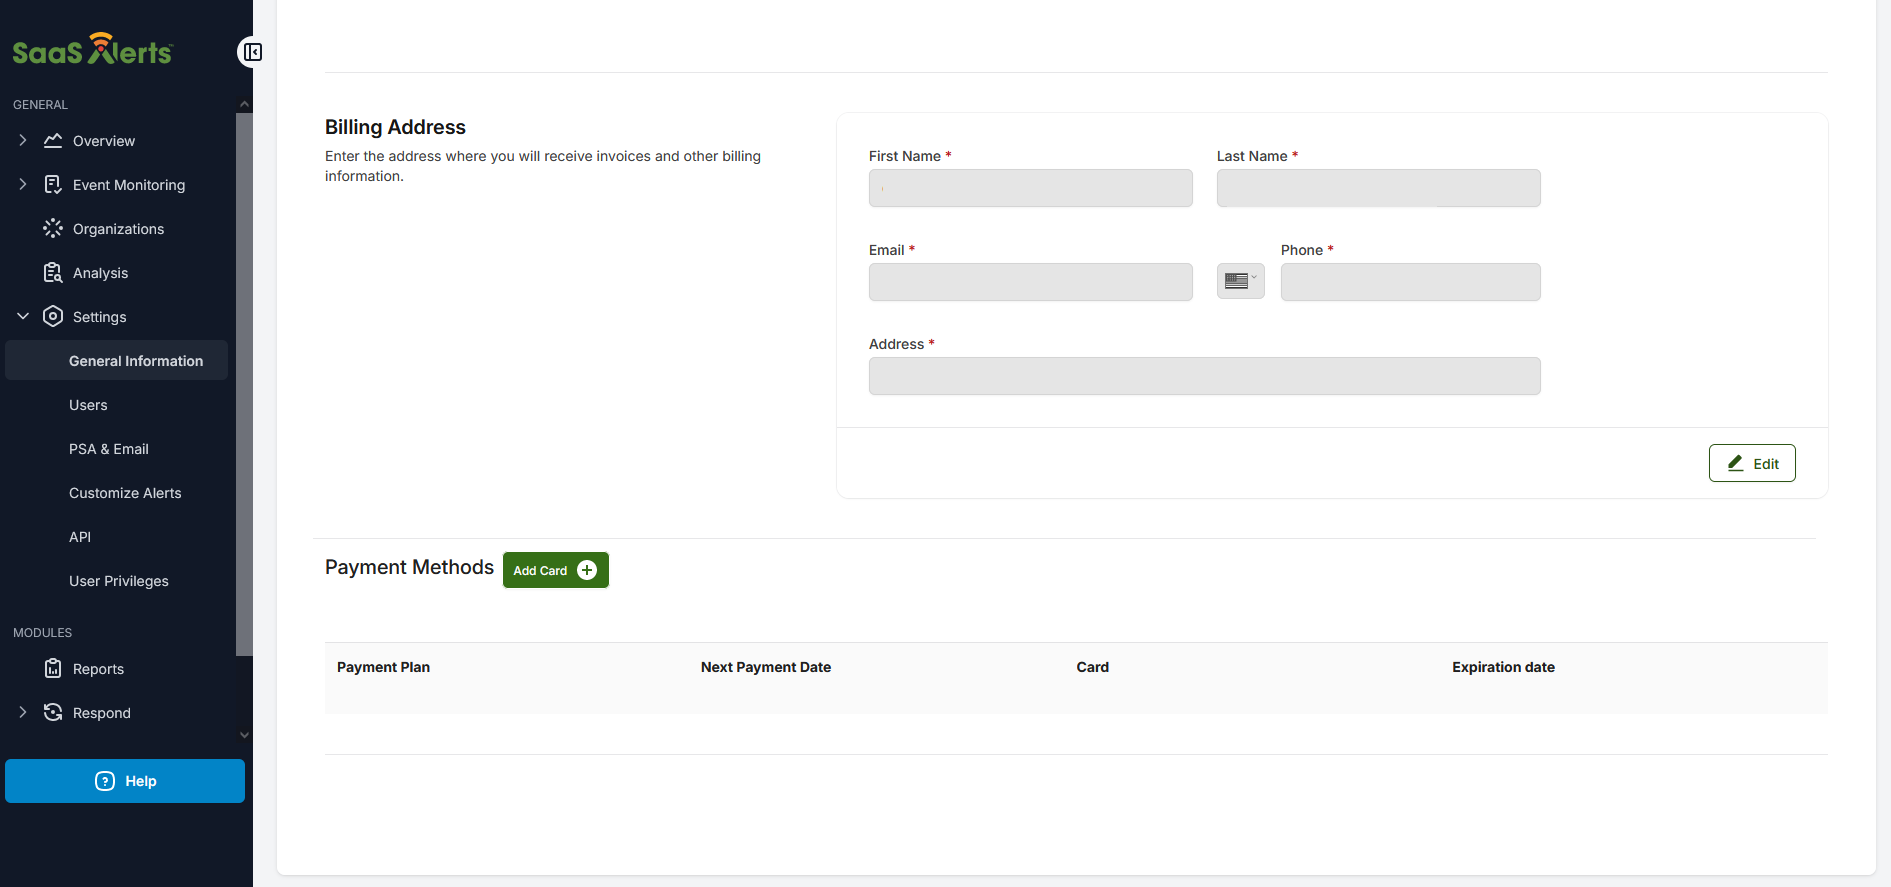
Settings
This tab is where your business information is listed, including billing information and payment methods.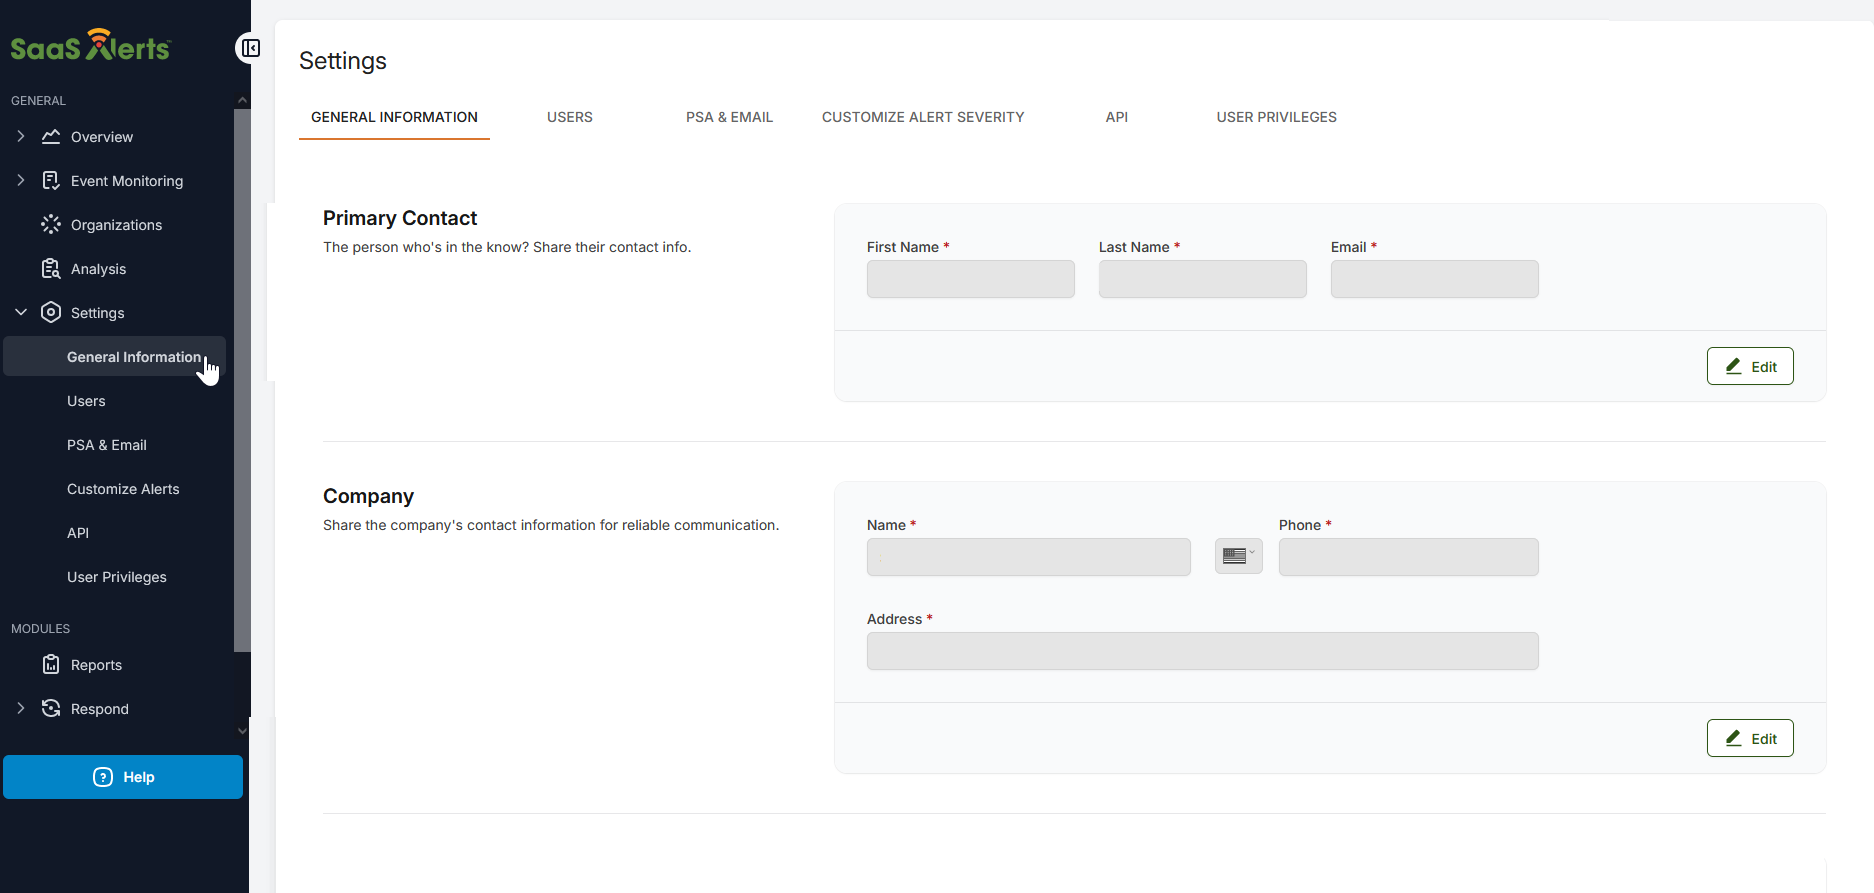
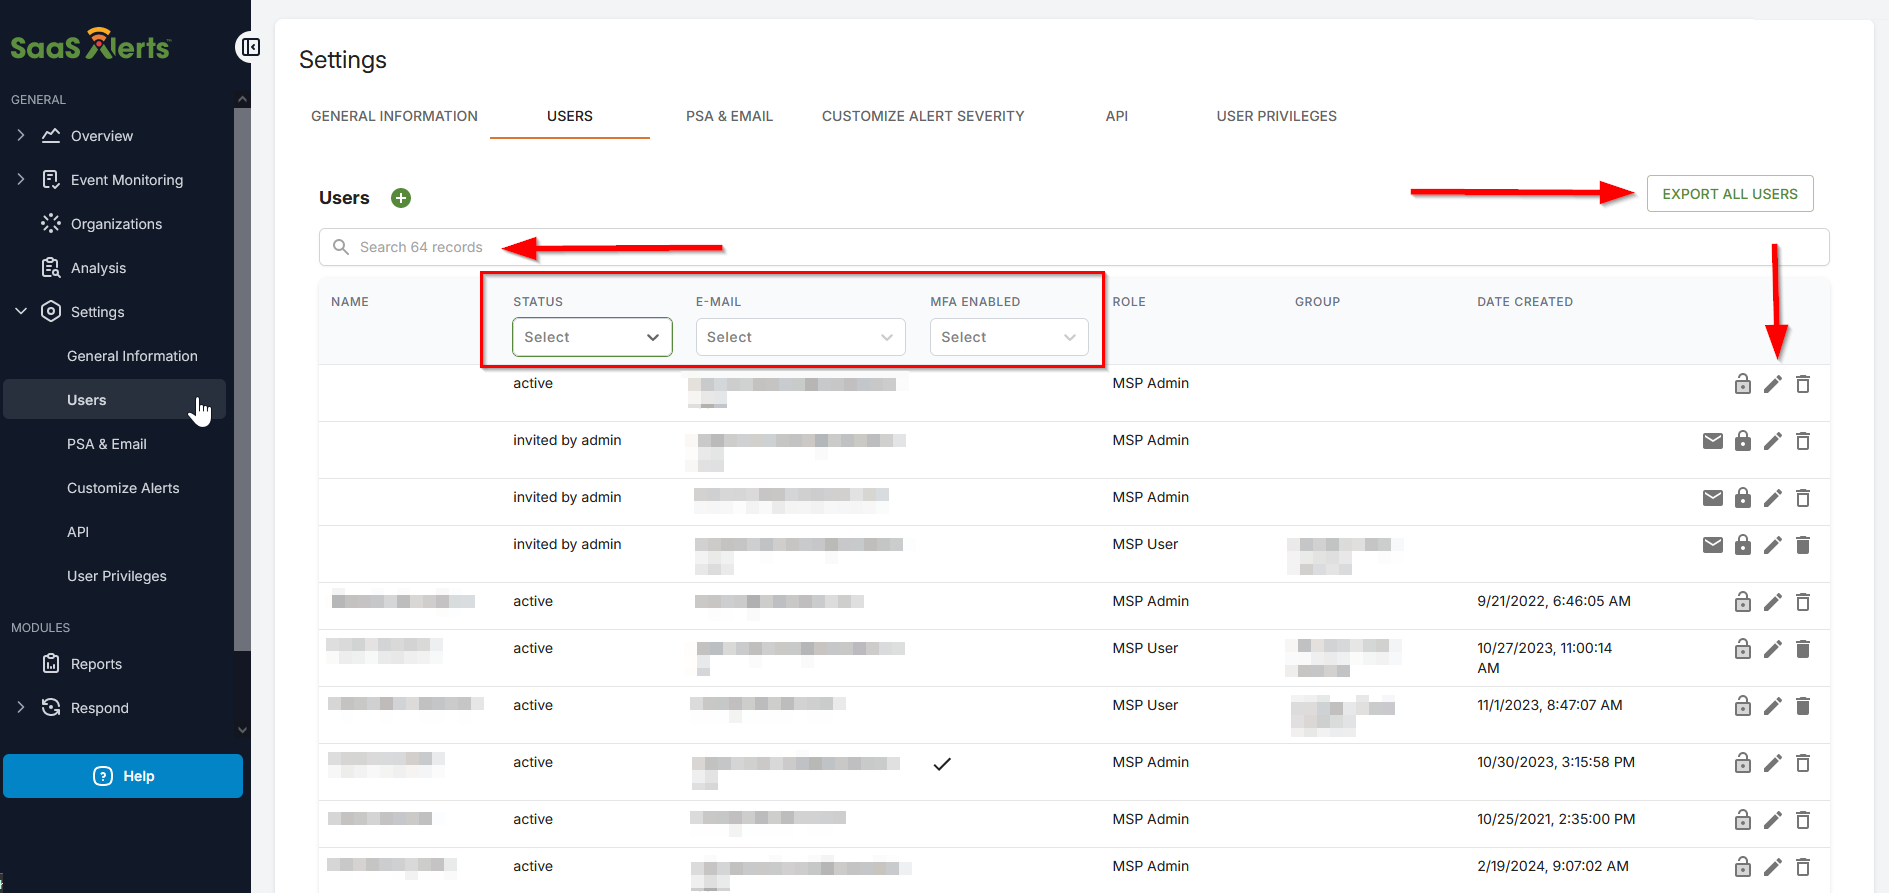
This tab is where you can add, remove, and update users with access to SaaS Alerts. You can filter on Status, Email, or MFA Enabled.
- Clicking the pencil icon allows you to edit a user account.
- Clicking the lock icon indicates if the account is active or not.
- Clicking the trash icon will delete an MSP User account (an MSP Admin account first has to be demoted to an MSP User account to be deleted).
- Clicking Export All Users will export the user list to a spreadsheet in CSV format.
This tab is where you can add a PSA or email notification.
To add a PSA, click Add PSA.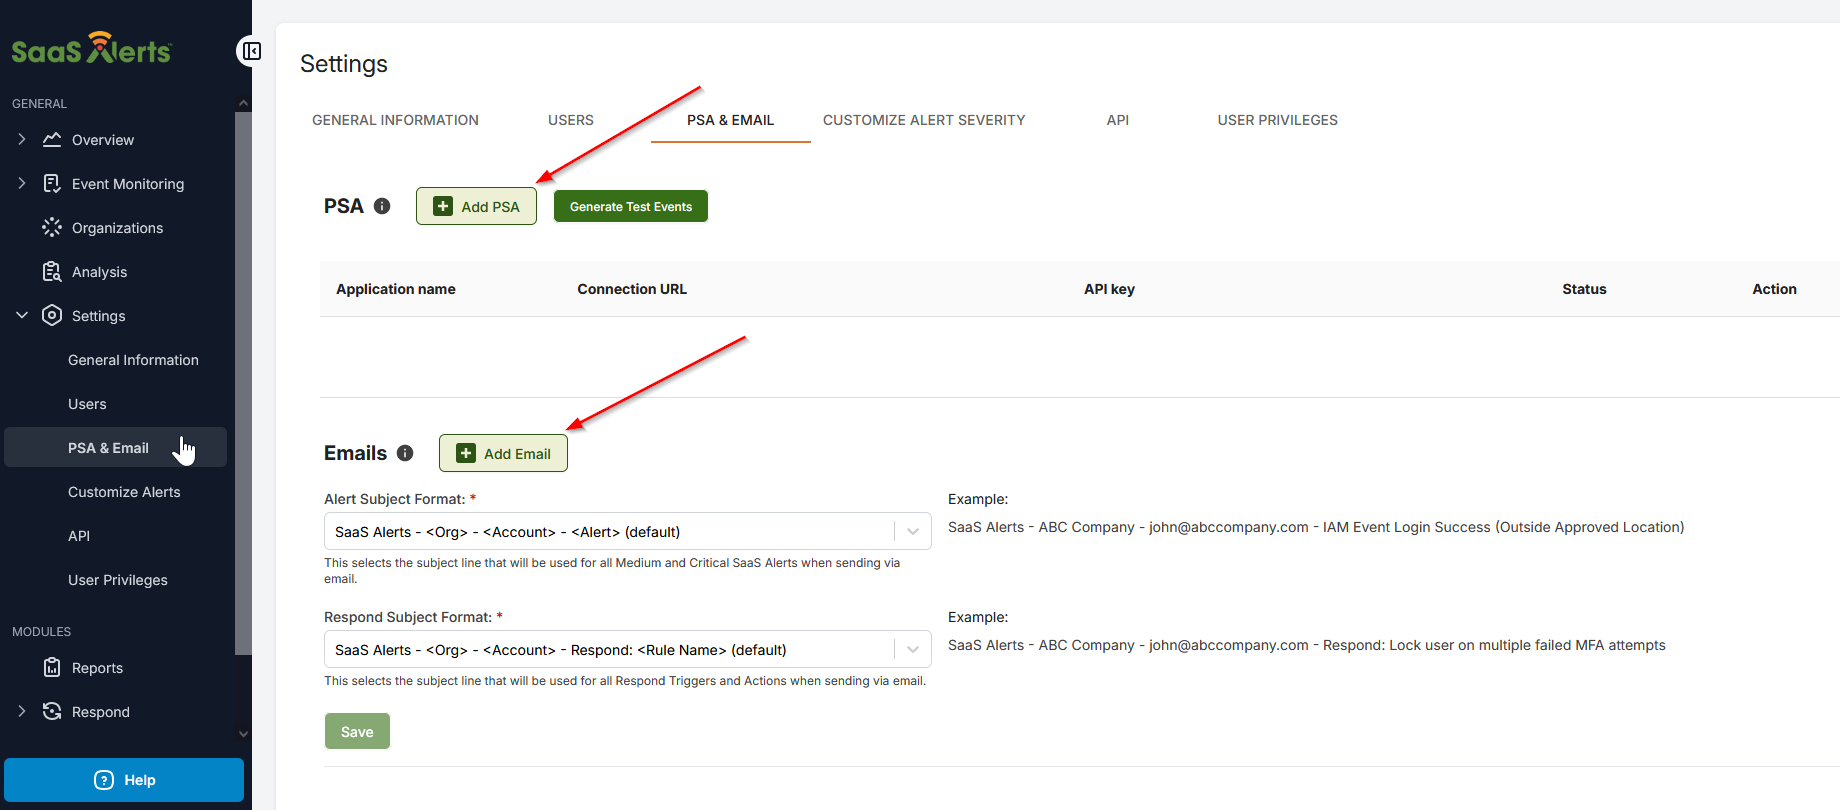
Select the PSA you would like to add and enter the relevant information.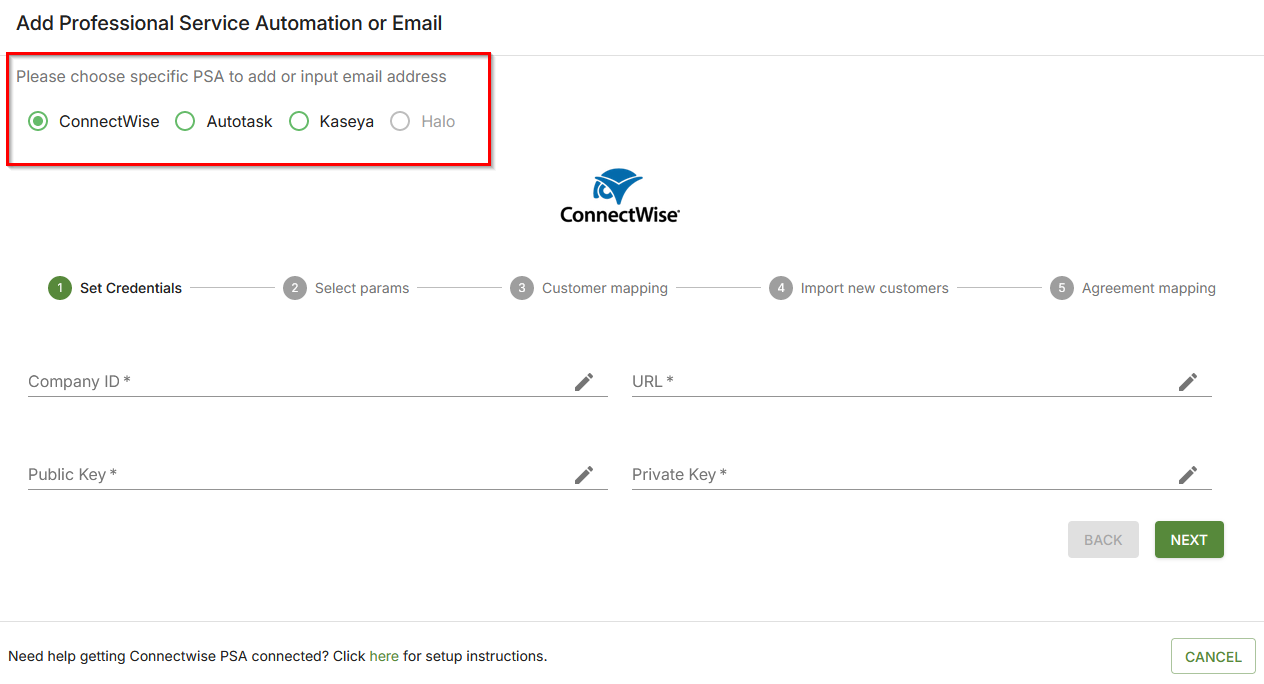
To add email notifications, click Add Email and add an email address.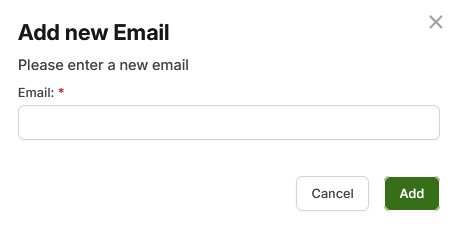
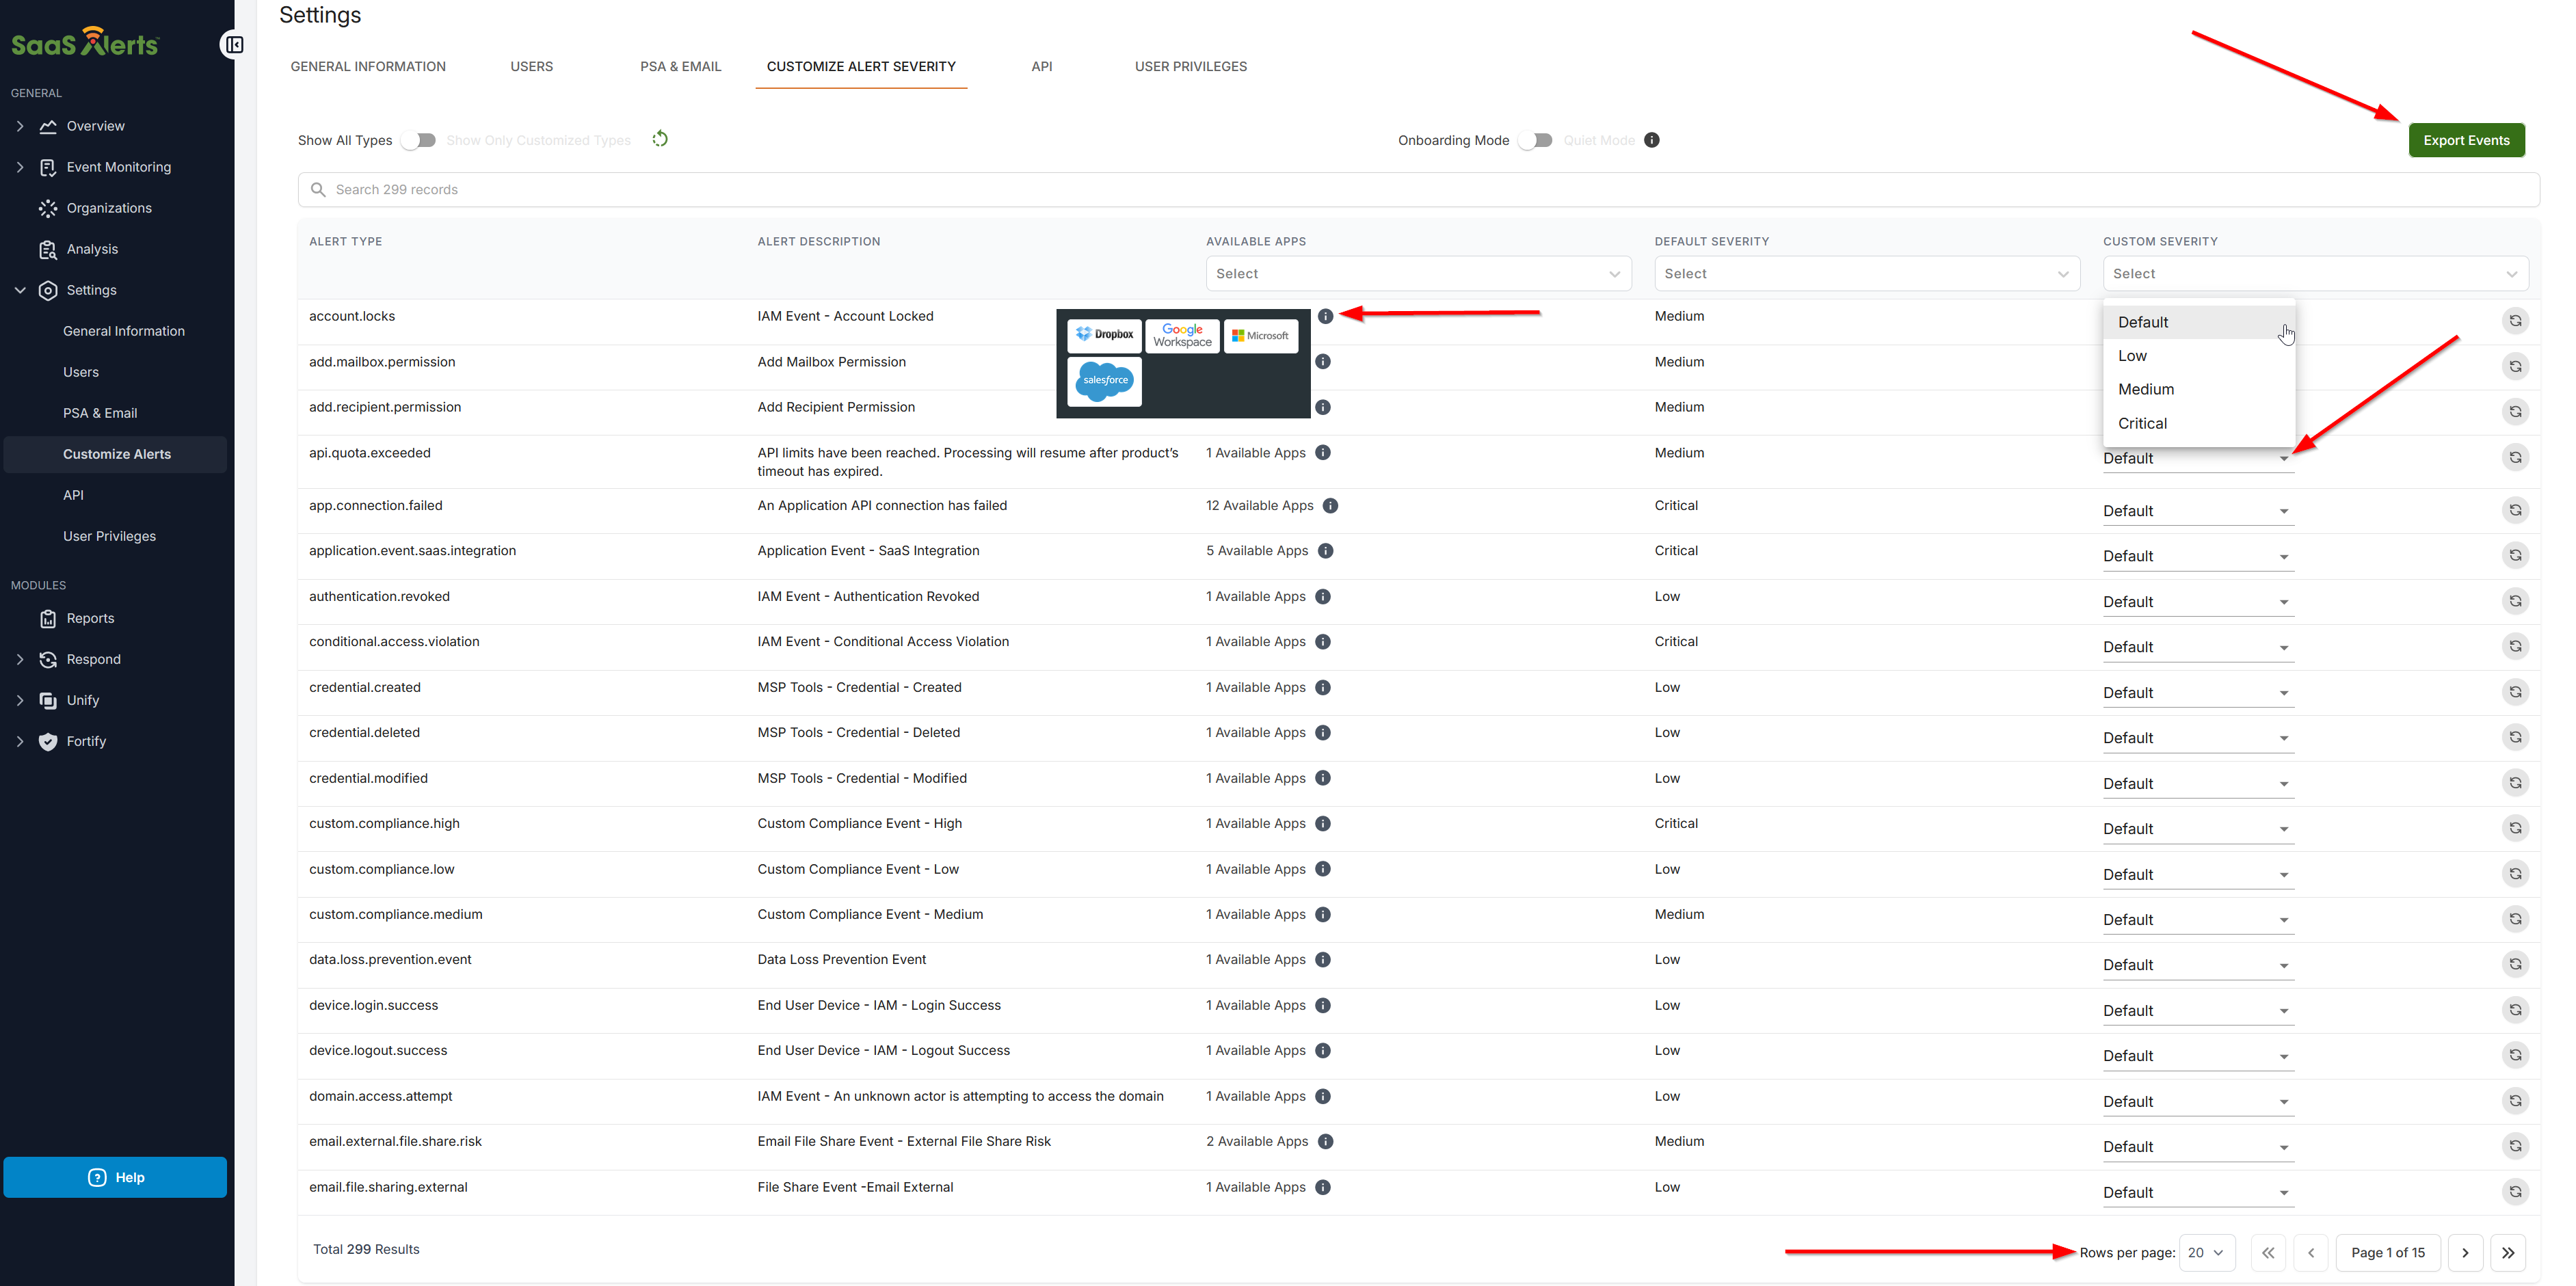
This tab allows you to customize alert severity, which can be set to Low, Medium, or Critical.
This list of alerts can also be exported for reference.
Hovering over the i icon will display the list of applications relevant to the alert.
Changing the Rows per page selection at the bottom of the page will allow you to see the entire list.
NOTE Only alerts with a Medium or Critical severity will generate an email or ticket.
To set up a SaaS Alerts Webhooks subscription, complete the following steps:
- To add a domain for subscription authorization, click the Add new domain icon
 .
.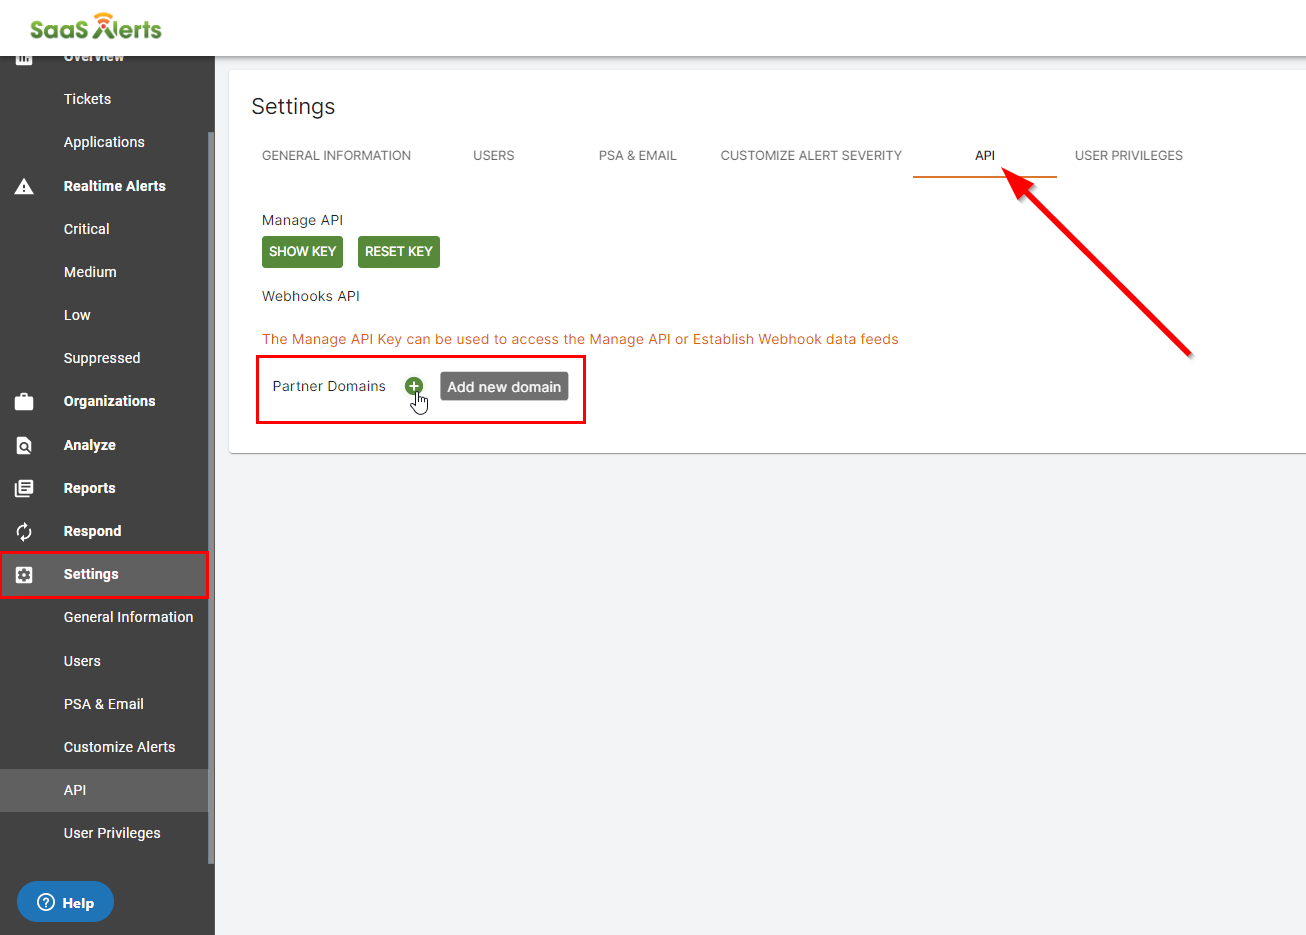
- Enter a valid domain you will use for creating subscription endpoints.
-
EXAMPLE
partnerdomain.com
partnerdomain.com/path
webhooks.partnerdomain.com - Click Add to submit the domain for validation and add the domain authorization for a SaaS Alerts Webhooks subscription if validation is successful.
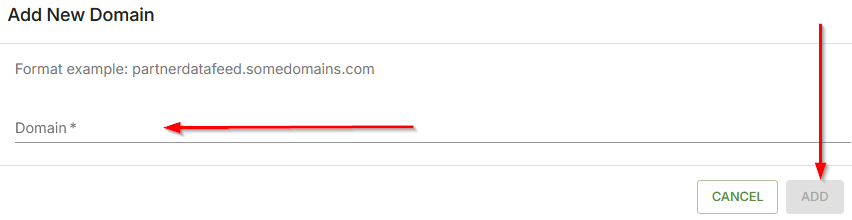
NOTE Validation requires that, when queried, the domain returns a 2xx (typically 200) response indicating that it is live and can accept HTTP(s) requests. The domain host can have a blank page, API endpoint, or maybe the domain on which your primary website exists.
IMPORTANT The domain must match the location of your webhook endpoint.
The domain validation process will produce either of the following results:
For more information, refer to Webhooks (API documentation).
This tab allows you to enable role-based access control (RBAC), Group Access.
IMPORTANT RBAC requires at least two organizations to be connected to the platform and at least one non-MSP Admin account (MSP User). If no MSP User accounts are present, one will need to be created or an MSP Admin demoted to MSP User first for RBAC to function as expected.
- Turn on the toggle to enable RBAC/group access.
- Click the Add new Group icon .
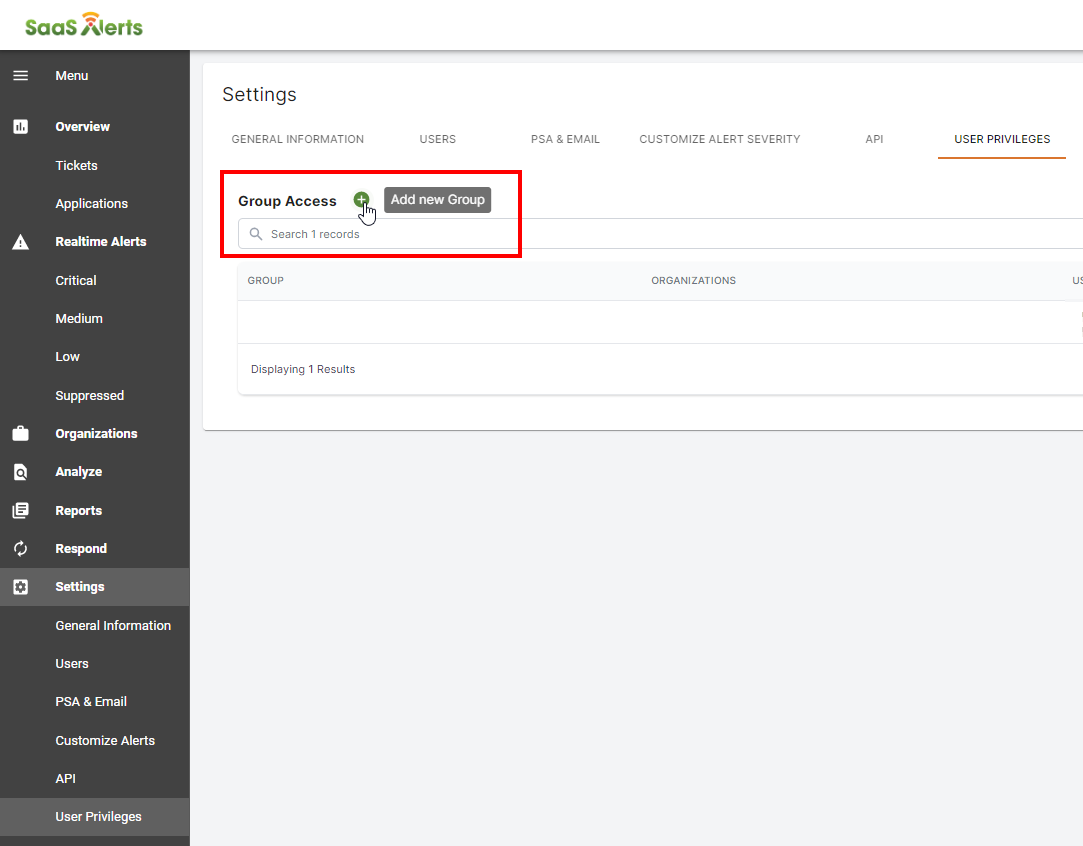
- Enter a Group Name and select Organization(s) and User(s).
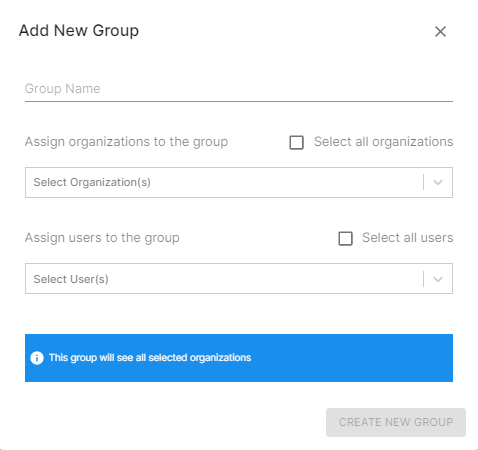
NOTE If the Create New Group option remains grayed out after selecting Select all users, it means no MSP Users exist in your partner instance. RBAC works only on non MSP Admin accounts. Creating a new MSP User account or demoting an existing MSP Admin account will allow you to create a group as expected.
For more information, refer to Role-based access control (RBAC) group access.
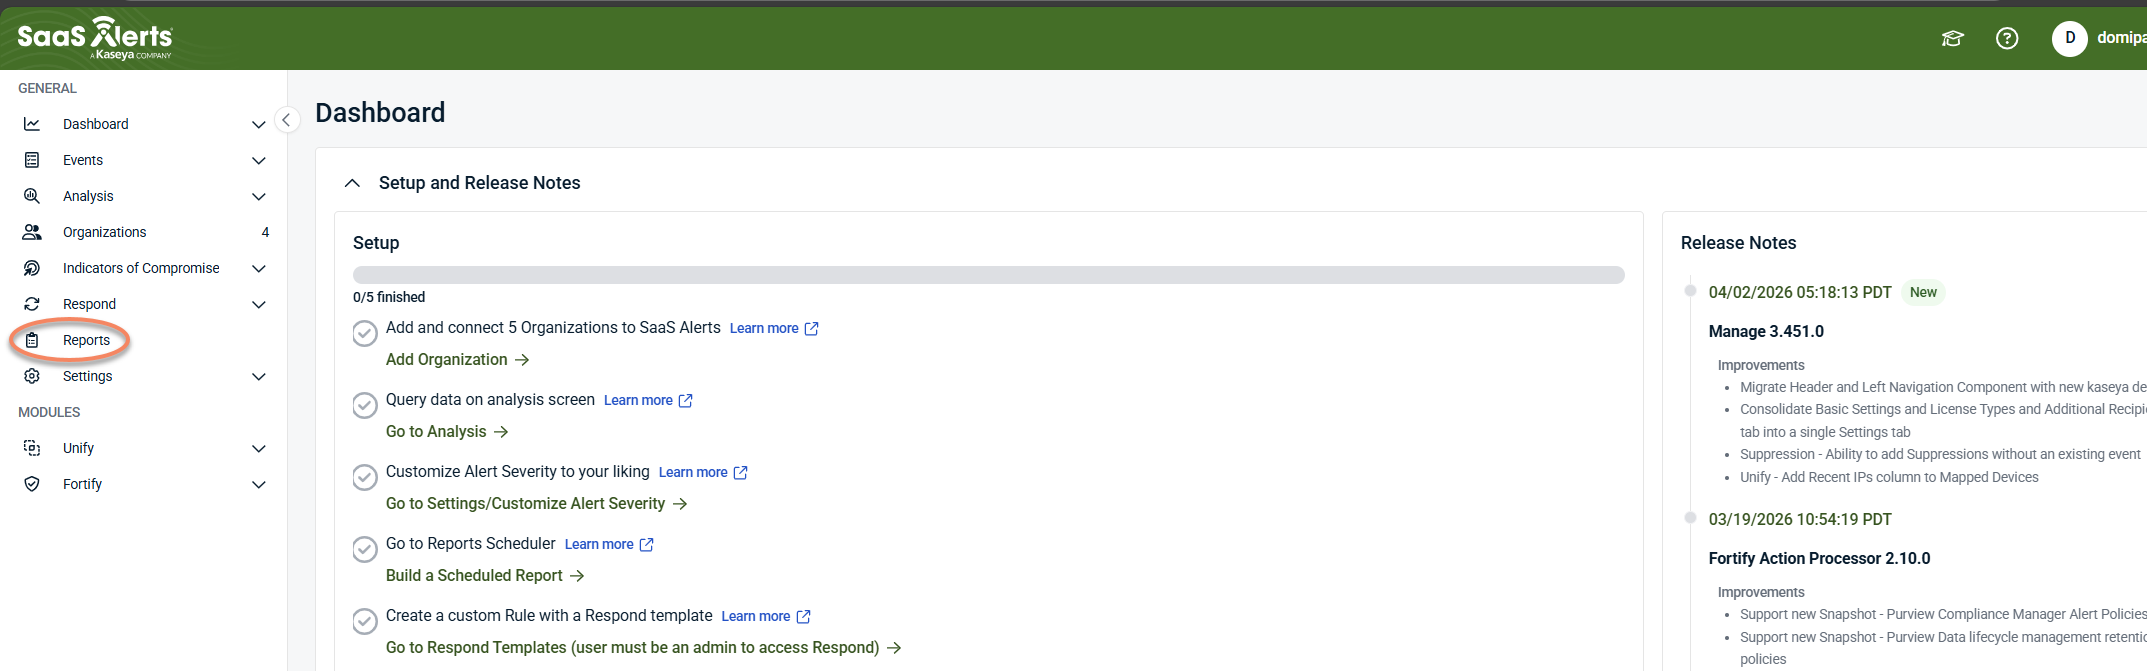
Reports
The Reports module requires an additional authentication with SaaS Alerts from a user account with MFA enabled.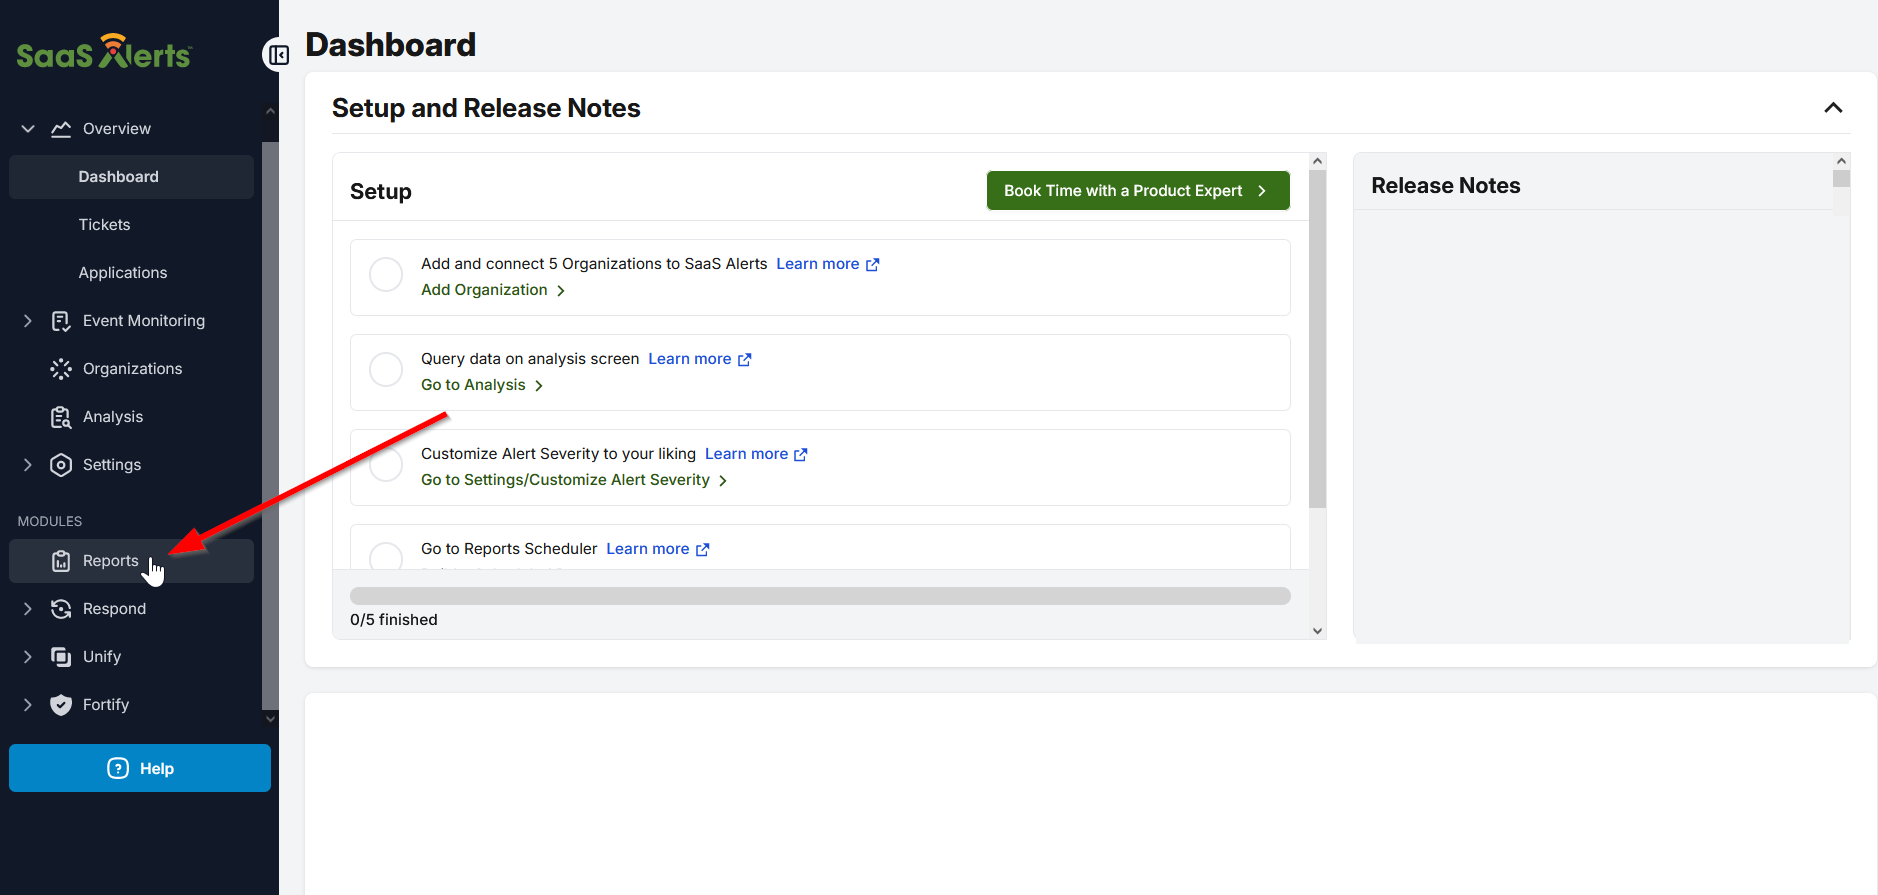
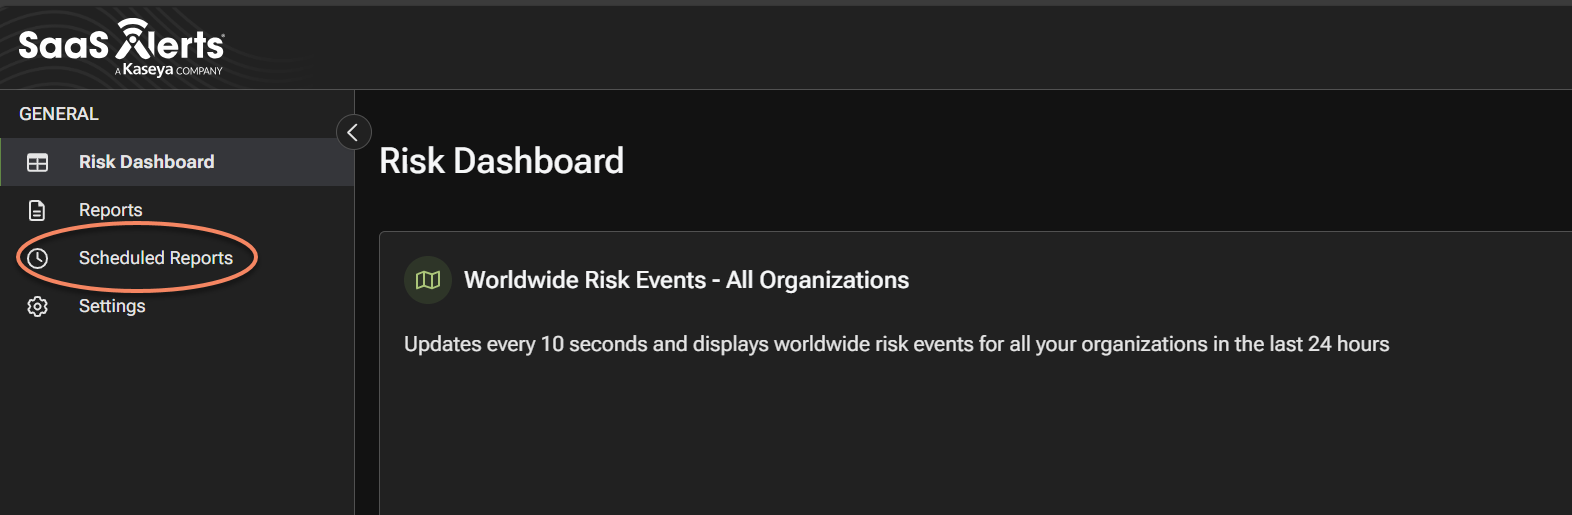
Based on the dates selected, Worldwide Risk Events for all organizations are displayed on the map. Events are updated every five seconds capturing data from the last 24 hours.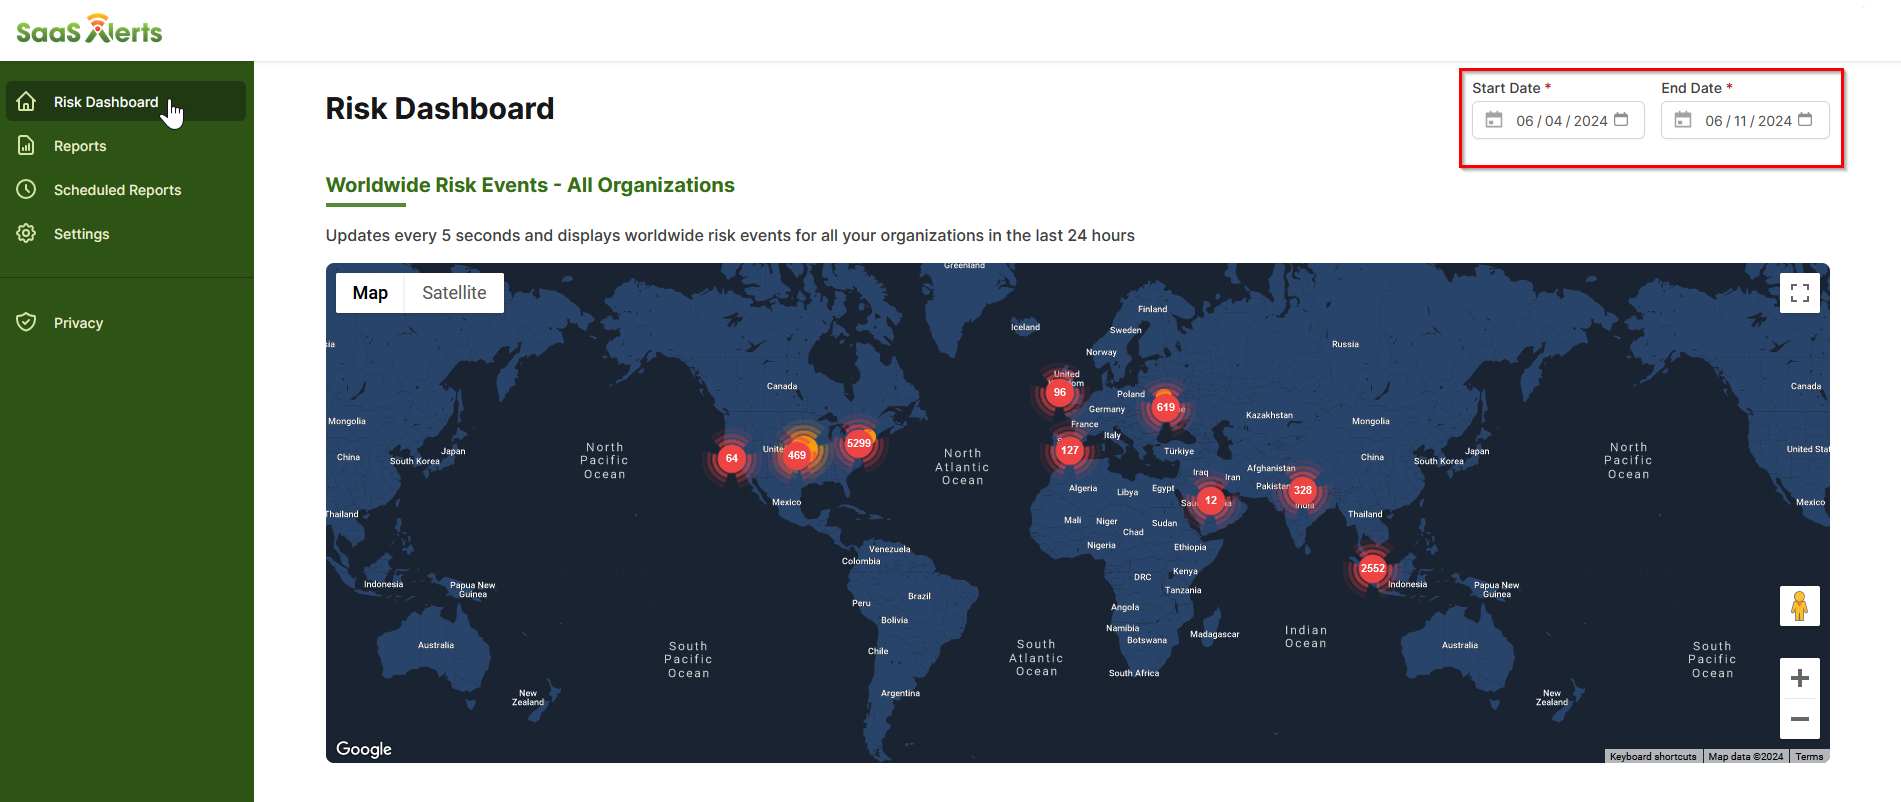
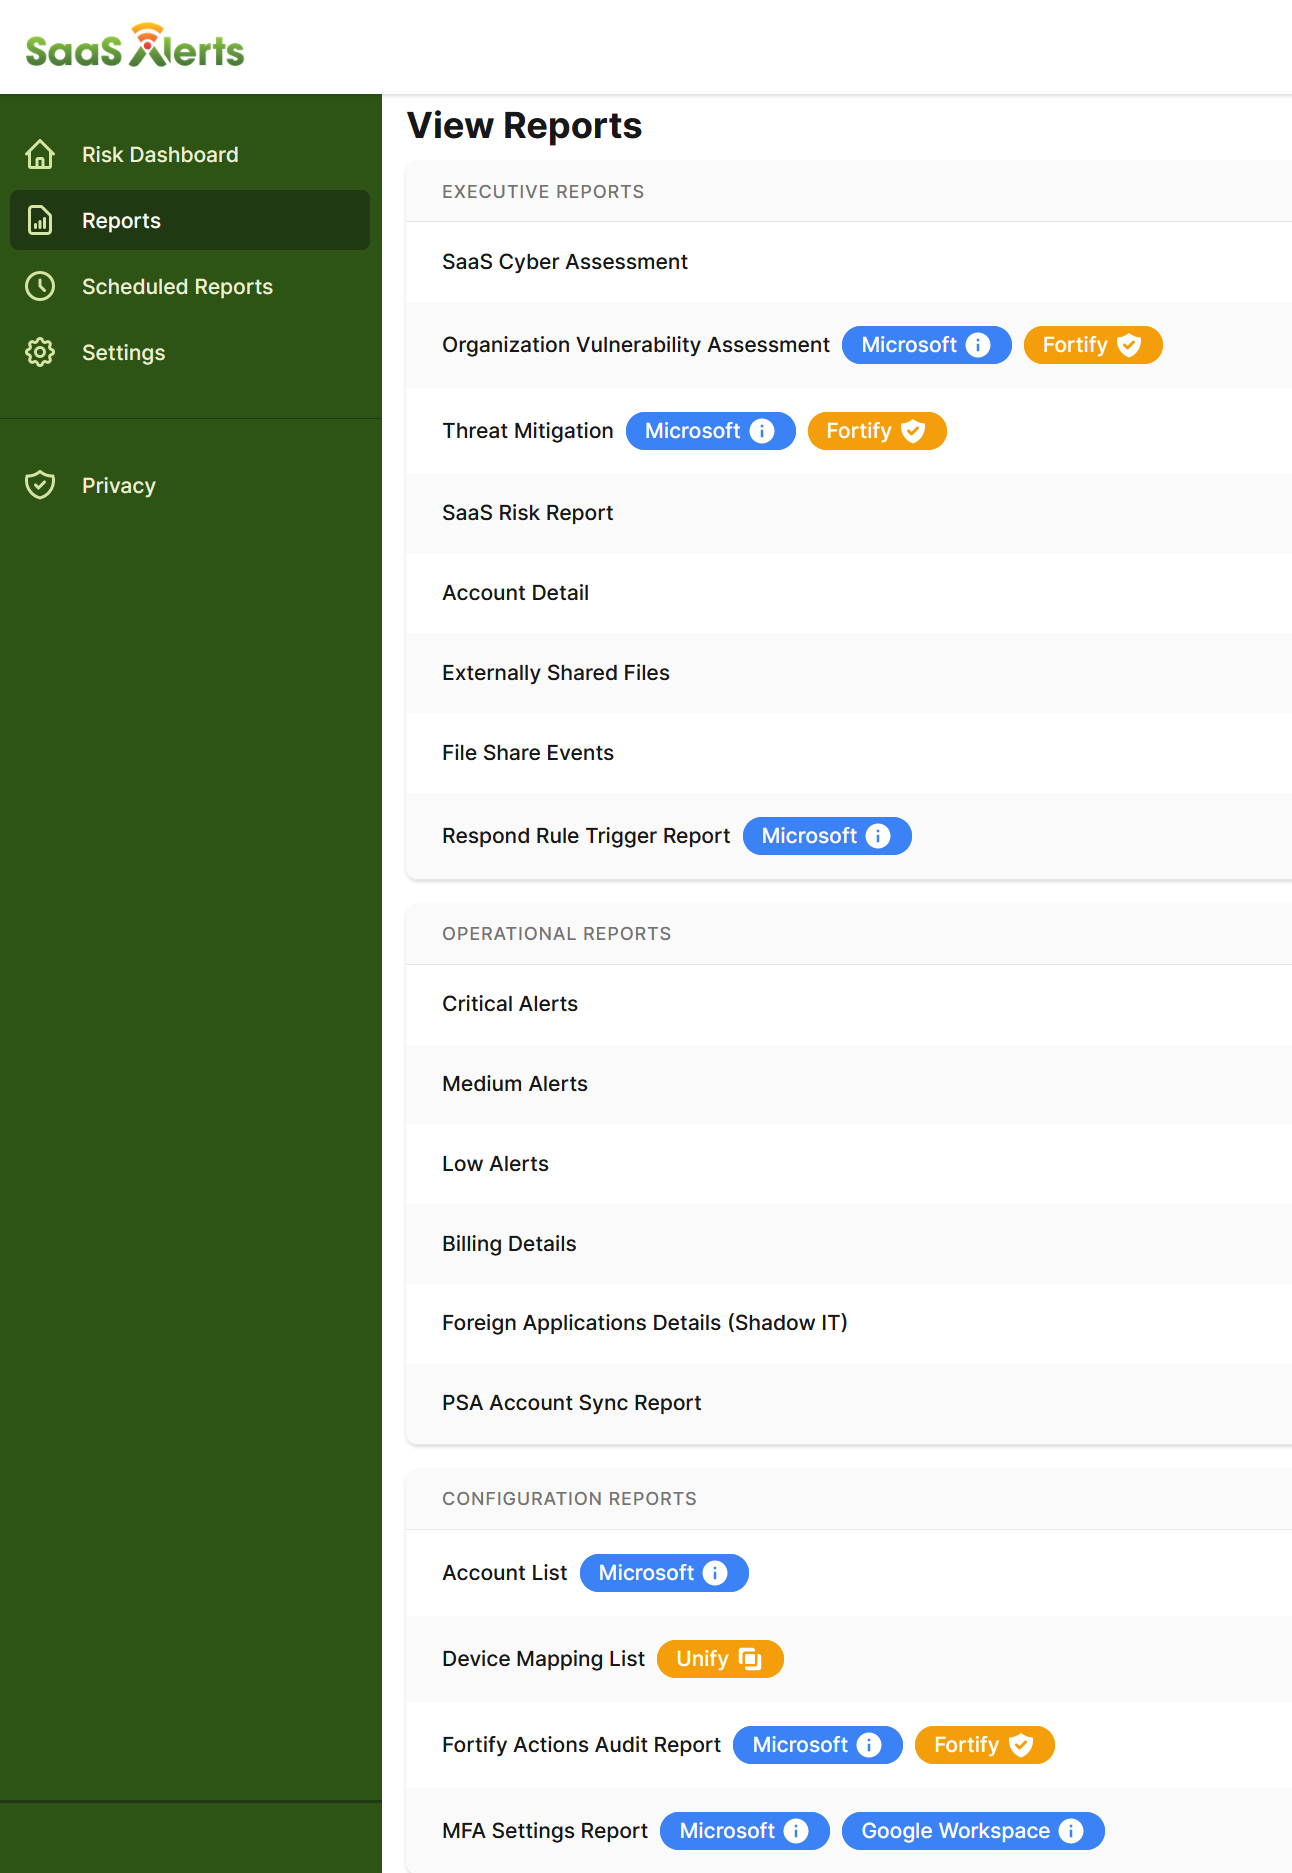
SaaS Alerts provides a list of predefined reports listed in three categories:
- Executive Reports
- Operational Reports
- Configuration Reports
The Report module allows partners to customize report schedules for each customer. You will see any existing scheduled reports on the main Scheduled Reports page.
Creating a new scheduled report
Accessing scheduled reports
1. From the side navigation menu, click Reports.
2. Select Scheduled Reports.
You are taken to the Scheduled Reports page, where existing schedules (if any) are listed and can be filtered by report, organization, schedule type, or frequency.
Creating a new scheduled report
1. On the Scheduled Reports page, select + New Schedule.

2. The Create a new scheduled report panel opens.
This panel is divided into three sections: Schedule details, Report details, and Recipients.
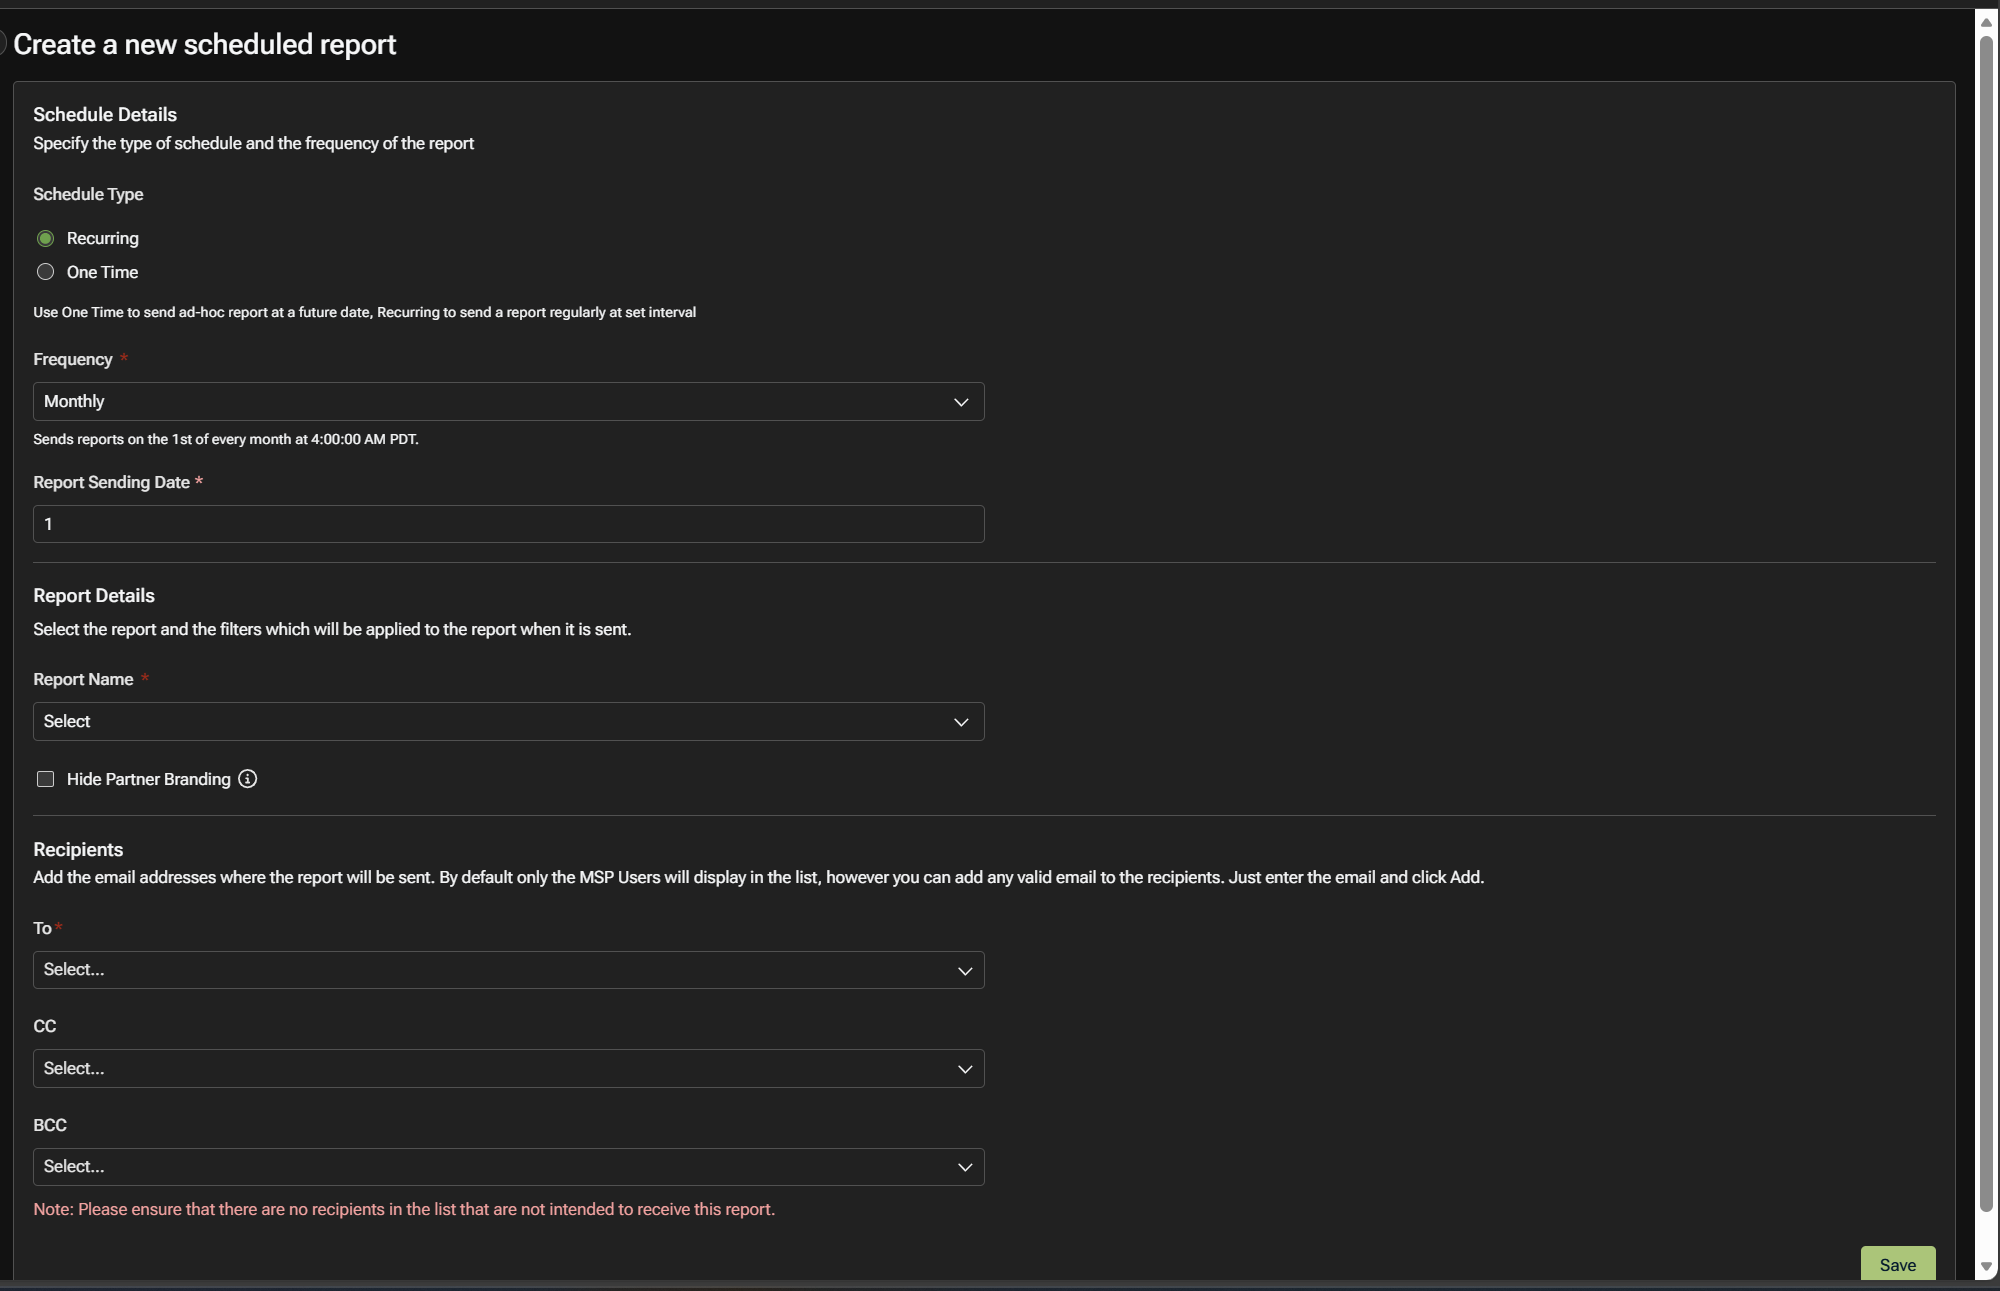
Schedule details
Use this section to define when the report is sent.
Schedule type
-
Recurring: Sends the report repeatedly based on the selected frequency
-
One time: Sends the report once on a future date
NOTE Choosing Recurring will send the report at the beginning of the preferred frequency at 12:00 AM UTC time zone.
EXAMPLE Scheduled weekly reports will be sent every Monday at 12:00 AM UTC
Frequency
Select how often the report is generated (for example, monthly). The available options depend on the selected schedule type.
Report sending date
For recurring schedules, this setting determines the day the report is sent within the selected frequency.
Report details
Use this section to define what is included in the scheduled delivery. Reports are listed in two categories, Organization Reports and MSP Only Reports.
Report name
Select the report to be sent. Only existing reports appear in the list.
Hide partner branding (optional)
Enable this option if you want to exclude partner branding from the generated report.
Recipients
Use this section to define who receives the report.
-
To: Primary recipients
-
CC: Additional recipients copied on the report email
-
BCC: Recipients who receive the report without being visible to other recipients
By default, MSP users appear in the recipient list. You can also add external email addresses by entering the address and selecting Add.
NOTE Ensure that only intended recipients are included before saving the schedule.
Saving the schedule
After completing all required fields, select Save. The scheduled report appears in the Scheduled Reports list.
Managing scheduled reports
From the Scheduled Reports page, you can:
-
View existing schedules
-
Filter schedules by report, organization, schedule type, or frequency
-
Edit or delete a schedule as needed
Branding allows you to upload a logo to be used in reports and dashboards.
For image branding to be successful, follow the guidelines in terms of file size and image format.
Respond
The Respond module allows you to create customizable rules that trigger automated actions to minimize the risk when some conditions are met. It offers the ability to react faster to events being managed by SaaS Alerts.
Requirements
- SaaS Alerts MSP Admin privileges.
- Sign in with Microsoft or Google OAuth, or enable MFA in SaaS Alerts user settings.
- Accept all Respond module security permissions.
- A global admin account that is specific to the organization domain to connect to Respond.
NOTE Make sure you disable MFA if you choose to use Google or Microsoft authentication.
IMPORTANT If the global admin account used to create a Respond connection has its permissions diminished, password changed, or sign-in blocked, the Respond connection will break and have to be re-established once the account is restored to global admin and sign-in is unblocked for that account.
For more information, refer to The Respond module.
After the Respond permissions requirements are accepted, you will land on the Rules page. From here, you will be able to create a new rule, manage existing rules, or turn off the Respond module completely.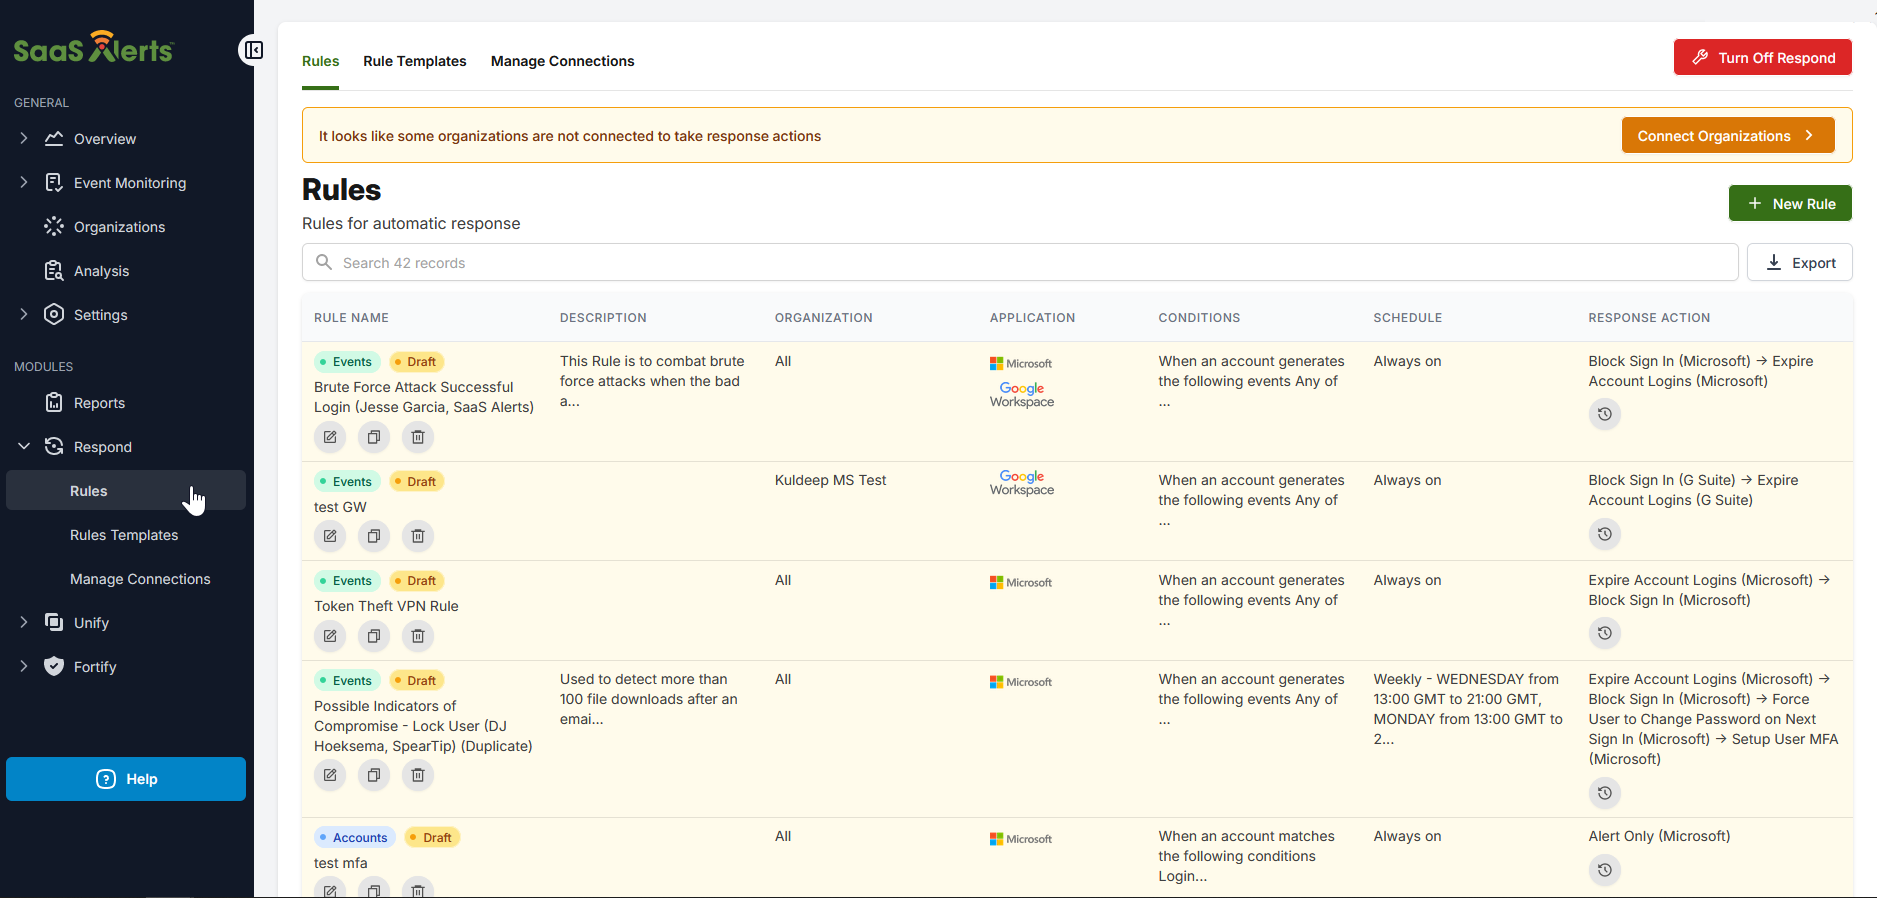
Creating a rule
Before creating a rule, it's important to understand how rules are structured. Rules apply to one or more organizations, at least one account (typically a user account), and must be listening for at least one event. Rules can then have responses, or actions, that are taken if the rule conditions are observed triggering the response. Refer to Respond actions.
It is possible to select a no-action, which is the equivalent of creating a new SaaS Alerts event. The anatomy of a rule can be described as observed event(s) for customer organization(s) and SaaS Application account(s) that trigger actions selected by the MSP Admin to perform automated response(s).
Steps
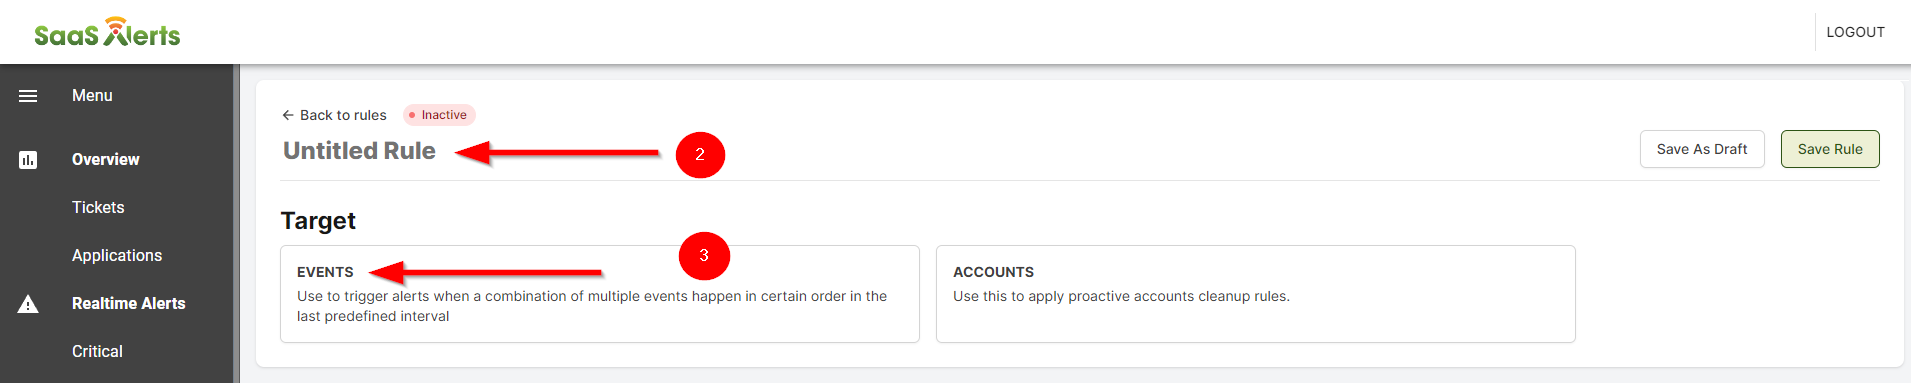
- From the Rules page, click New Rule.
- Click Untitled Rule to edit the name of the new rule.
- Select Events to create the Respond rule.
- In the Trigger section, select the application to be monitored. Currently, only Microsoft 365 can be selected. Next, select Organizations and Accounts.
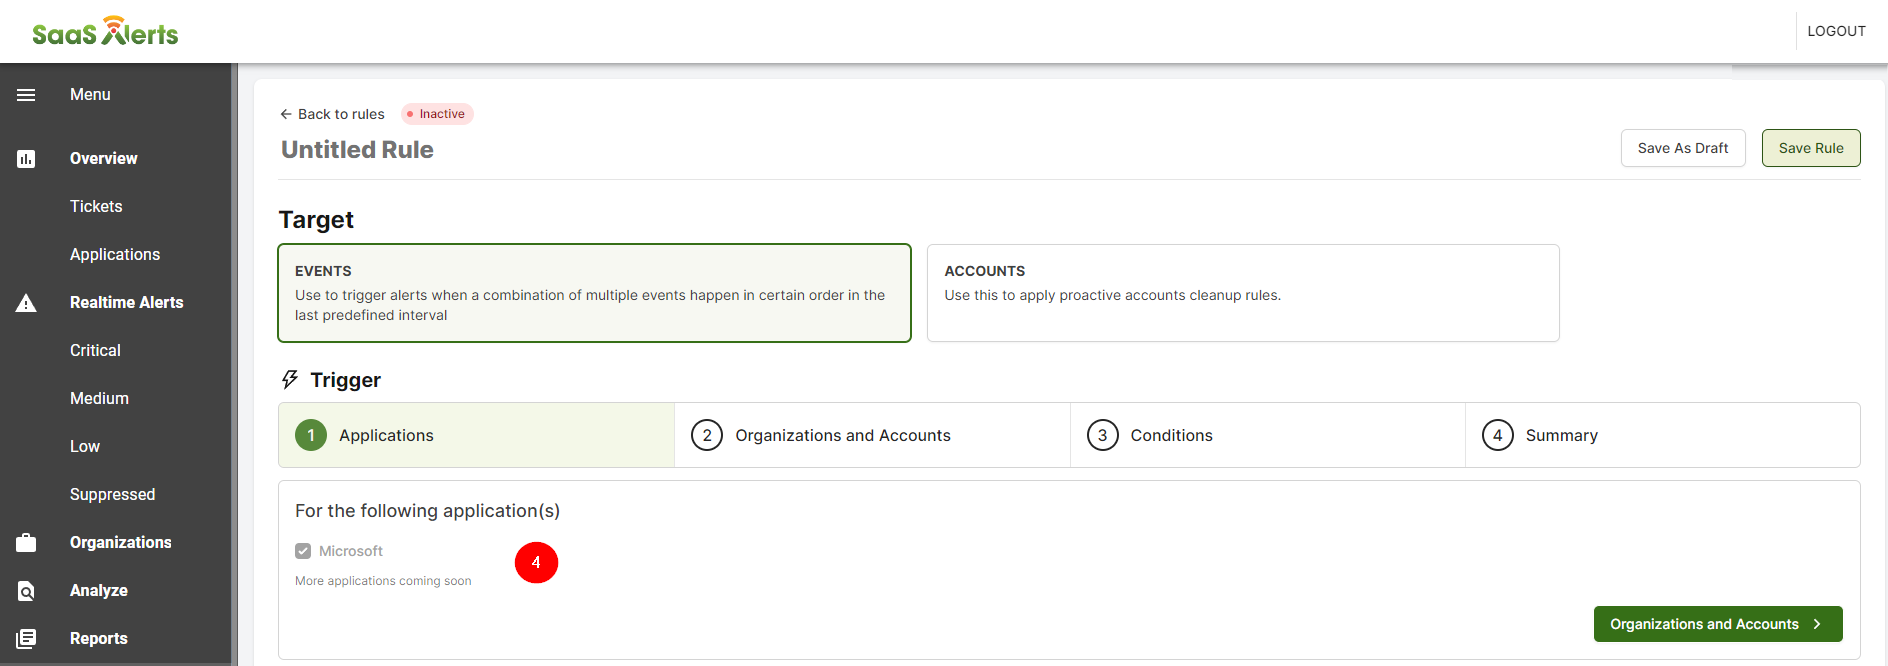
- Select the Organizations and Accountsto be monitored. You have the option to select one, all, or multiple organizations and accounts.
Unify
Refer to Unify overview.
Fortify
Refer to Fortify overview.


