Integration: SaaS Alerts and Syncro RMM
SaaS Alerts
NAVIGATION Organizations > Edit Organization > + New Application
PERMISSIONS Ability to connect MSP tools to organizations
Syncro
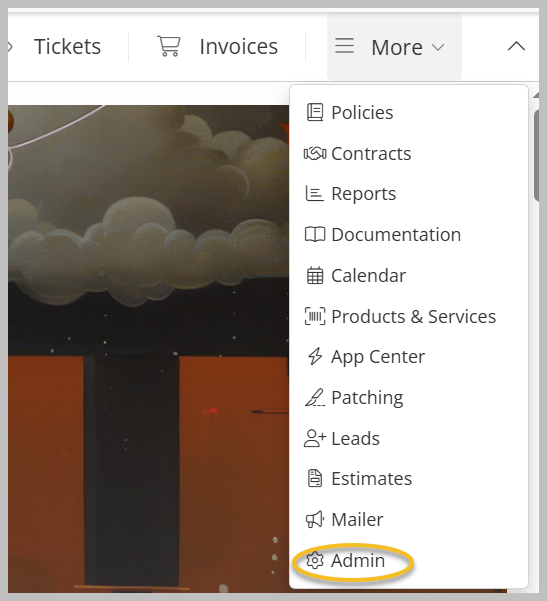
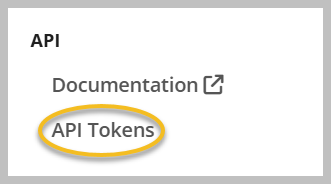
NAVIGATION More > Admin > API Tokens
PERMISSIONS Ability to create API tokens with custom permissions
The Syncro RMM integration connects Syncro to SaaS Alerts as an MSP tool and provides device and user activity data for use with Unify.
This integration processes two types of data:
-
User activity and actions performed in Syncro
-
Device data and associated alerts
To enable device discovery and correlation, Syncro organizations must be mapped to SaaS Alerts organizations. Unmapped organizations do not provide device data.
If you want to configure ticket creation and alert routing using Syncro, see Integration: SaaS Alerts and Syncro PSA.
Prerequisites
Before you begin, ensure you have the following:
-
An active SaaS Alerts account with access to Organizations
-
Permission to manage applications within organizations (Organizations > Edit Organization > + New Application)
-
Access to your Syncro instance with permission to create API tokens (More > Admin > API Tokens)
-
A Syncro API token with the required custom permissions (see Create an API token in Syncro)
How to...
To create an API token, complete the following steps:
-
Expand the More menu and click Admin.
-
Scroll down and click API Tokens under API on the side navigation menu.
-
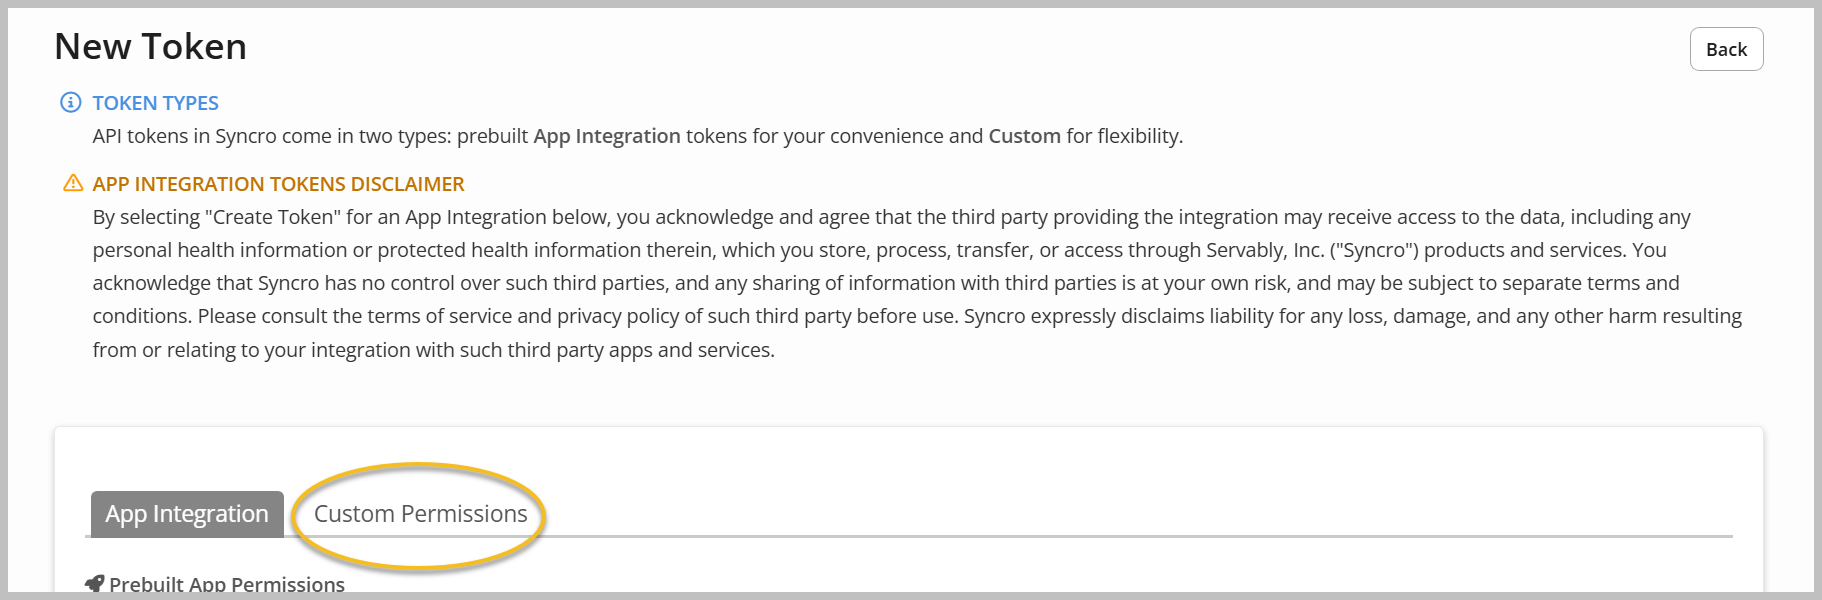
Click + New Token.

-
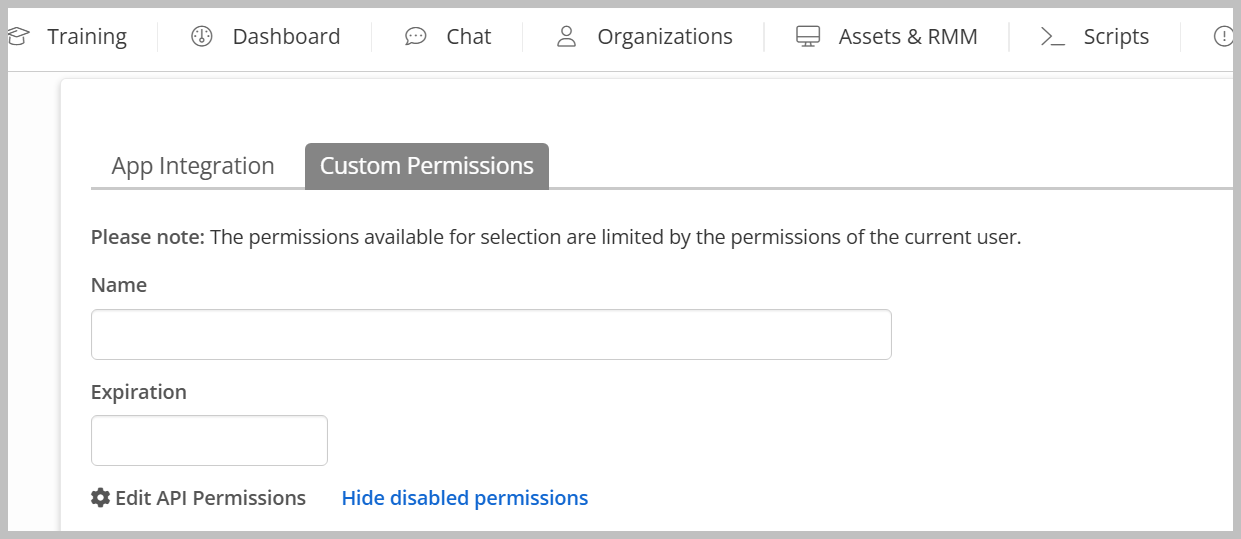
Select Custom Permissions.
-
Provide a name and expiration date.
-
Assign permissions as needed. Recommended permissions are as follows:
-
Assets - View Details
-
Assets - List/Search
-
Contacts - Import
-
Customers - List/Search
-
Customers - View Detail
-
Customers - View Total Invoiced
-
Products - List/Search
-
Products - View Cost
-
Line Item - Edit Prices
-
Line Item - View Cost
-
Line Item - Add Manual Item for Invoices/Estimates
-
Tickets - List/Search
-
Tickets - View Details
-
Tickets - Create
-
Tickets - Edit
-
Ticket Comments - New
-
Recurring Invoices - List
-
Recurring Invoices - Edit
-
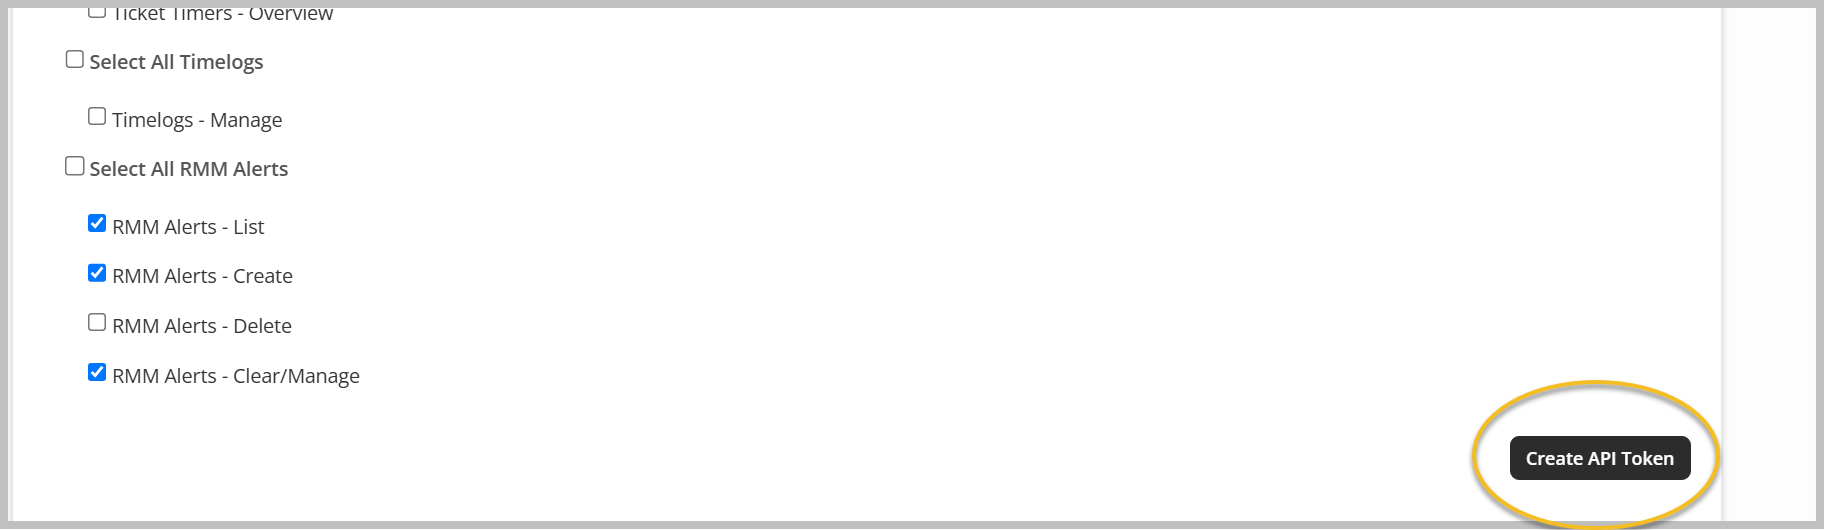
RMM Alerts - List
-
RMM Alerts - Create
-
RMM Alerts - Clear/Manage
-
-
Click Create API Token.
-
Copy the token, store it securely, and click Done.

Outcome: The API token is available for use when connecting Syncro in SaaS Alerts.
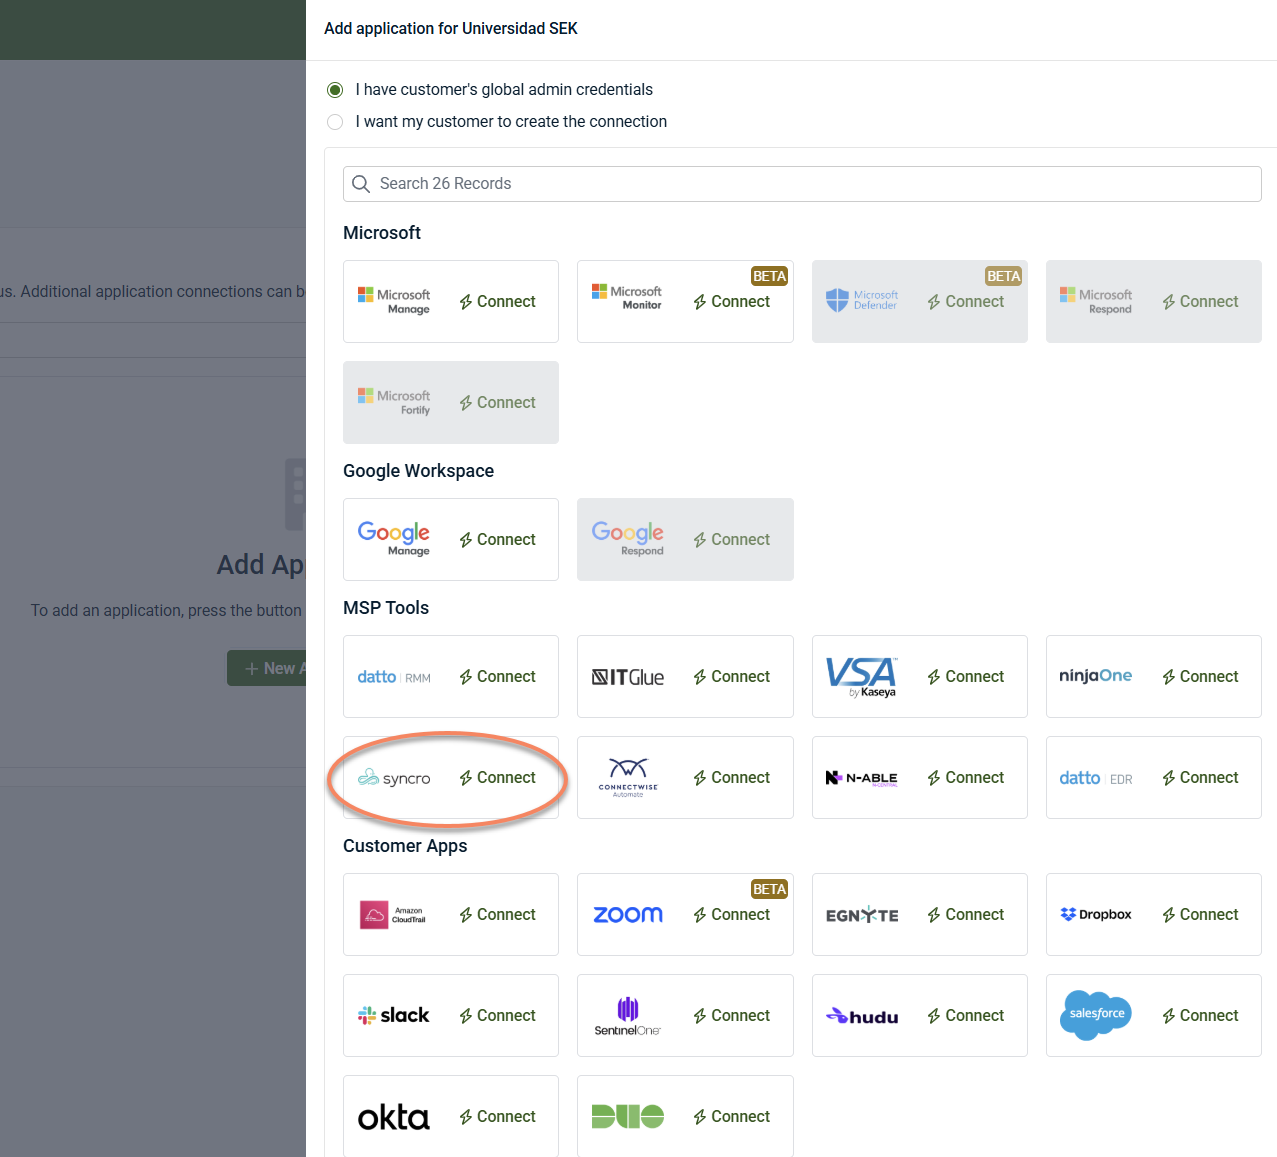
To enable the integration, complete the following steps:
-
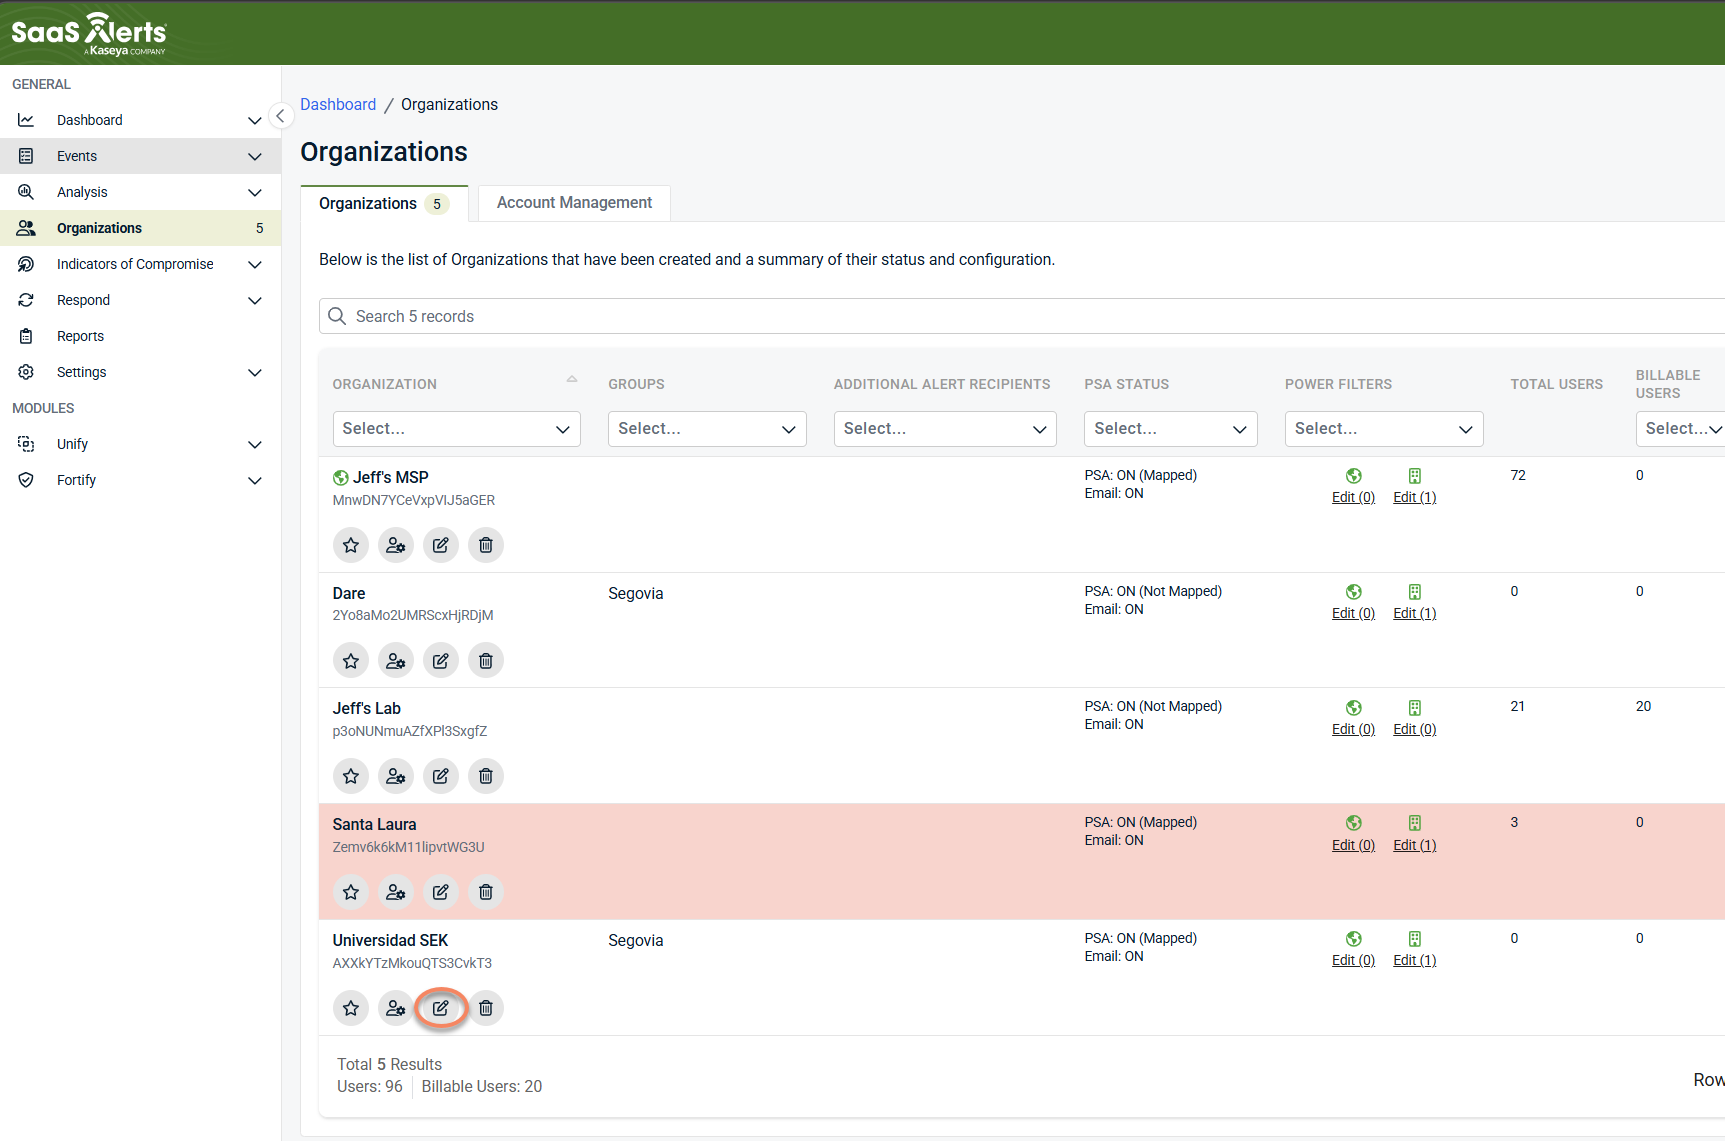
From the side navigation menu, click Organizations.
-
Select an organization and click Edit Organization (pencil icon).
-
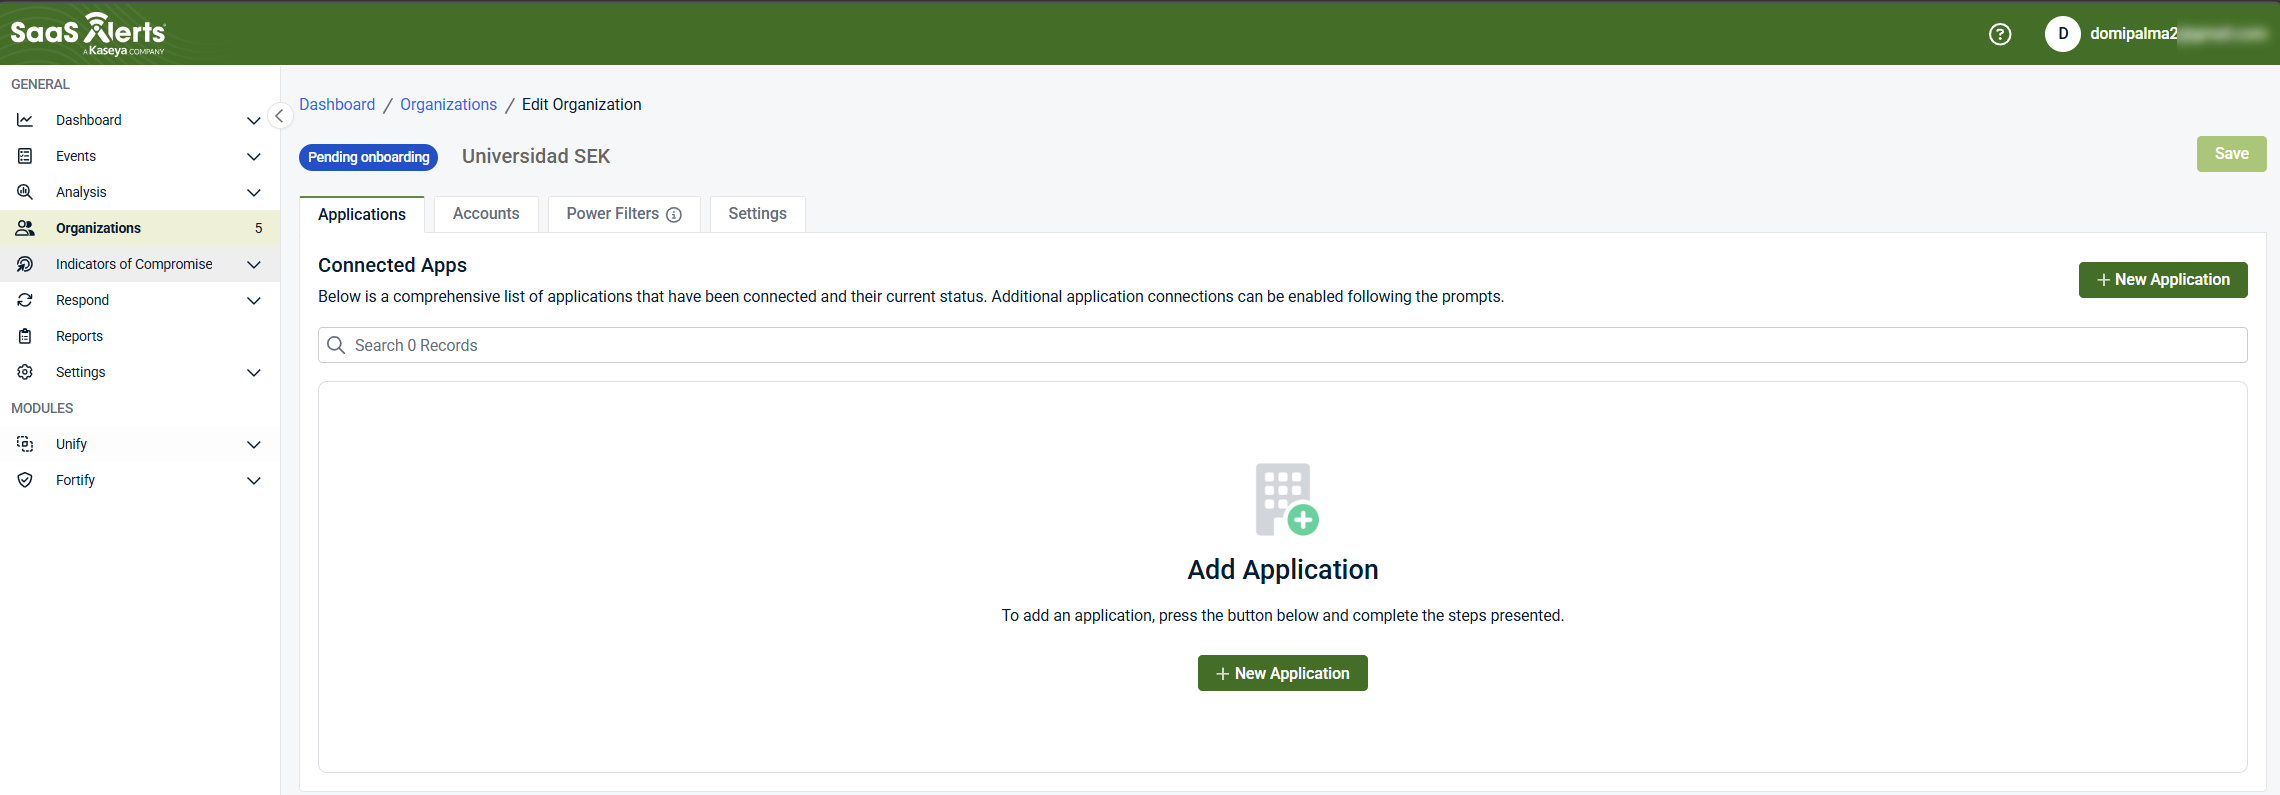
Click + New Application.
-
Under MSP Tools, select Syncro.
Connection wizard in SaaS Alerts
-
Enter the Syncro domain (client domain).
-
Enter the API token created earlier.
-
Click Next.
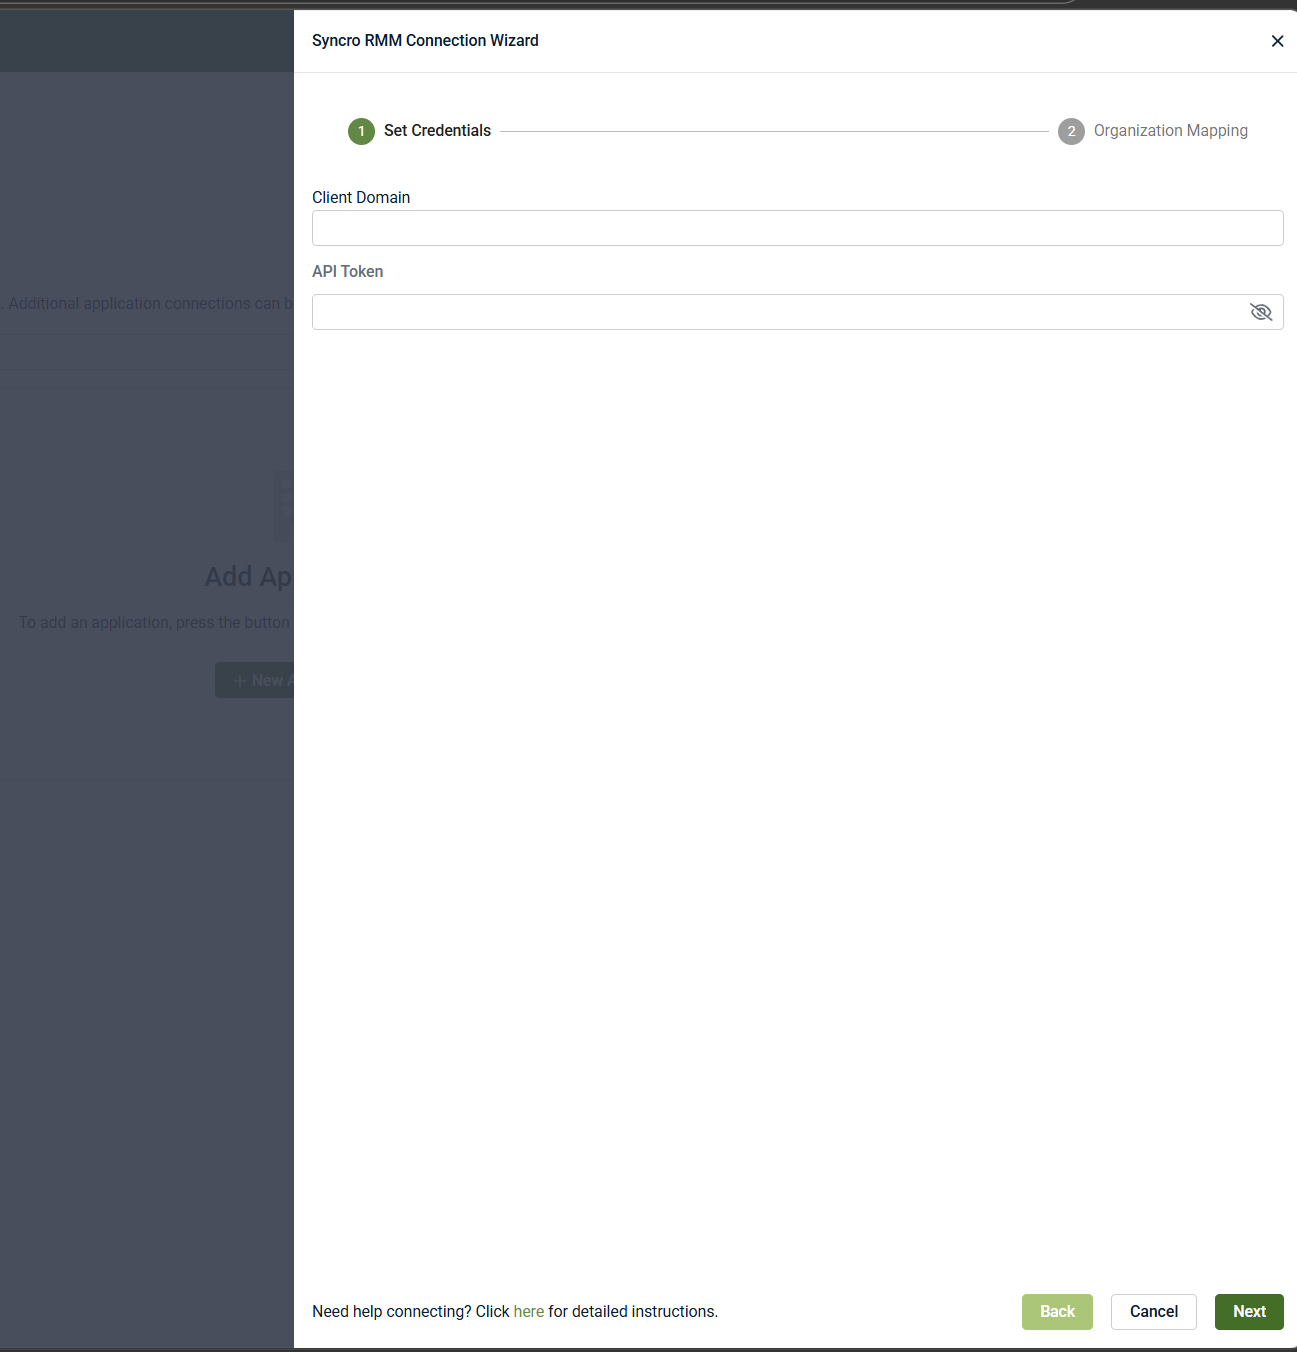
If credentials are valid, the wizard proceeds to Account Mapping.
Outcome: Connection to Syncro is established.
NOTE If an existing Syncro integration is already configured, you may see a warning. Unless you are intentionally connecting multiple Syncro instances, cancel the setup to avoid creating duplicate integrations.
After the Syncro credentials are validated, the wizard moves to Account Mapping.

This step determines how Syncro data is associated with SaaS Alerts organizations.
User activity
-
Select a User Activity Organization
-
All user activity and actions from Syncro are associated with this organization
-
This organization cannot be changed after the integration is configured
Device organization mapping
-
Map each Syncro organization to a SaaS Alerts organization using the Device Organization Mapping table
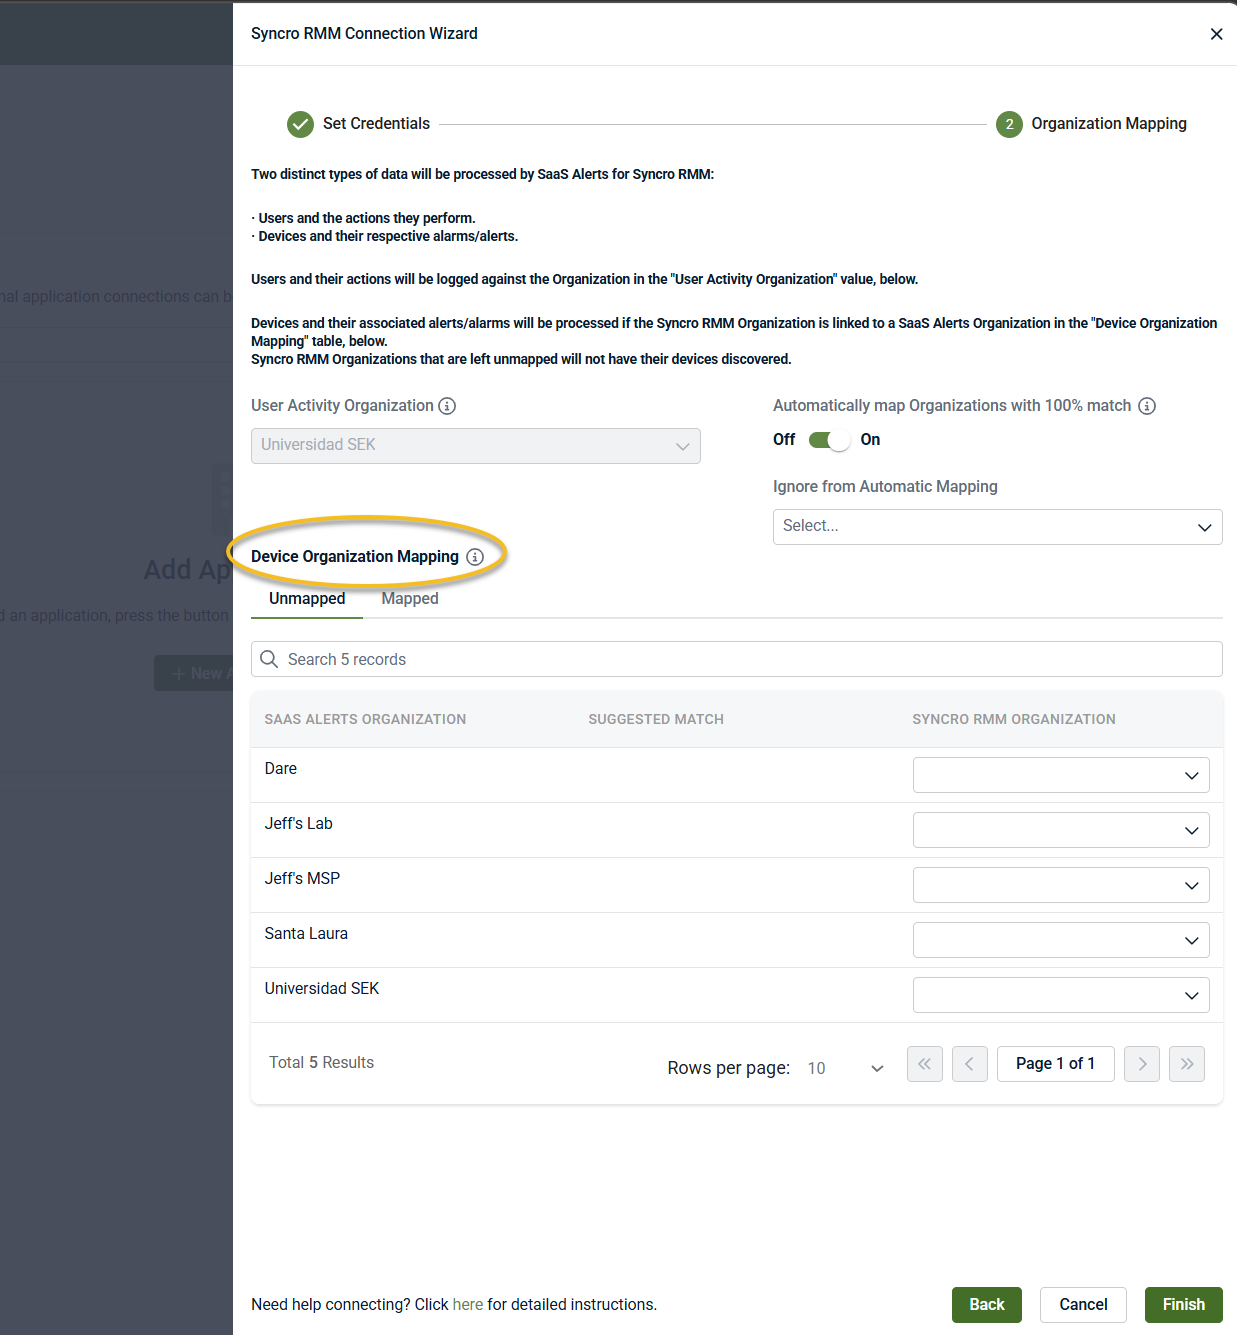
-
Only mapped organizations will have devices discovered and processed
-
Unmapped organizations will not provide device data
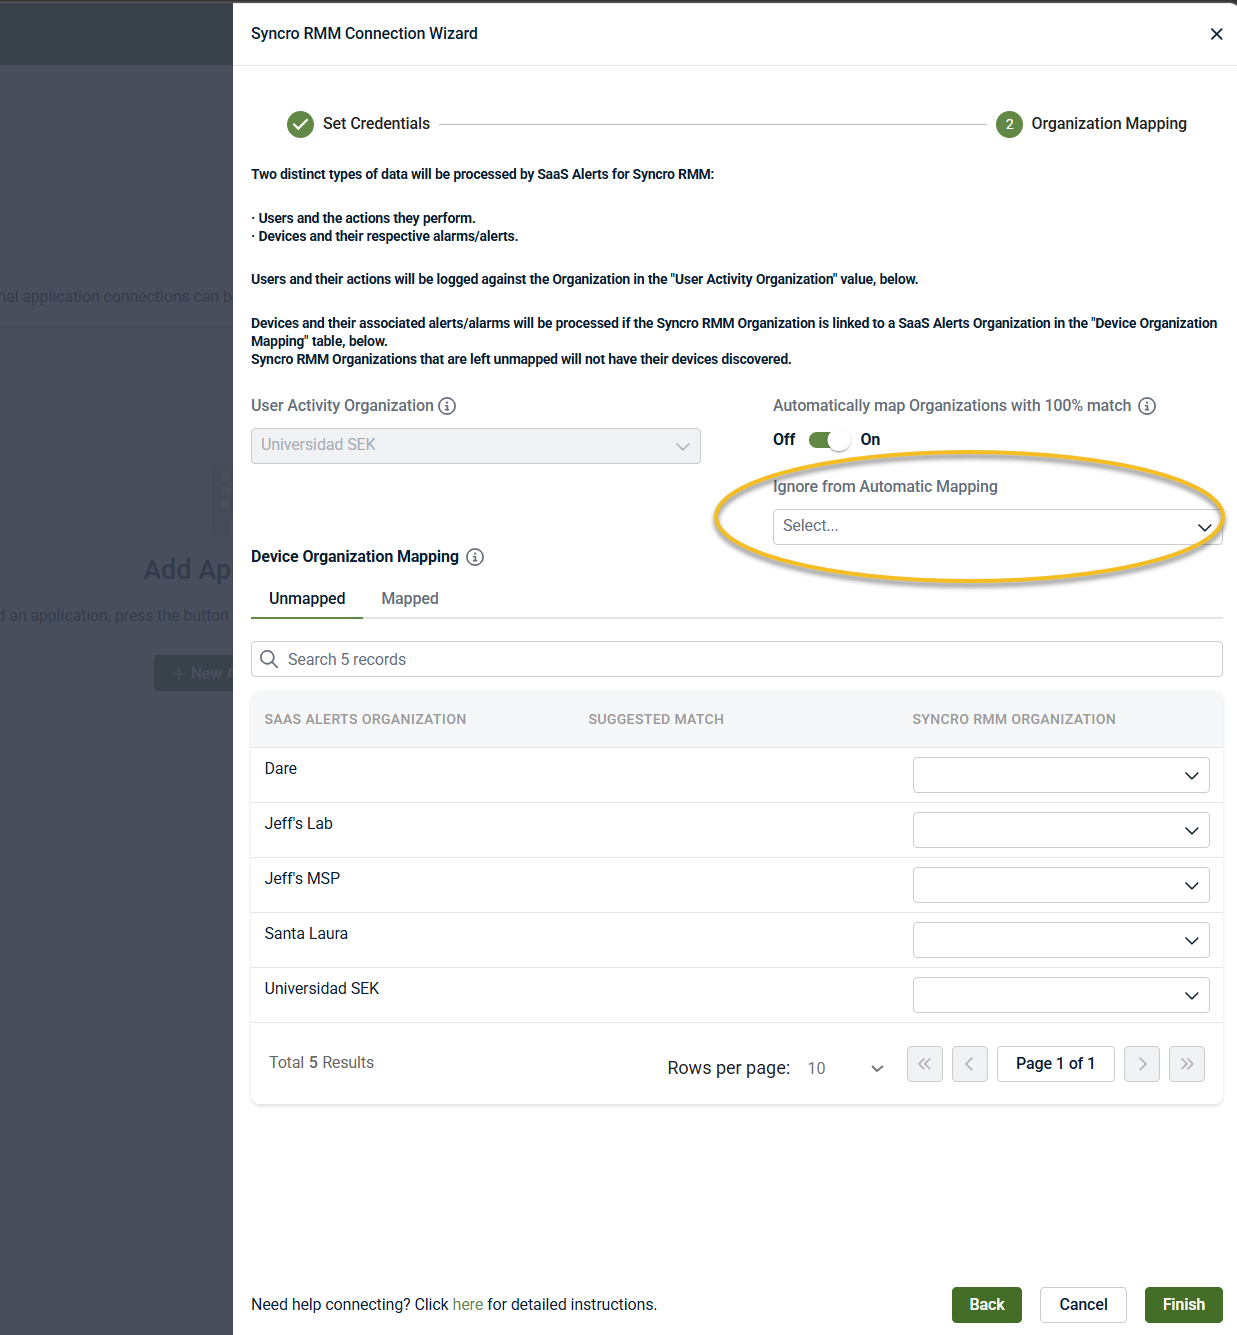
Optional settings
-
Automatically map organizations with a 100% match: When enabled, Syncro organizations are automatically mapped to SaaS Alerts organizations when names match exactly.

-
Ignore from Automatic Mapping: Exclude specific organizations from automatic mapping, if needed.
Once mapping is complete, click Finish.
Outcome:
-
Syncro organizations are mapped to SaaS Alerts organizations
-
Device data and associated alerts are processed only for mapped organizations
-
User activity is associated with the selected User Activity Organization
NOTE You can edit the Syncro connection at any time after setup to update mappings or add new ones.
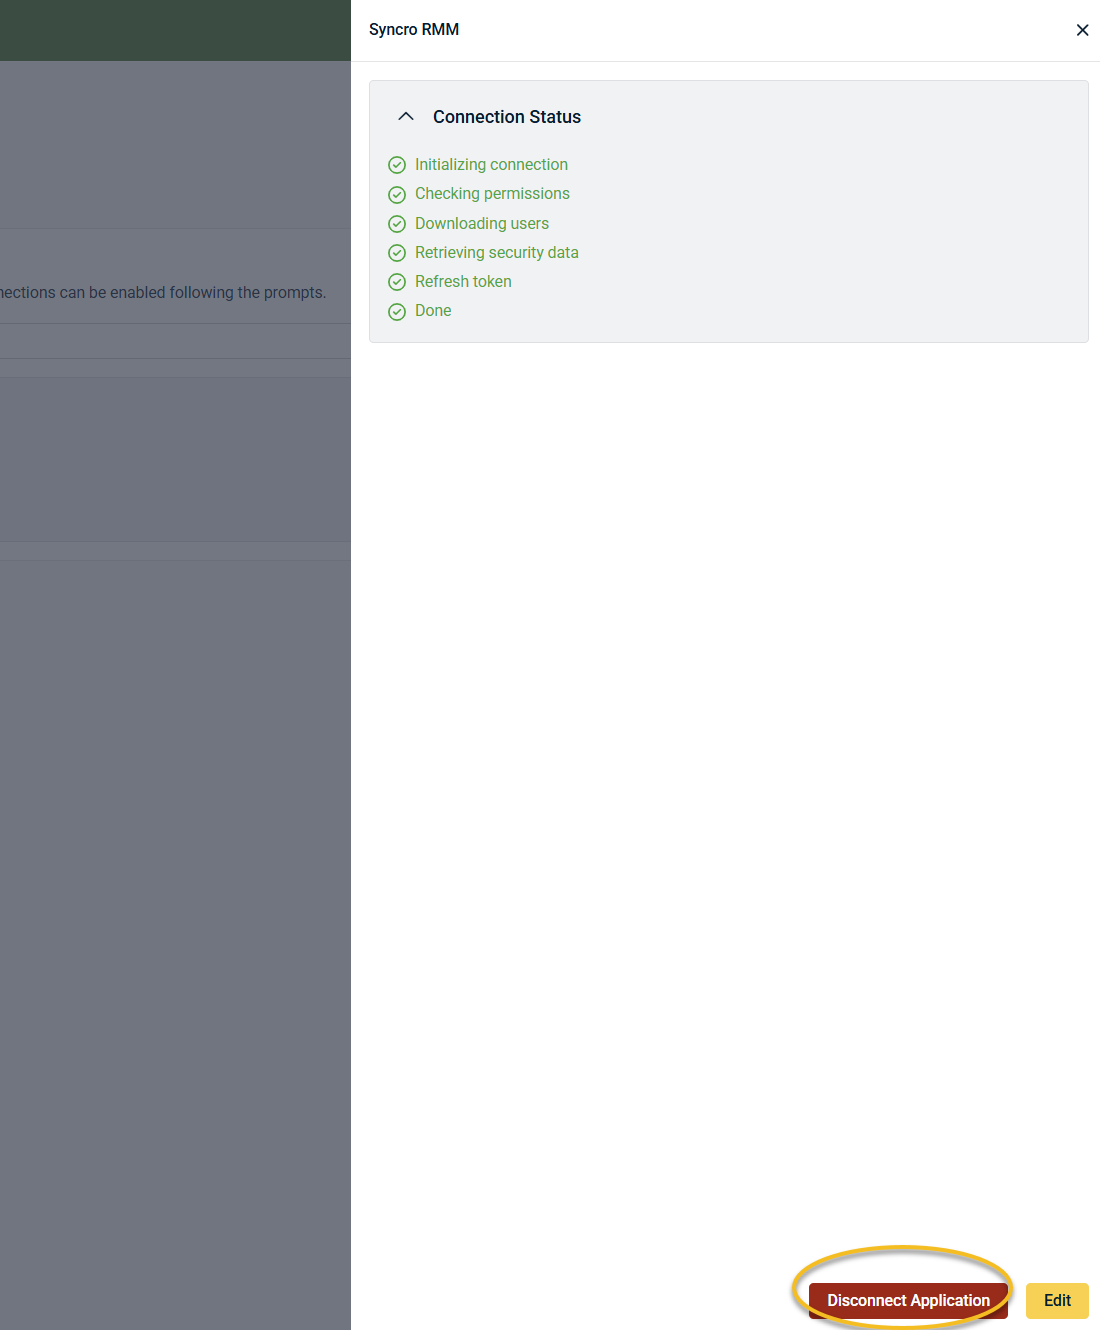
When the integration is completed successfully, Syncro appears as a connected application under MSP Tools in the Applications tab for the selected organization.

To disable the integration, complete the following steps:
-
From the side navigation menu, click Organizations.
-
Select the organization and click Edit Organization (pencil icon).
-
In the Applications tab, select Syncro under MSP Tools.
-
Click Disconnect Application and confirm.
Related articles
-
Integration: SaaS Alerts and Syncro PSA: Connect Syncro to SaaS Alerts to create tickets, map organizations, and configure alert routing and contract settings
-
Unify overview: Understand how Unify correlates device data from MSP tools with SaaS activity to enrich events, alerts, and Respond logic with device
-
Information on Microsoft Entra Device ID: Learn how Microsoft Entra Device ID improves device correlation accuracy in Unify by matching device identifiers between SaaS activity and RMM data


