N-Able N-Central RMM Integration
If you are currently using IP restrictions in your firewall or within the product, please make sure to allow these IP addresses:
- 35.192.223.4
- 35.224.156.102
Prerequisites
- Create a Role for SaaS Alerts
- Create an API Only User for SaaS Alerts and get API Key
- Schedule an Automation Policy to store devices’ public IP addresses to the IPV4_PUB custom property
Creating a role for SaaS Alerts
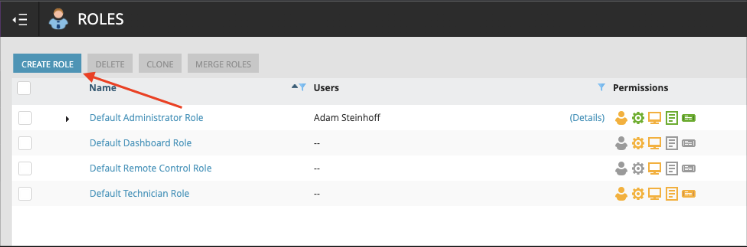
- From within N-Central, navigate to Administration\User Management\Roles.
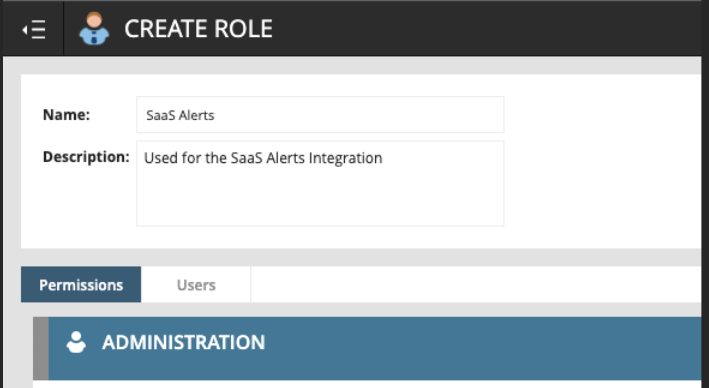
- Click Create Role.
- Name the Role. Suggestion: SaaS Alerts
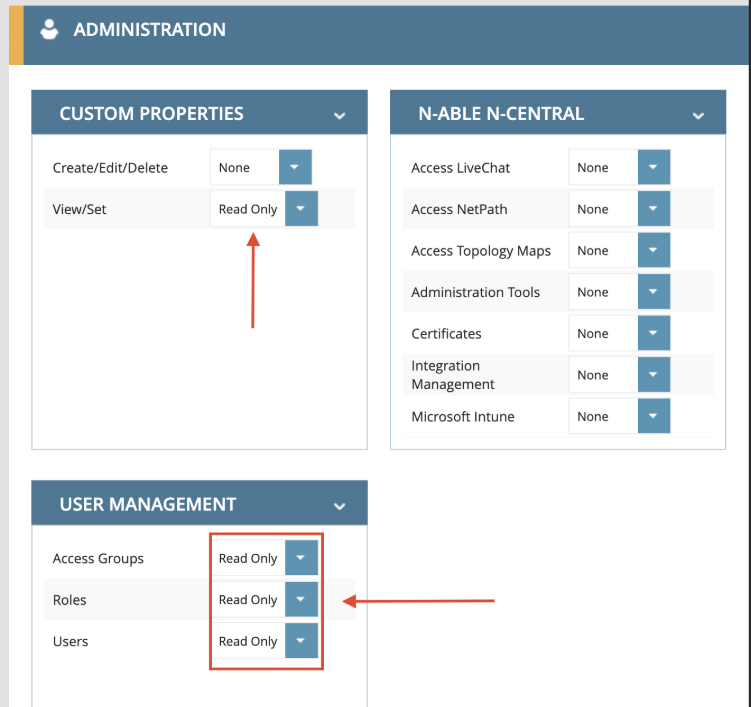
- Scroll down Custom Properties\ View/Set and select Read Only. Then, go to Administration\User Management and select Read Only for Access Groups, Roles, and Users.
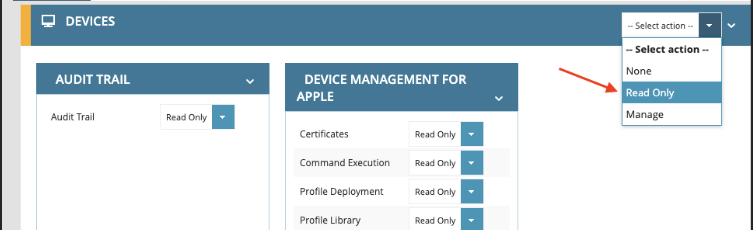
- Scroll down to Devices and select Read Only from the Action menu to add Read Only to all sub items.
- Scroll to the bottom and click Save.
Creating an API Only user
- Navigate to Administration\User Management\Users.
- Click Create User.
- Enter the user information and password.
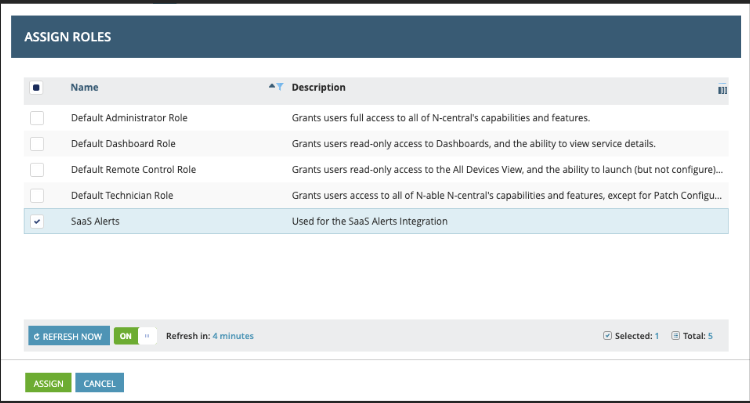
- Click the Role tab and click Assign Roles.
- Select the role you created earlier and click Assign.
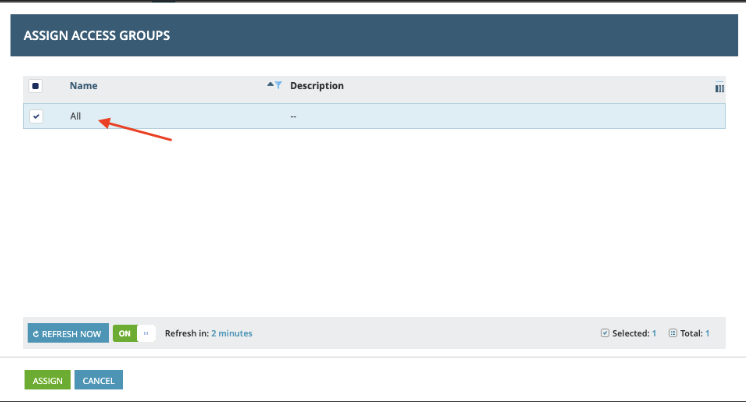
- Click the Access Groups tab and click Assign Access Groups.
- Select All and click Assign.
- Click the User Details tab, and then the User Information sub-tab
- Ensure that MFA Not Required is selected.

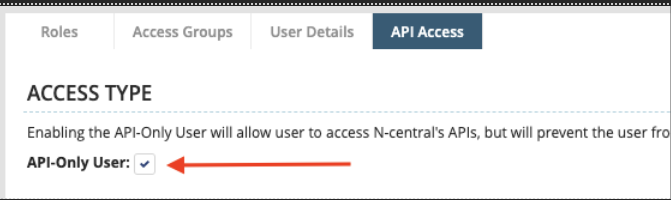
- Click the API Access tab, and ensure that API-Only User is selected.
- Click Save.
- Click OK and then Save/Cancel.
Web tokens
To generate the web token when adding a user or modifying an existing user.
-
Click Administration > User Management > Users.
-
Click Create User or select the name of an existing API user.
-
Click the API Access tab.
-
Click Generate JSON Web Token and copy the token for login use.
-
Click Save to exit.
IMPORTANT There are N-Able rate limits that may impact our ability to pull in device information for partners with more than 5000 devices. The symptoms may include slow updates to IP addresses and/or Entra Device IDs. Please refer to REST API known issues and limitations.
Scheduling an automation policy for public IP addresses
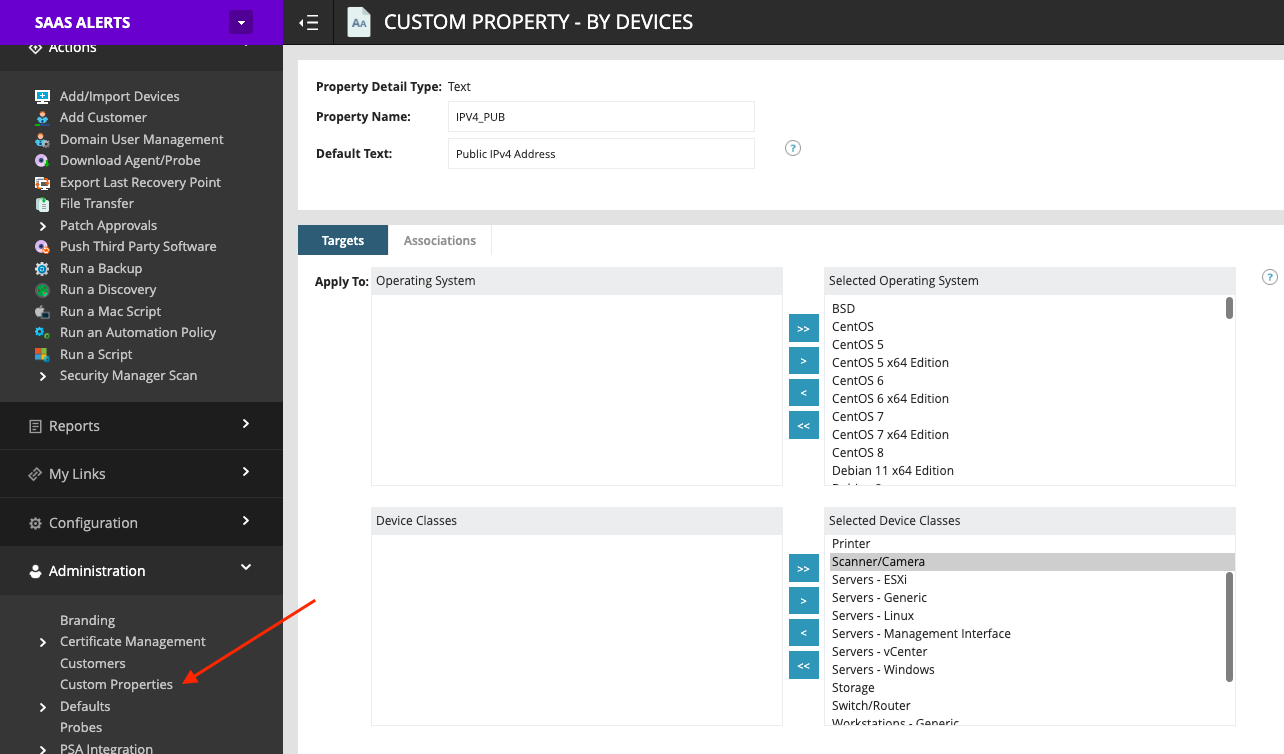
- Navigate to Administration\Custom Properties.
- Click Add, then select By Devices\Text Type.
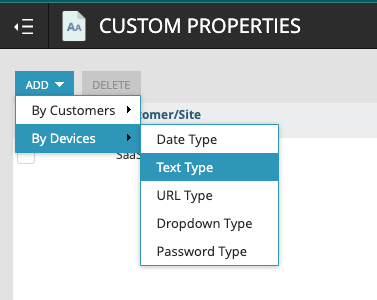
- Set the Property Name to IPV4_PUB, the Default Text to Public IPv4 Address, and ensure that all Operating Systems and all Device Classes are selected by pushing the >> arrows on each list.
NOTE As new Operating Systems are added to N-Central, you will need to edit this property and ensure that the new OSes are moved to the Selected Operating Systems on the right.
- Navigate to Configuration\Scheduled Tasks\Script/Software Repository.
- In the Search bar at the top, enter public, and then click Clone on Get Public IP Address.

- Utilize the following information in the Clone Repository Item screen.
- Name: Get Public IP Address and Save to IPV4_PUB.
- Description: Leverage whatsmyip.com to retrieve public IP of device and store in the IPV4_PUB Custom Property.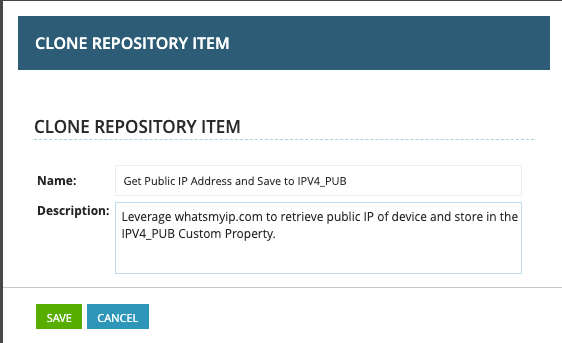
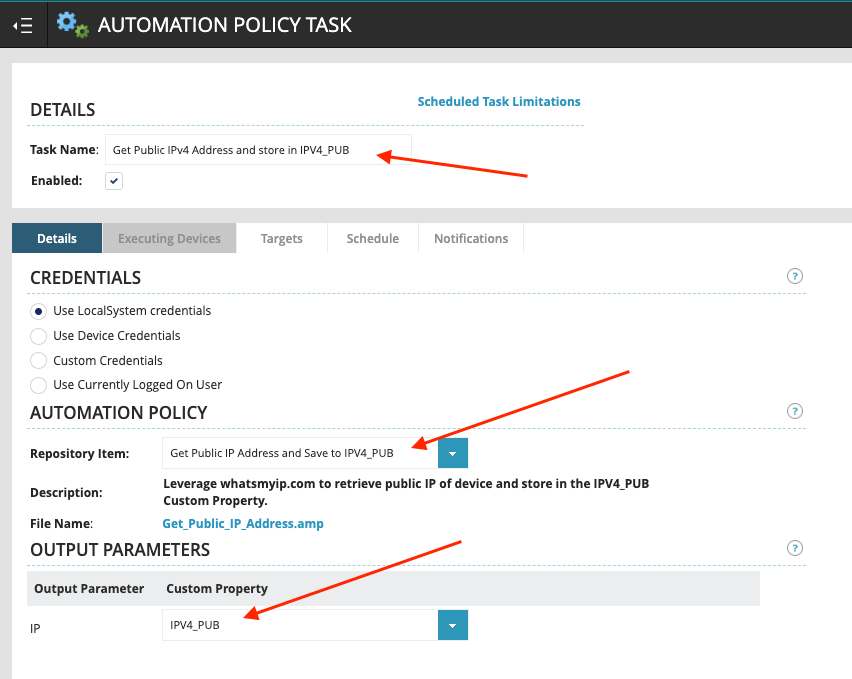
- Navigate to Actions\Run an Automation Policy.
- Utilize the following information in the Automation Policy Task\Details tab.
- Task Name: Get Public IPv4 Address and store in IPV4_PUB.
- Repository Name: Get Public IP Address and Save to IPV4_PUB.
- Output Parameter (IP): IPV4_PUB
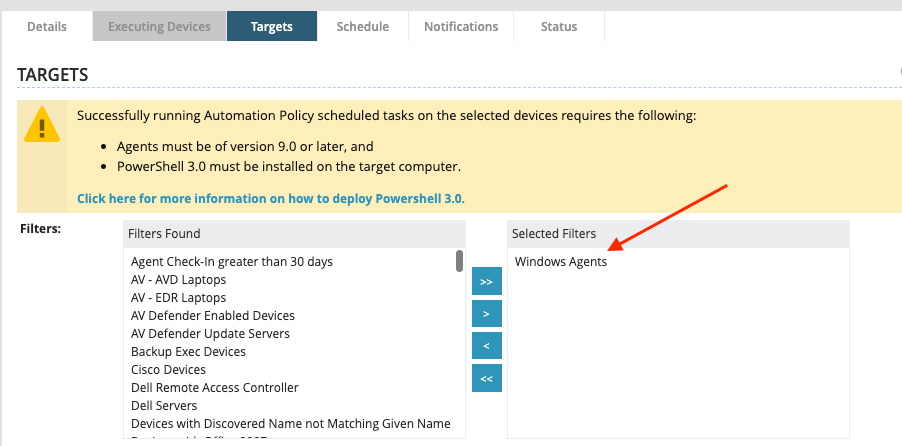
- On the Automation Policy Task\Targets tab, ensure Windows Agents is in the Selected Filters section.
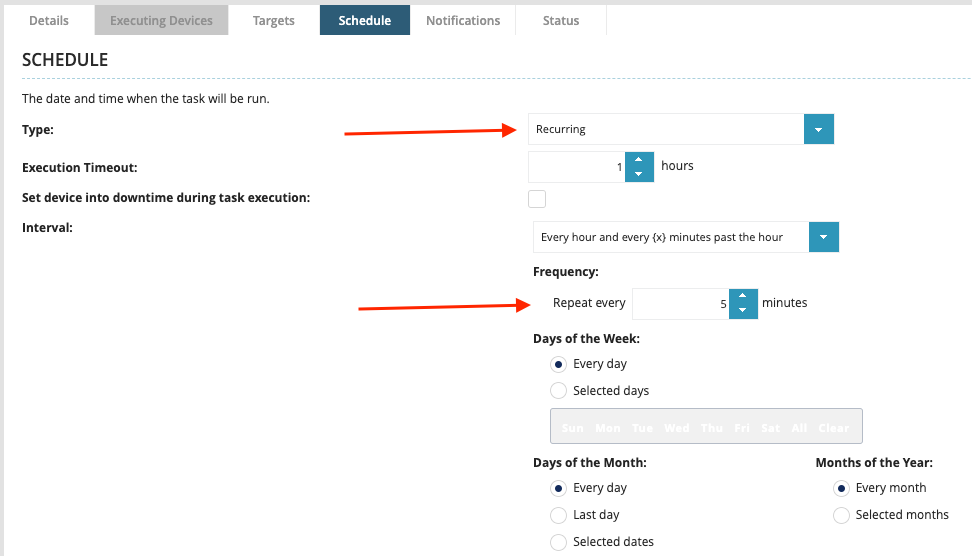
- On the Automation Policy Task\Schedule tab, ensure that it is set to Recurring and to repeat every 5 minutes.
NOTE You can select 10 or 15 minutes but Unify functionality will be more accurate with every 5 minutes.
.
- Click Save.
- To verify that the process worked, follow the steps below.
- Wait 5 minutes (or 10, 15 depending on your schedule selection above).
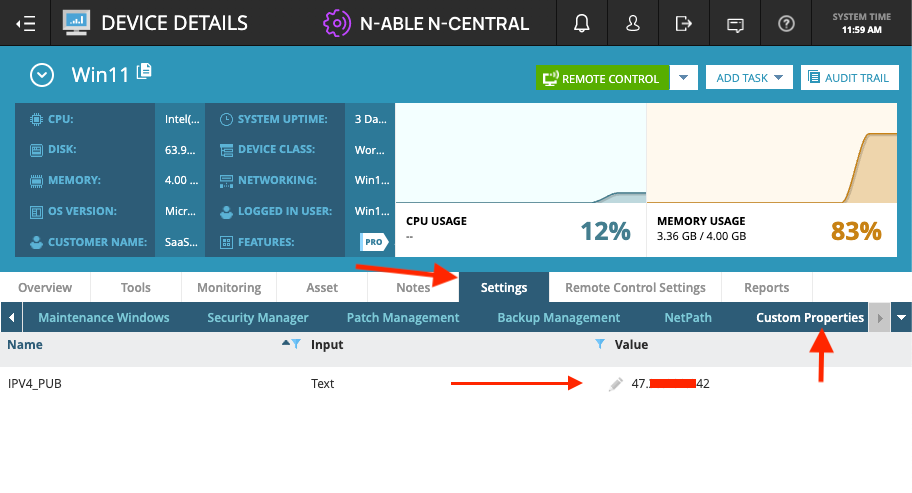
- Go to a Windows device and navigate to Settings\Custom Properties.
- Ensure that the IPV4_PUB custom property has been populated with the correct Public IP address for that device.
NOTE For instructions on setting up MSFT Entra ID for enhanced Unify functionality, please refer to Information on Microsoft Entra ID. To configure Unify functionality in SaaS Alerts, refer to Unify overview.
Connecting SaaS Alerts to N-Central
- Find your MSP’s organization in SaaS Alerts or create a new organization for your MSP. You can do that on the SaaS Alerts Organization page.
- Click N-Central in the list of products.
- Populate the connection wizard with the N-Able N-Central API info you collected earlier.
- Click Next.
- You are now ready to configure Unify overview.
NOTE You may receive an alert indicating that an existing N-Central integration already exists. Unless you have multiple instances of N-Central, you should cancel, or you will have duplicates.


