ConnectWise PSA Integration
With SaaS Alerts, you are able to integrate your Professional Services Automation (PSA) system. This feature will allow SaaS Alerts to send critical and medium alerts directly to your PSA.
ConnectWise PSA supported packages:
- ConnectWise Standard
- ConnectWise Premium
To integrate ConnectWise PSA to SaaS Alerts, you first need to add the security permissions. If you added the security permissions already, skip ahead to the Adding the ConnectWise Manage connection steps of this guide. If the permissions have not been set, complete the following steps:
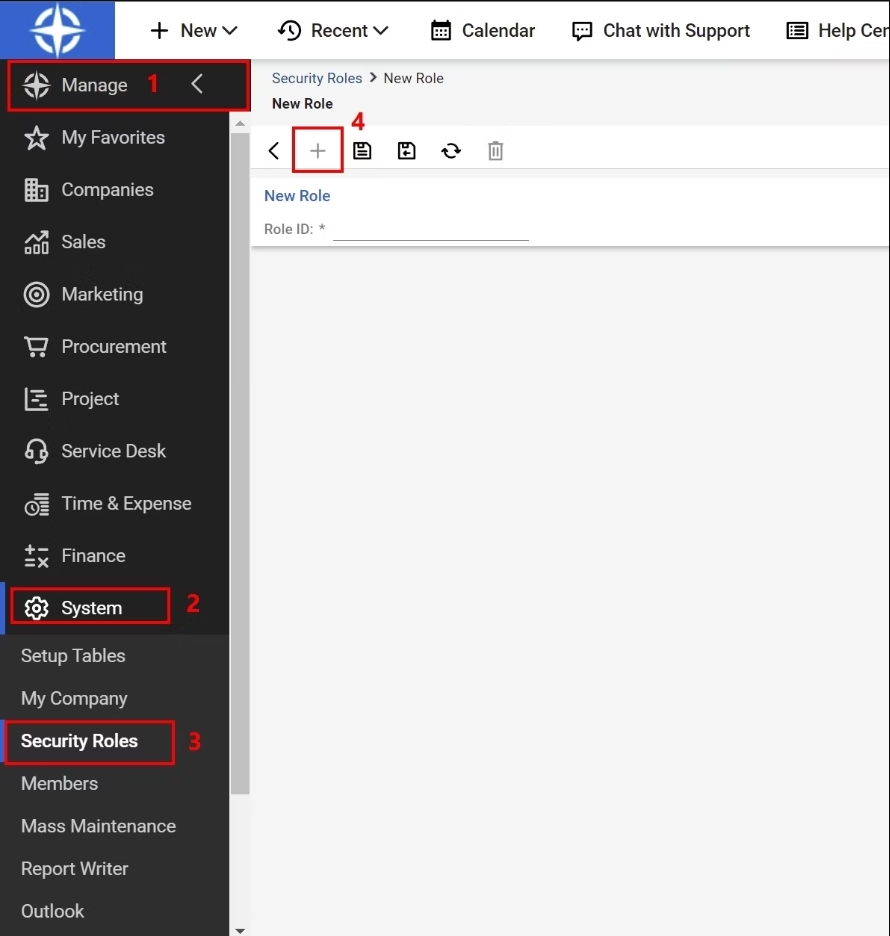
Adding a new security role
- Open ConnectWise Manage and navigate to the Manage column on the left side of the page.
- Once this panel is open, navigate to the System tab (gear towards the bottom of the page).
- Open the Security Roles tab.
- Click the + icon to create a new role.
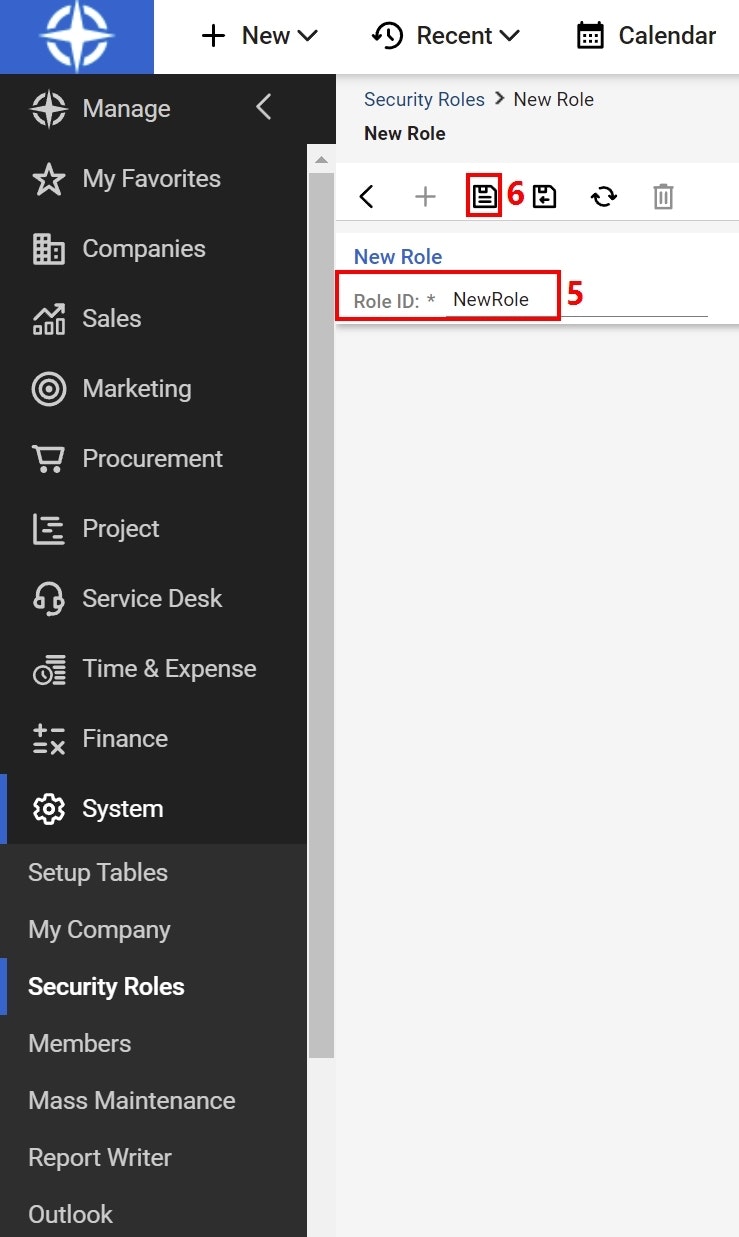
- Enter the name of the new role you'd like to add next to the Role ID line.
- Finally, click the save icon directly above (see the second image in this step).
Accessing security permissions for the new role
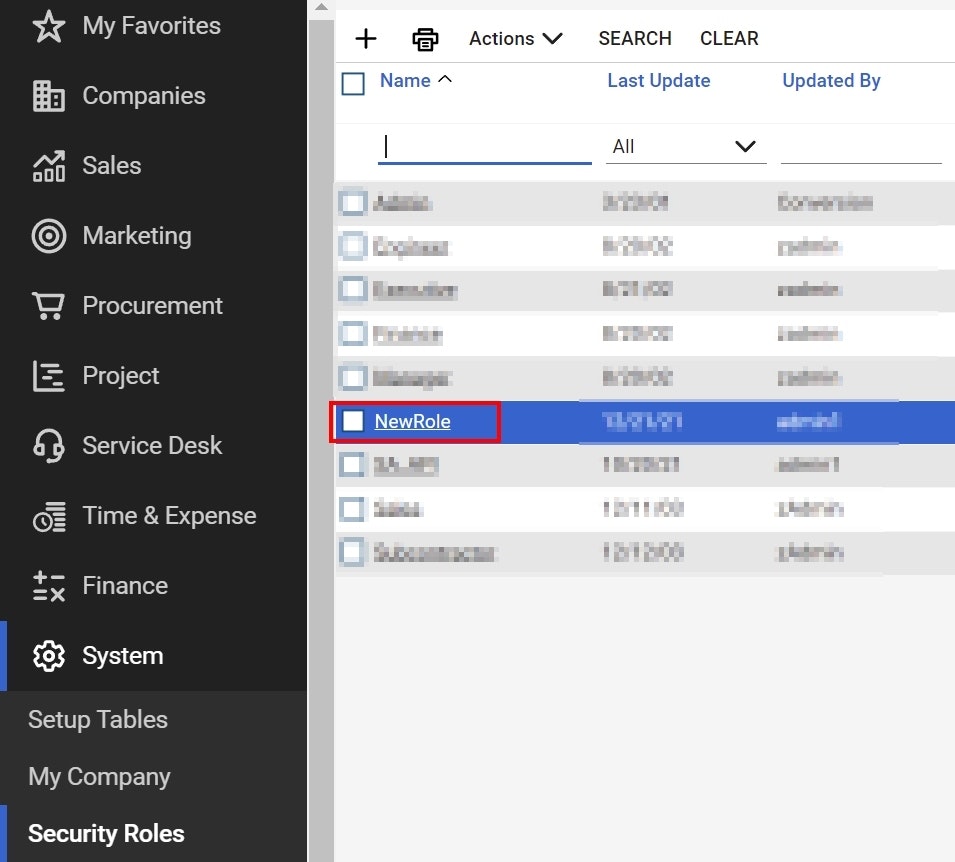
Now that the new role user exists, it will appear in the list of security roles.
- Click the name of the new role, which will open a new page of permissions.
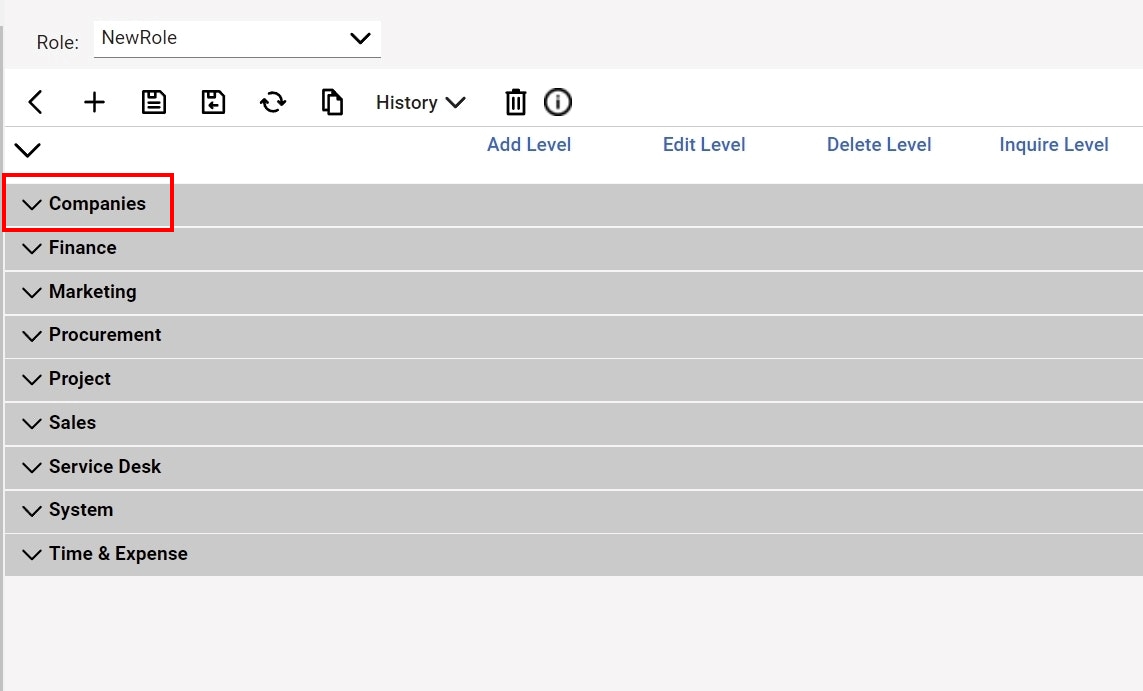
- Expand the Companies menu to access the list of permissions.
- For the Company Maintenance and Contacts rows, set the Inquire Level columns to All.
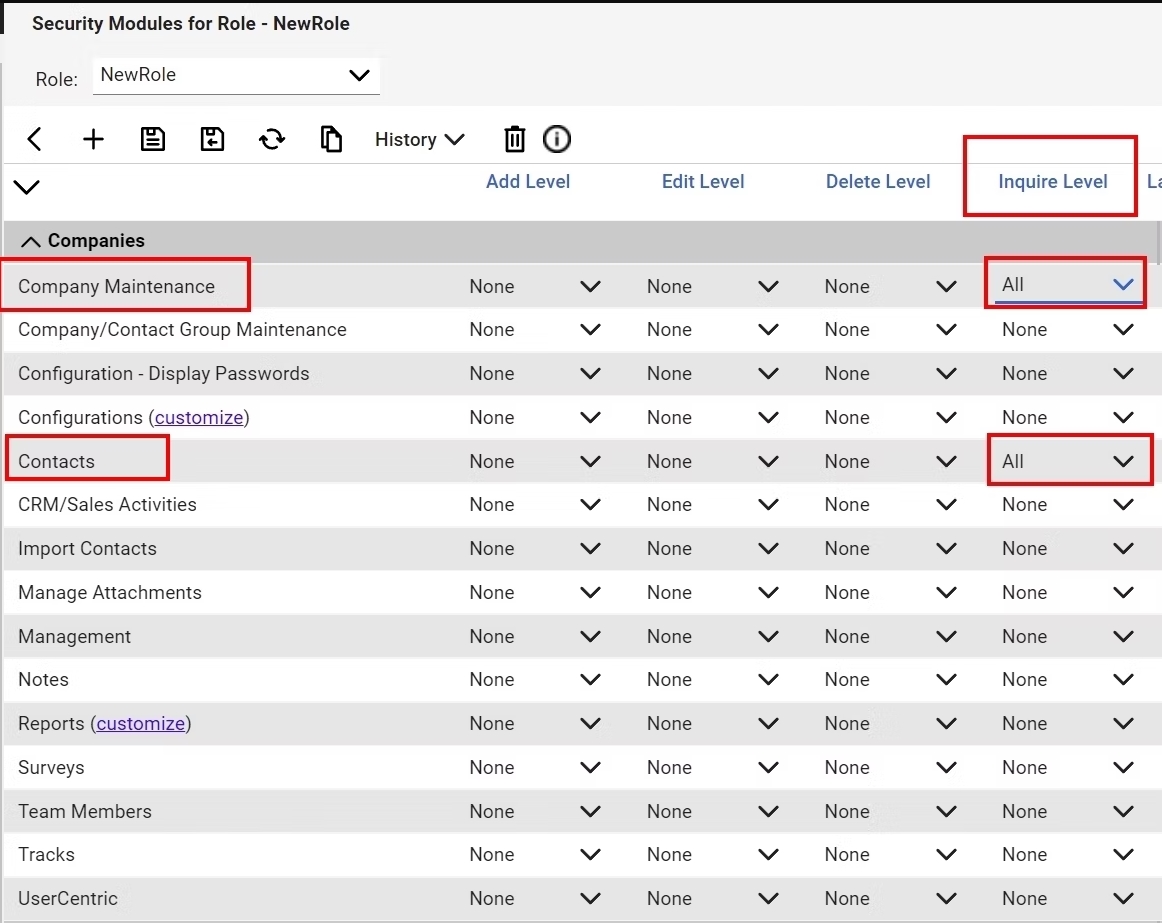
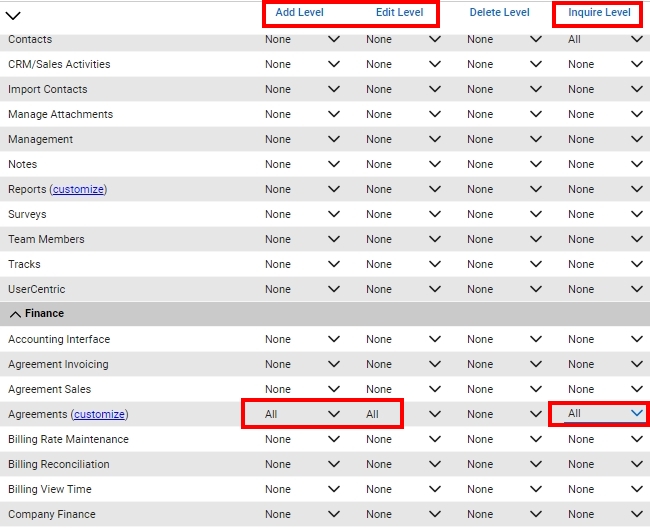
- Expand the Finance menu to access the list of permissions.

- In the Agreements row, set the Add Level, Edit Level and Inquire Level columns to All.
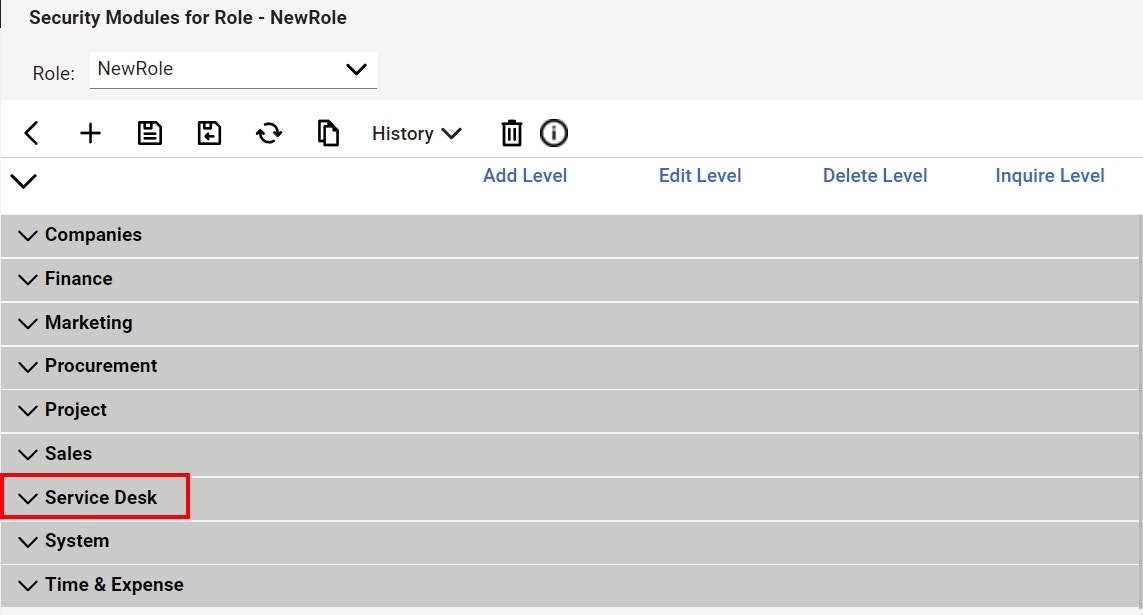
- Expand the Service Desk menu to access the list of permissions.
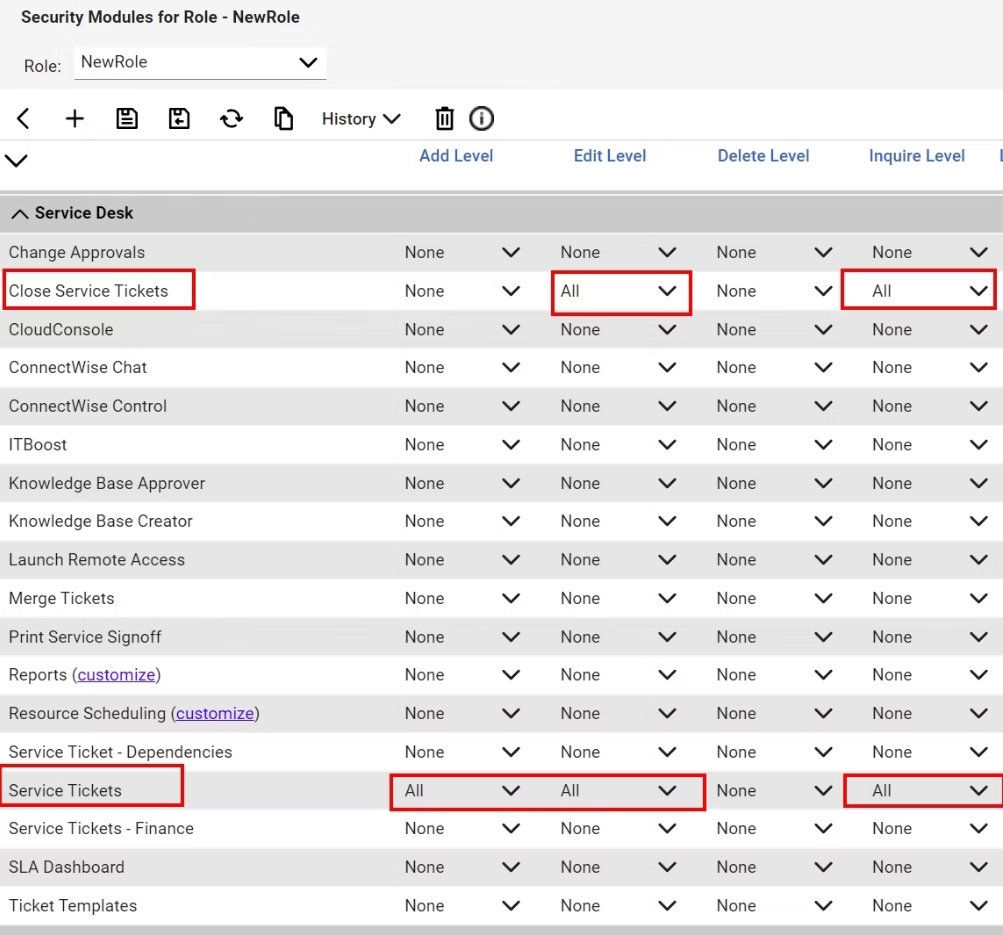
- In the Close service tickets row, set the Edit Level and Inquire Level columns to All.
- In the Service Tickets row, set the Add Level, Edit Level and Inquire Level to All.
- Expand the System menu to access the list of permissions. Ensure that API Reports has the Inquire Level set to All.
- In the Table Setup (customize) row, set the Inquire Level to All.
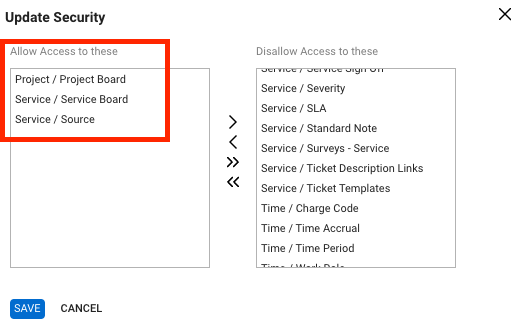
- Click the (customize) link next to Table Setup to access the Update Security window.
- Click the double right arrows (>>) to move all items from the Allow Access to these to the Disallow Access to these lists. Then, find Project / Project Board, Service / Service Board, and Service / Source in the list on the right and click the single left arrow (<) to move those items to the Allow Access to these list on the left.
- To save changes, click Save in the Update Security window.
- Click Save and Close near the top.
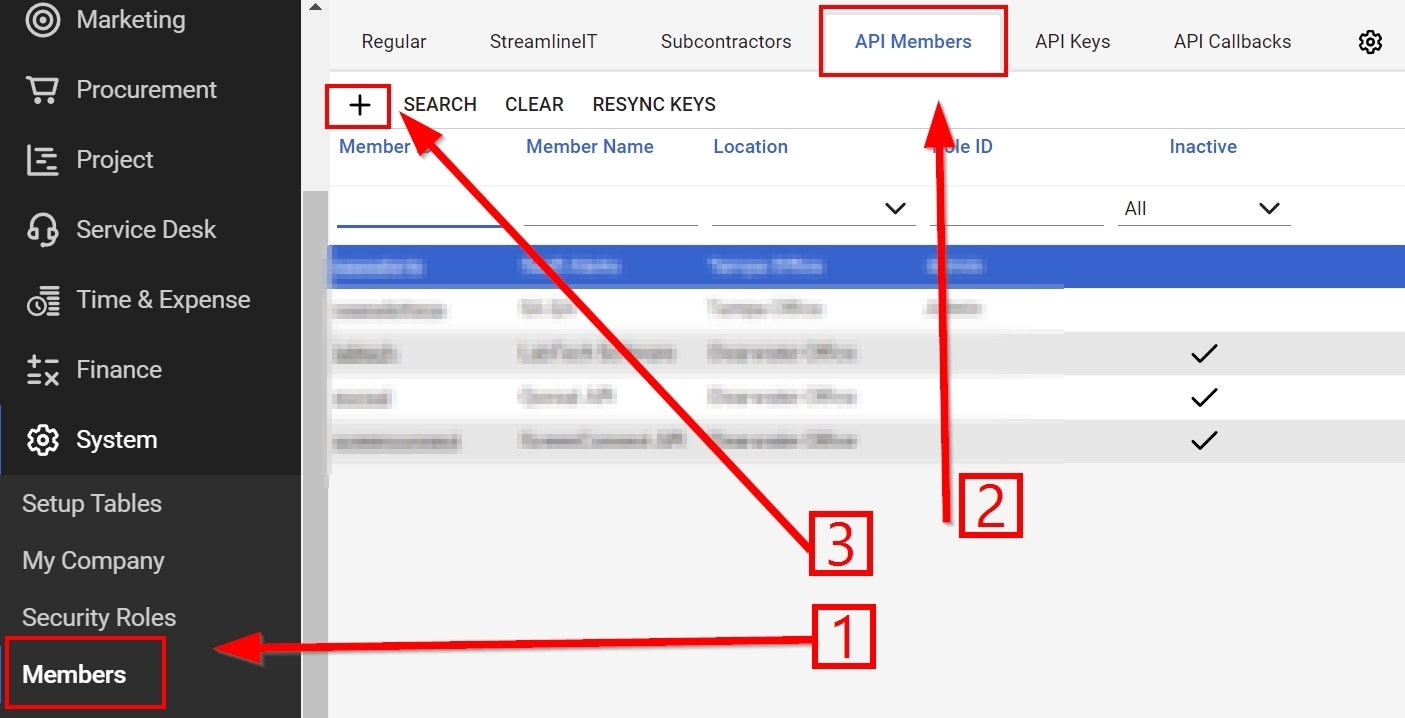
- To save all changes, click Members in the left column.
- Click Saveto continue.

Creating a new API member
Per the previous permission step, you should now be on the Members page. Complete the following steps to create a new API member:
- Click API Members.
- Click the + icon.
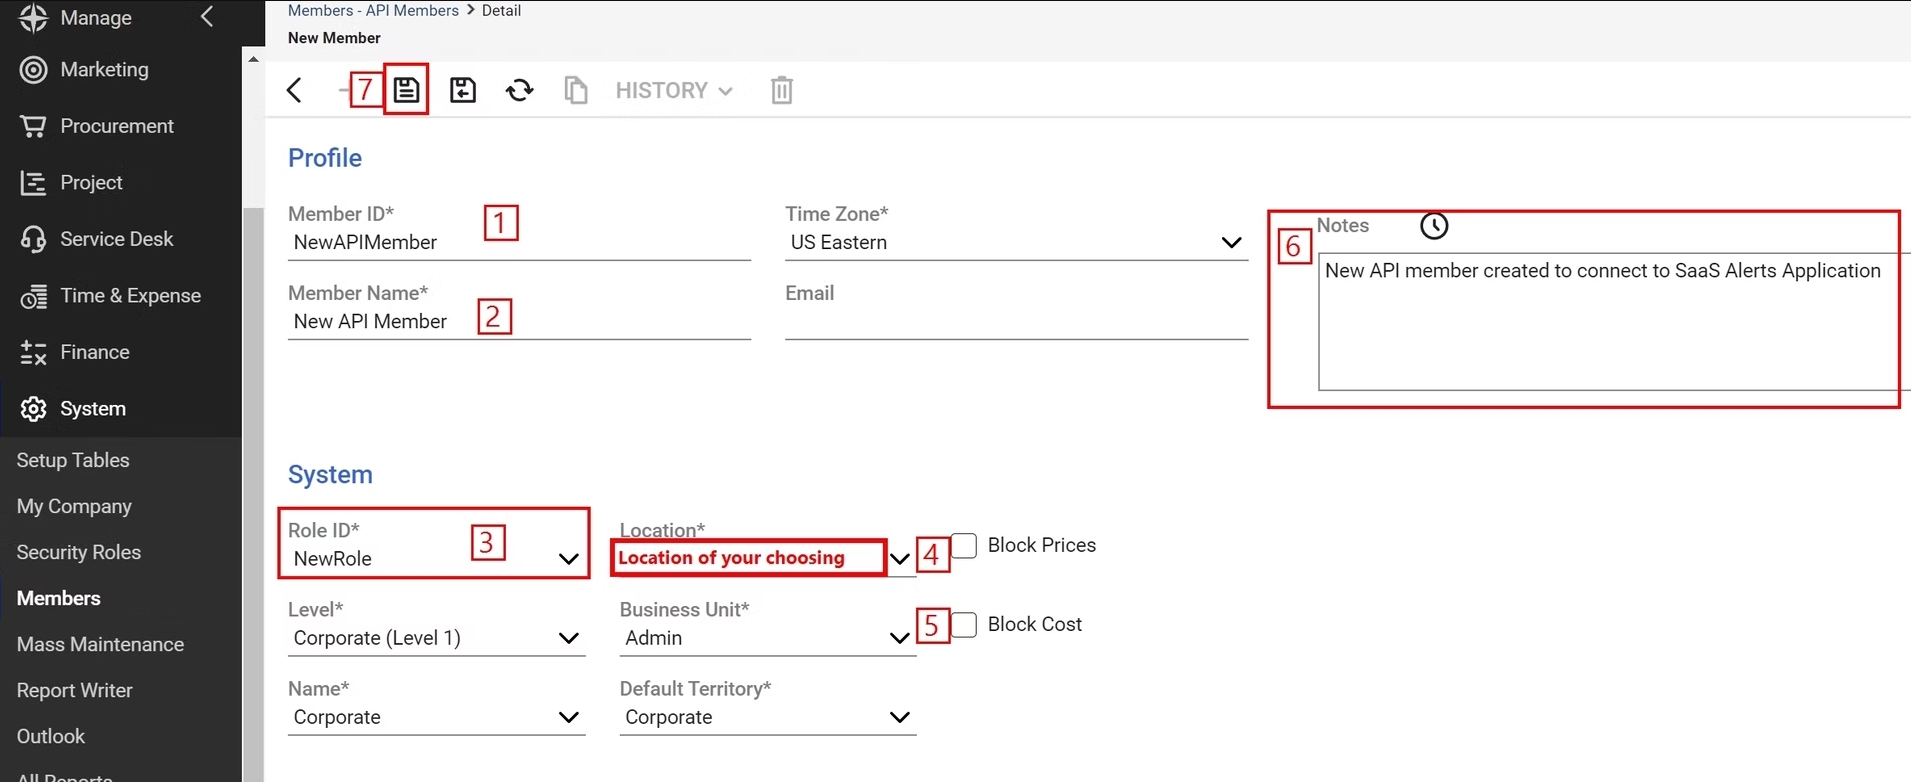
- Once the New Member profile page is open, fill in the following areas:
- Member ID
- Member Name
- Role ID (select the new role that was just created)
- Location (select an active location)
- Business Unit (Admin)
- Notes (optional)
- Click Save.
Generating API keys
- Now that the new API member has been created, click the API Keys tab towards the top of the profile page.
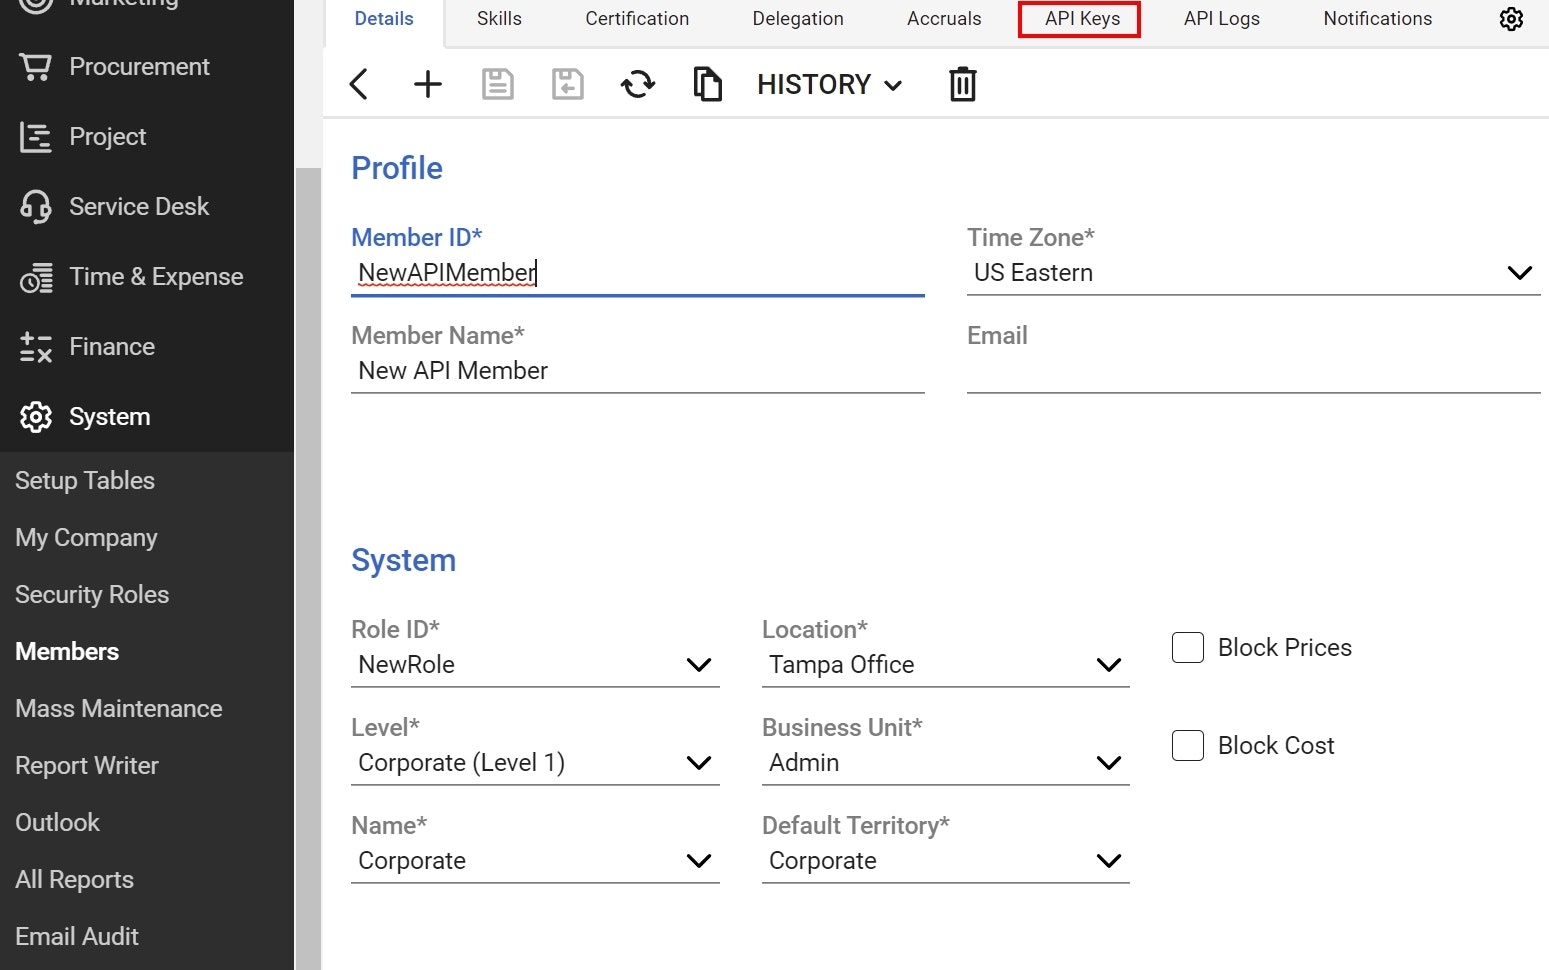
- On the new public API Key page, click the + icon.
- Fill in a description of the key and click Save.
The newly generated Public Key and Private Key will populate. You will need to copy down the private key, as this is the only time it will be available for viewing within the system.
Now, you will be able to authenticate a connection between ConnectWise and the SaaS Alerts application as described in Adding the ConnectWise Manage connection.
Adding the ConnectWise Manage connection
NOTE 35.224.156.102 must be allowlisted in ConnectWise for the SaaS Alerts Integration.
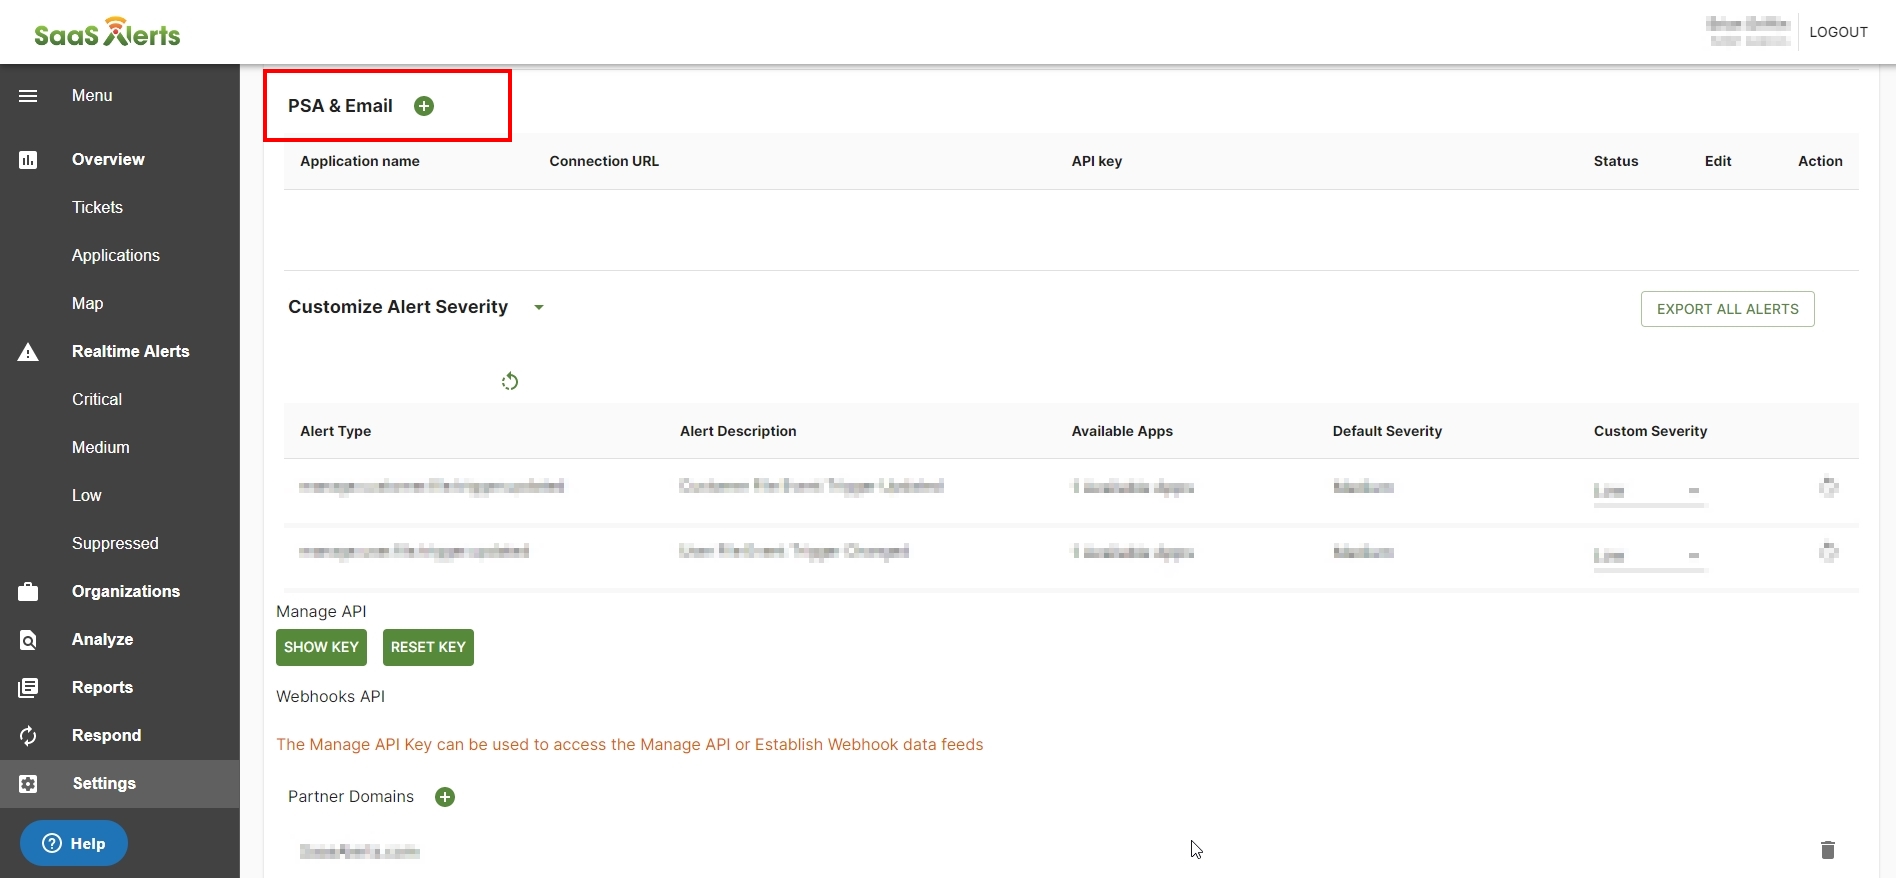
- Log in to SaaS Alerts and click Settings in the lower-left corner of the page.
- Scroll down to PSA & Email, and click the add icon
 .
.
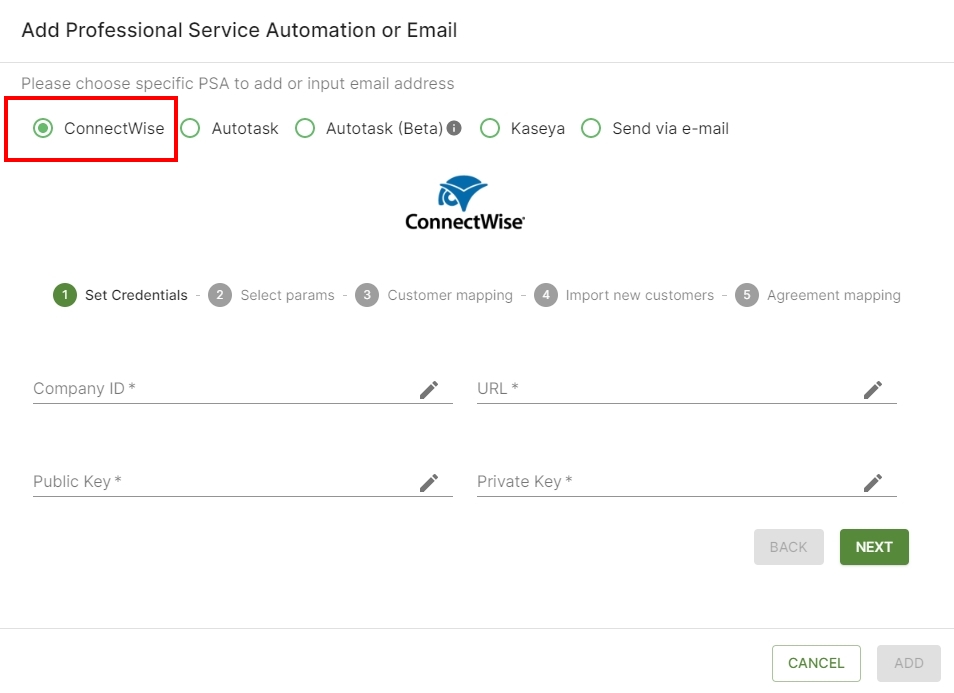
- Select ConnectWise to start the integration.
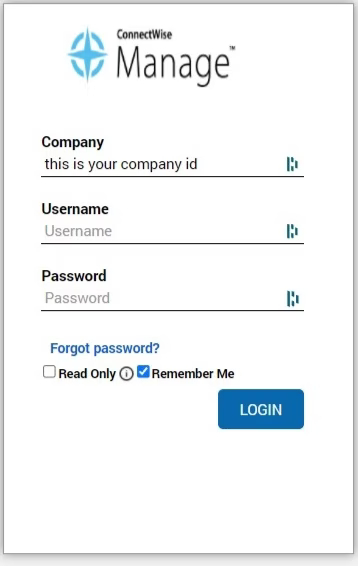
- In the first field, enter your company ID. This is the same as the company name you normally use to log in to ConnectWise Manage.
- Enter your URL where the login form appears (for example, mycompany.connectwise.com).
- Enter the private key.
- Enter the public Key.
- Click Next to proceed to step 2 of the required fields.
If you want to learn how to generate API keys in ConnectWise, refer to ConnectWise PSA Integration.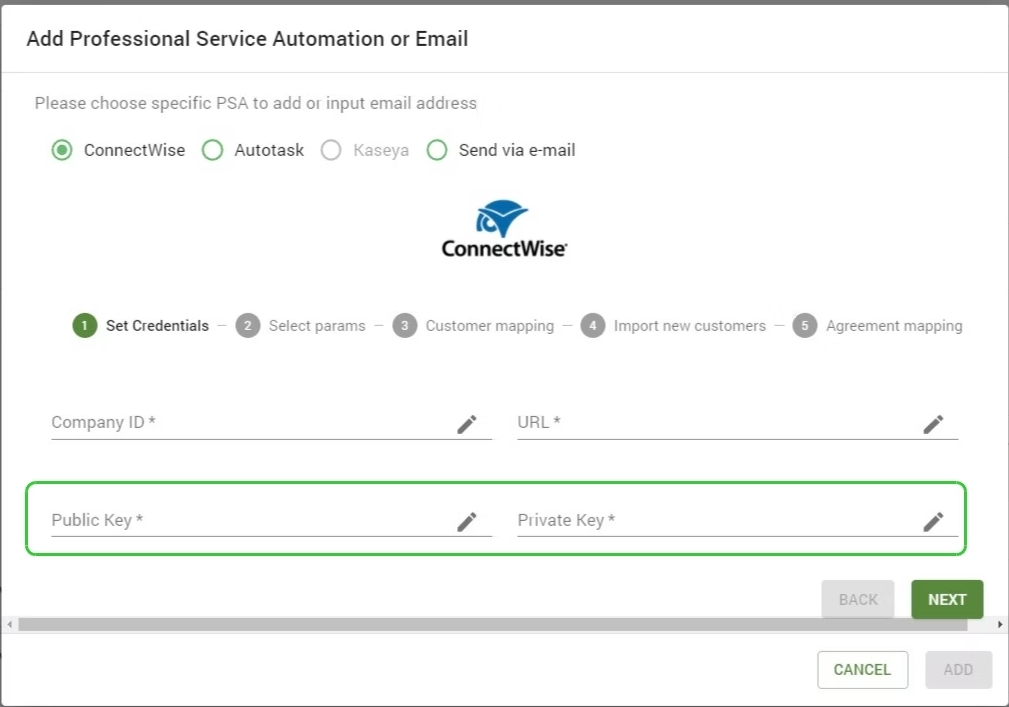
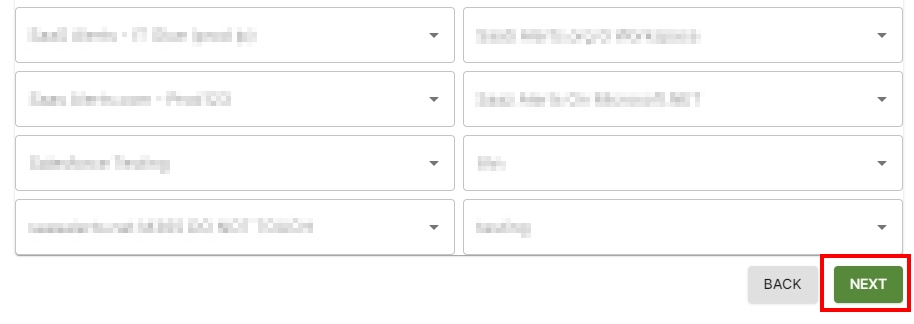
Selecting parameters
In this step, you'll map your board, board status, and medium and critical SaaS Alerts ticket priorities to your ConnectWise instance.
Considerations
- When an alert is created, what board should it go to? With what status?
- When you generate a medium priority ticket, what should it map to in your ConnectWise instance?
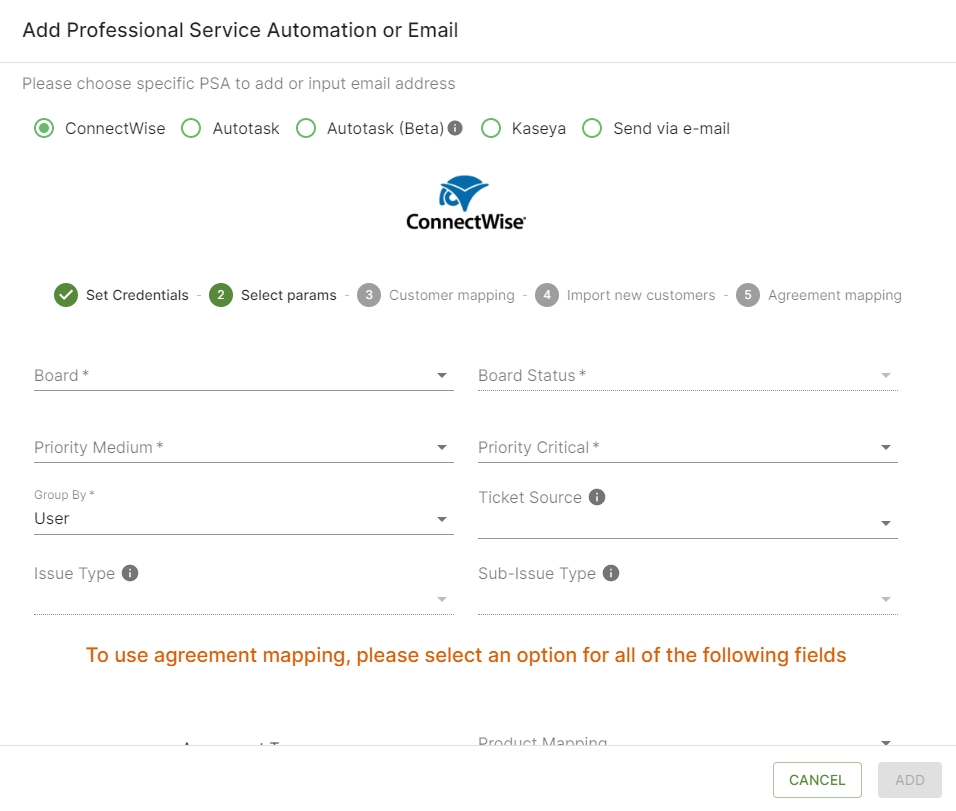
Click Next to go to the next step of the required fields.
NOTE It's recommended to select the group by User+Alert setting. Doing so will display the alert details in the subject of the ConnectWise ticket and also organize your tickets by username and alert.
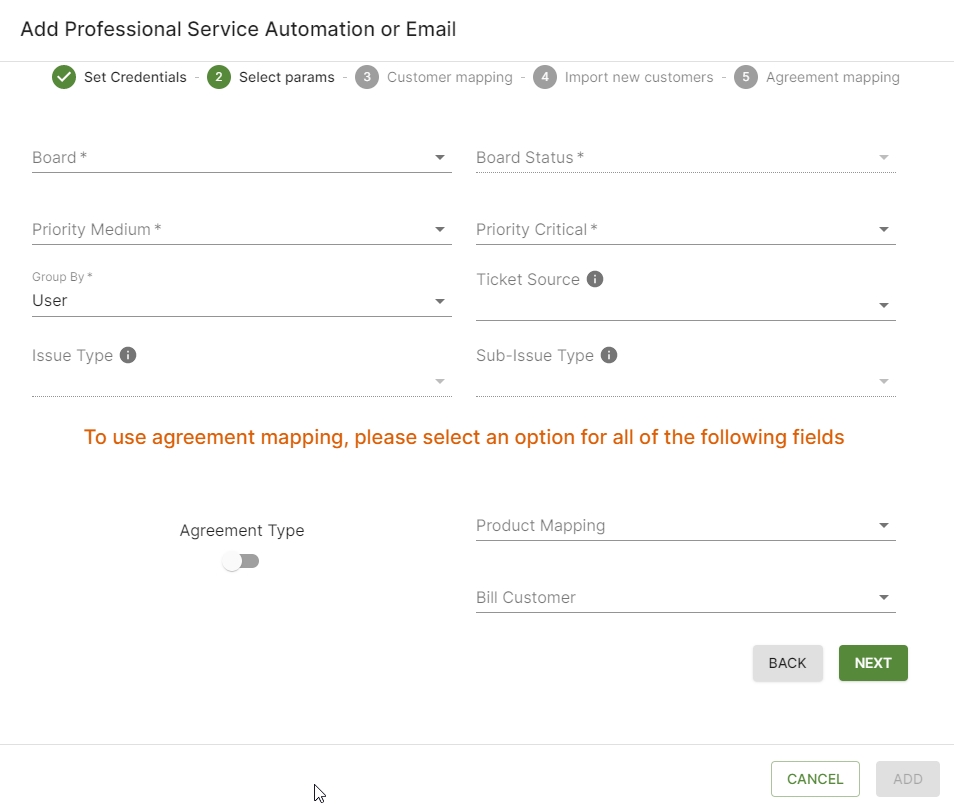
NOTE Optional: If you want to map tickets to an agreement, you can choose this as well.
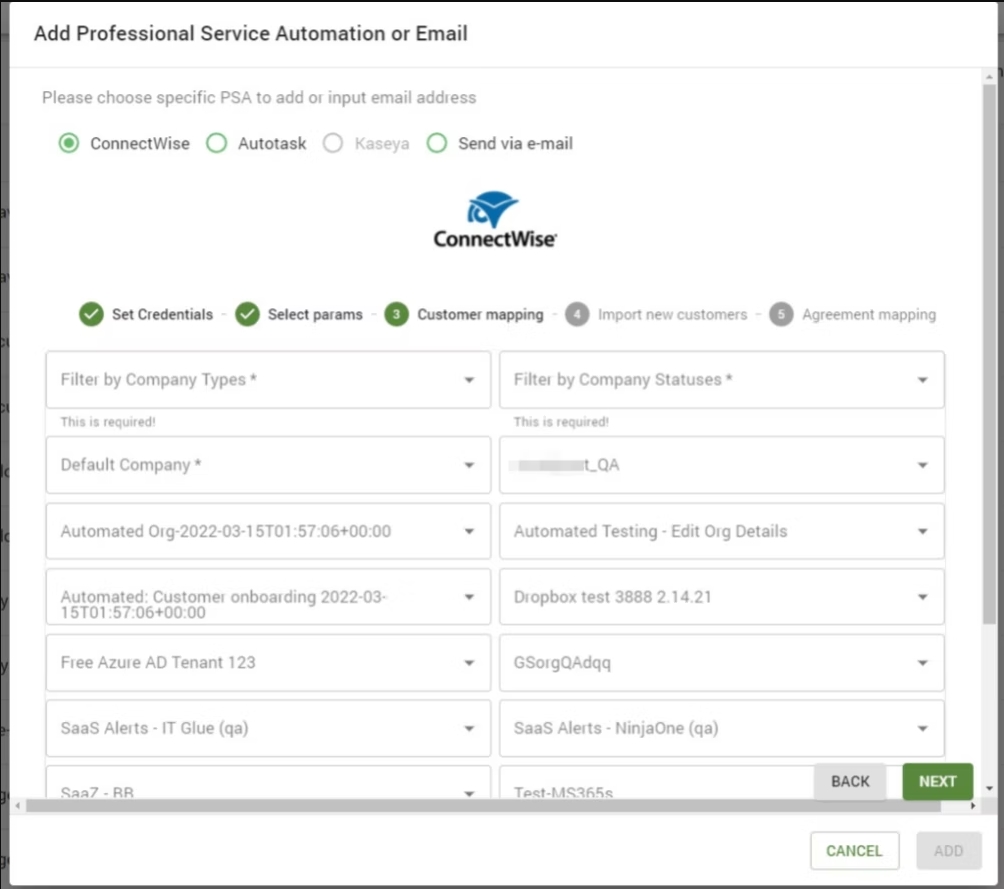
Customer mapping
- First, select a company type and company status filter (for example, Customer/Active).
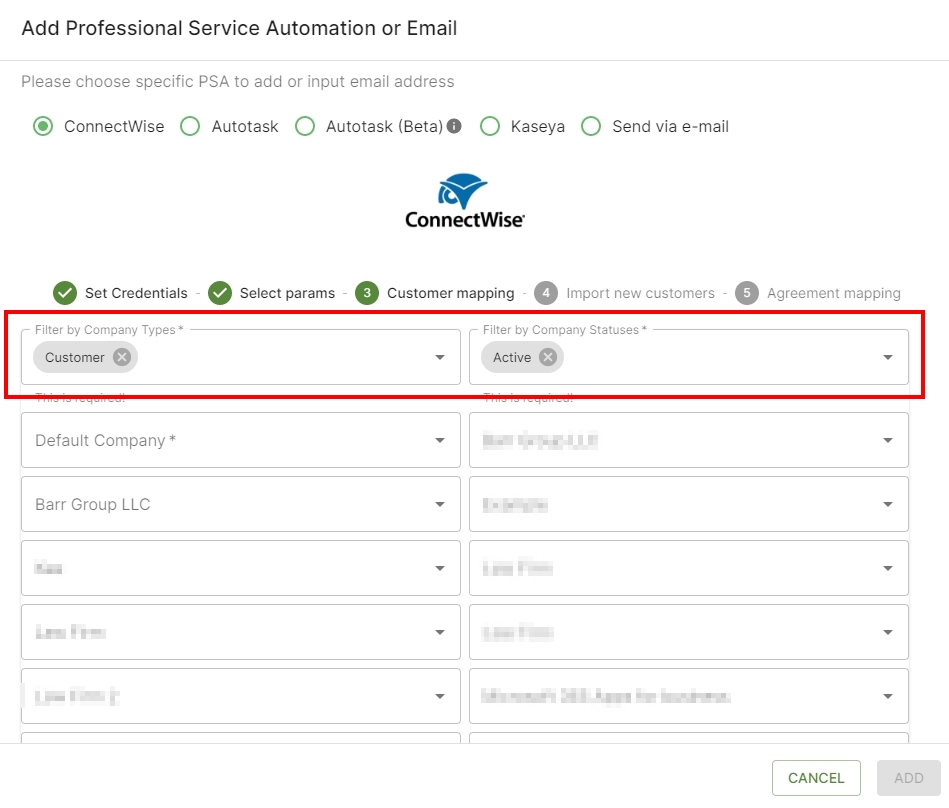
- Next, set a default company for any unmapped tickets. After that, you have the option to map your SaaS Alerts organizations to your ConnectWise companies.

- Click Next.
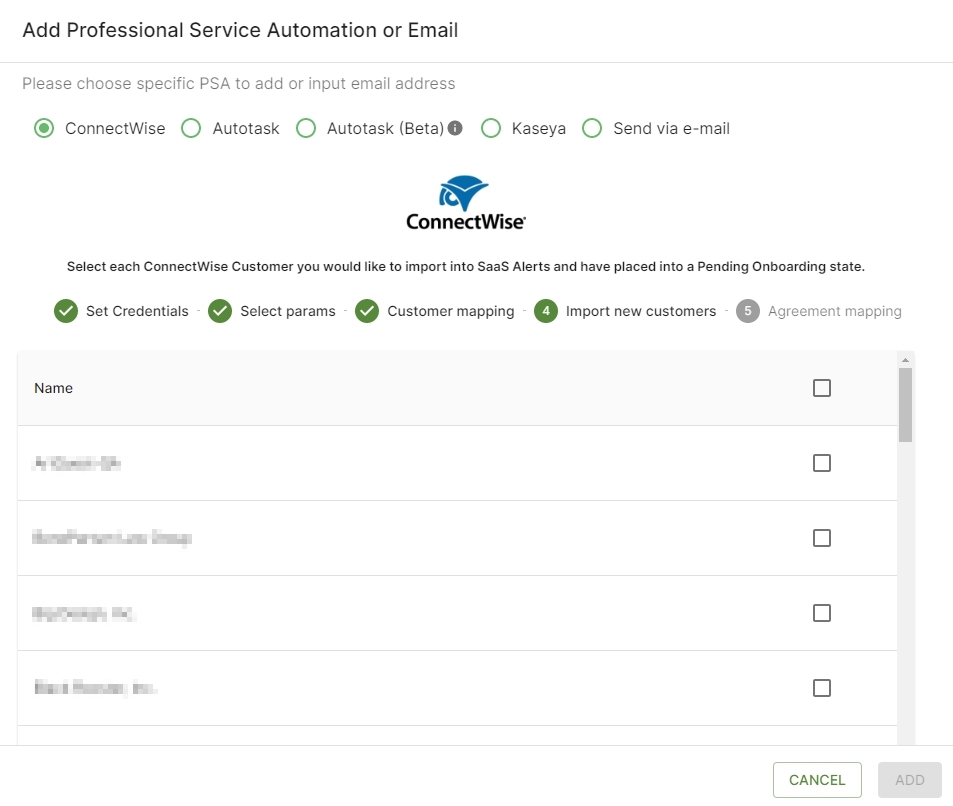
- Import New Customers will allow you to import your companies into SaaS Alerts.
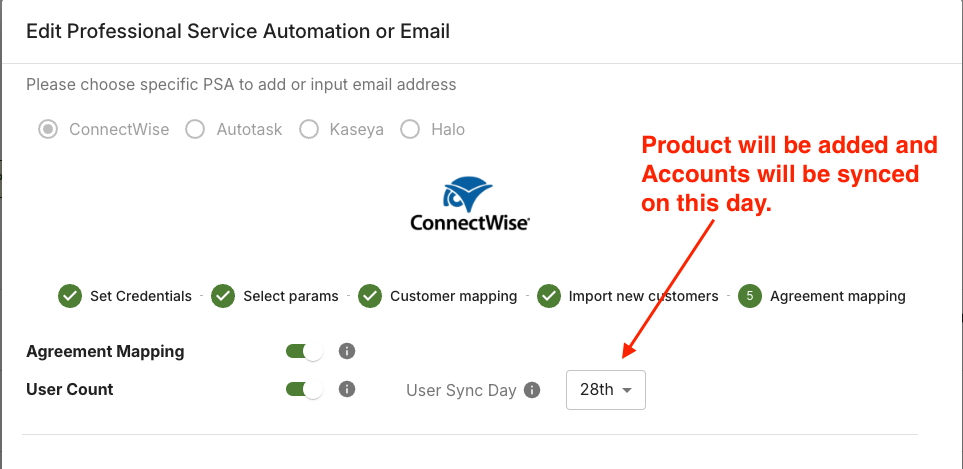
- Agreement Mapping is only active if you enabled it when first setting up parameters. You may enable it by using the Agreement Mapping toggle.
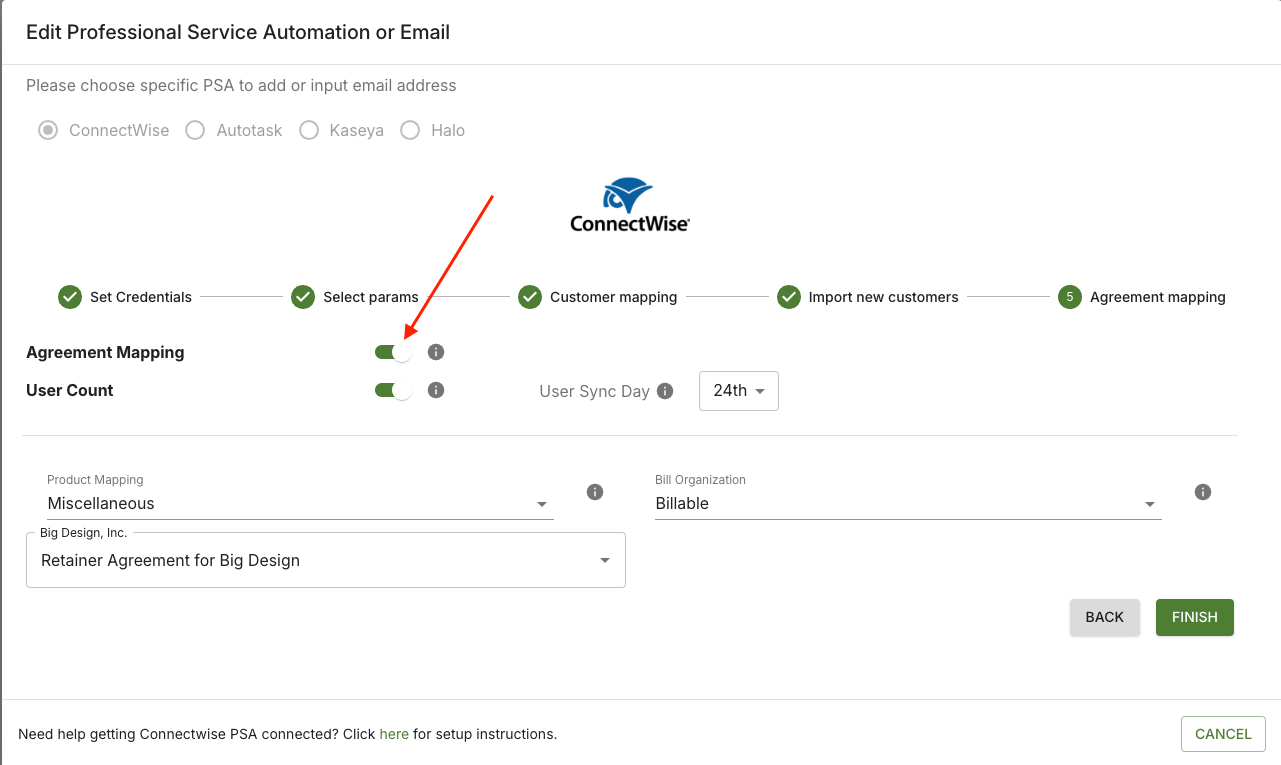
- User Sync Day - Billing Date: The initial product additions to the agreements and the initial billable account sync to Connectwise will occur on the date that you choose. Most partners set this date to be the date of their SaaS Alerts billing date.
- Click Finish.
EXAMPLE Map Automated Org-2022 to its equivalent in ConnectWise by clicking and selecting the ConnectWise option in the drop-down menu. Click Next to go to the last step of the required fields.
NOTE Verify if you previously added any of the organizations listed in the Import New Customer window to the SaaS Alerts organizations table before importing a customer. Selecting an existing organization will create a duplicate. This feature is intended to simplify the onboarding process for new partners exporting new organizations from ConnectWise to SaaS Alerts.
NOTE SaaS Alerts displays the Description of the product, not the Product ID.
After successfully completing this integration, medium and critical SaaS Alerts tickets will generate tickets in ConnectWise.


