Indicators of compromise (IoCs)
Indicators of Compromise (IoCs) are clues or evidence that suggest a system or organization may be compromised or under attack. In SaaS Alerts, IoCs allow partners to create custom, alert‑only events by combining one or more existing events with filters, logic, and context.
IoCs are especially powerful when used alongside Respond rules, enabling partners to detect suspicious behavior early and escalate only when additional activity confirms risk.
Key concepts
-
IoCs are alert‑only events: By themselves, IoCs do not take action. They generate events that can be reviewed, reported on, or used as building blocks in Respond rules.
-
Custom event creation: IoCs allow you to create entirely new events—complete with custom names, descriptions, severity levels, and metadata—beyond what is available under standard SaaS Alerts events.
-
Reusable logic: Once created, an IoC can be reused across multiple Respond rules without rebuilding complex filters each time.
-
Stackable detection: Multiple IoCs can be combined to represent increasingly suspicious behavior before triggering action.
Requirements
Ensure the following requirements are met before creating IoCs:
-
You must have MSP Admin privileges in SaaS Alerts.
-
When using IoCs in conjunction with our Respond module:
-
Sign in using Microsoft, K1, or Google OAuth, or
-
Enable Multi-Factor Authentication (MFA) in SaaS Alerts user settings.
-
-
Accept all security permissions required by the module.
NOTE If you choose Google, K1, or Microsoft Authentication, ensure MFA is disabled in SaaS Alerts.
Accessing indicators of compromise
1. Expand Indicators of Compromise in the side navigation menu.
2. Click Rules.
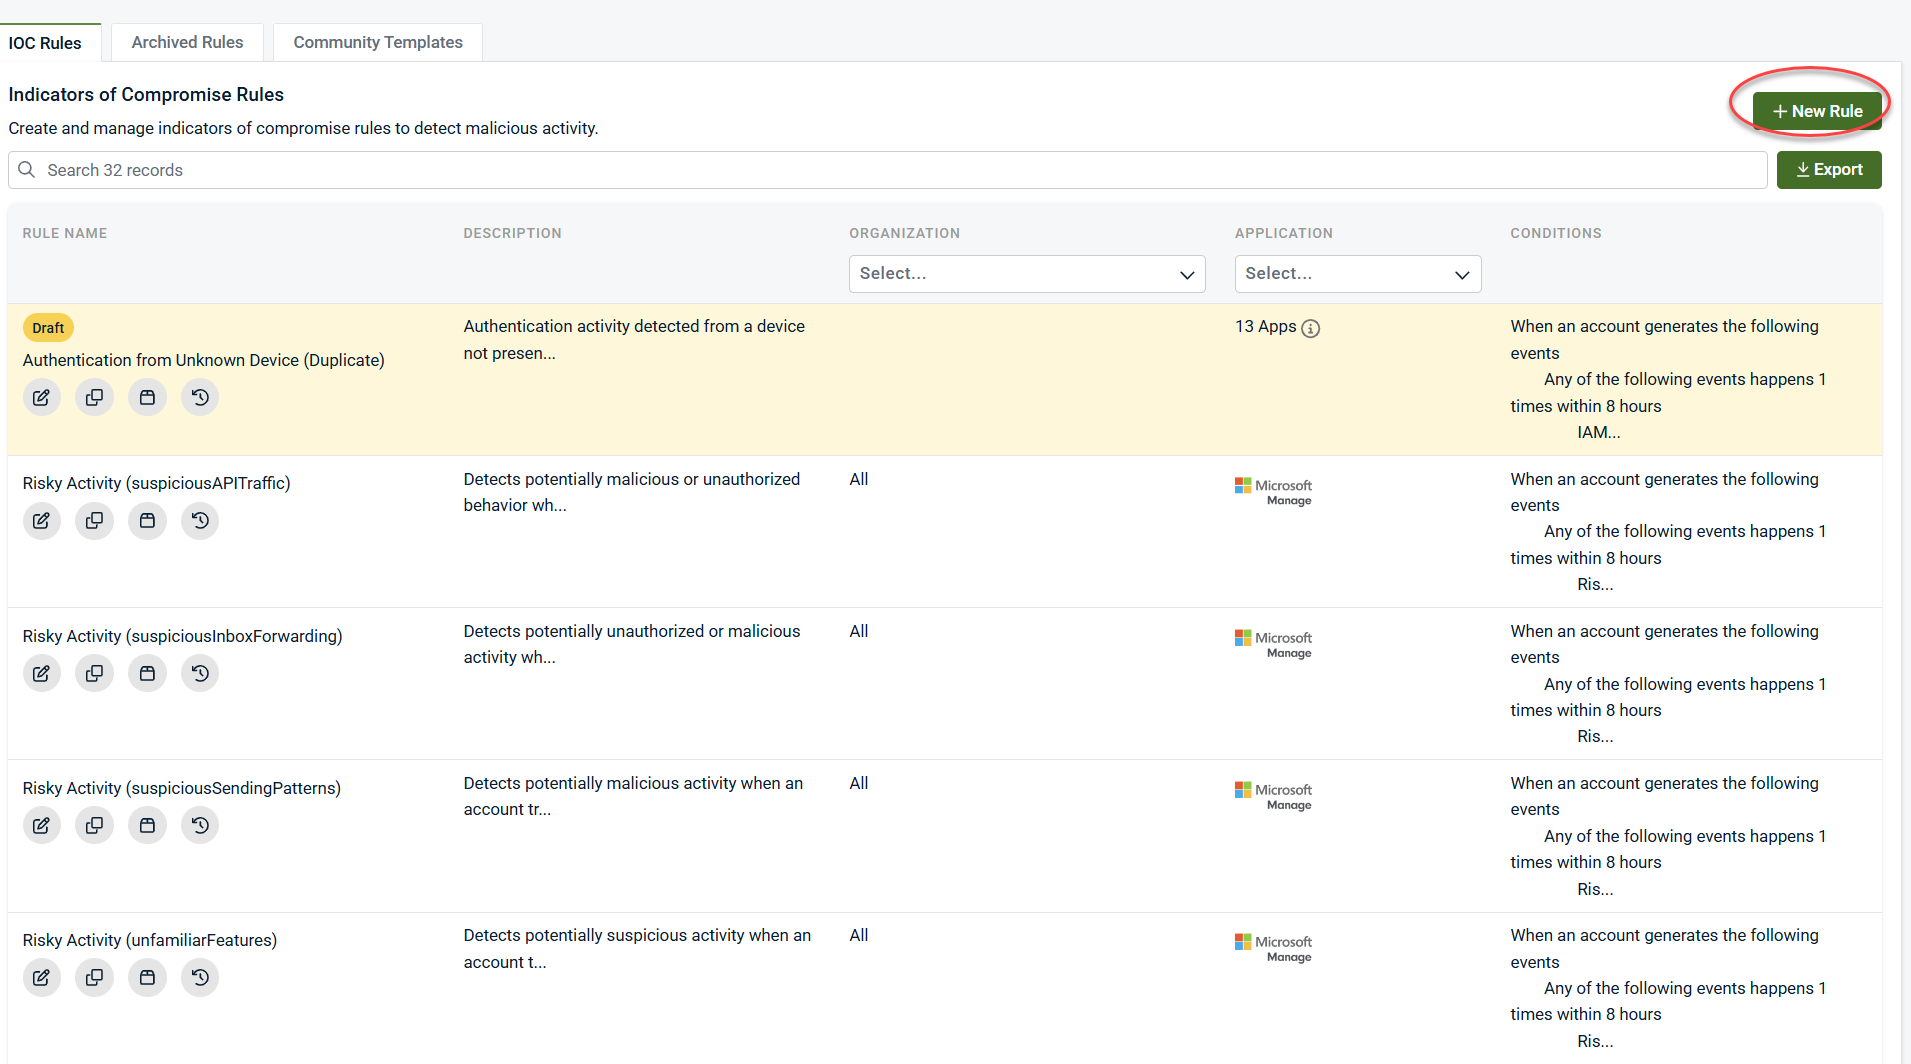
3. The Rules screen displays all active, draft, and archived IoCs.
From here, you can:
-
Create new IoCs
-
Duplicate community templates
-
Archive or restore existing IoCs
-
View trigger history
Community templates
SaaS Alerts provides Community IoC Templates to help partners get started quickly.
-
Templates are prebuilt IoCs designed around common threat patterns.
-
Templates can be duplicated into your environment and fully customized.
-
The number of templates will continue to grow over time.
Using a community template
1. Expand Indicators of Compromise in the side navigation menu.
2. Click Community Templates.
3. Decide which template you would like to use and click Duplicate to add it to your environment.
4. Click Create.
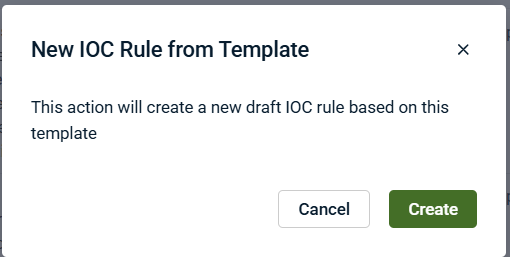
6. A confirmation message appears once the template is successfully added.
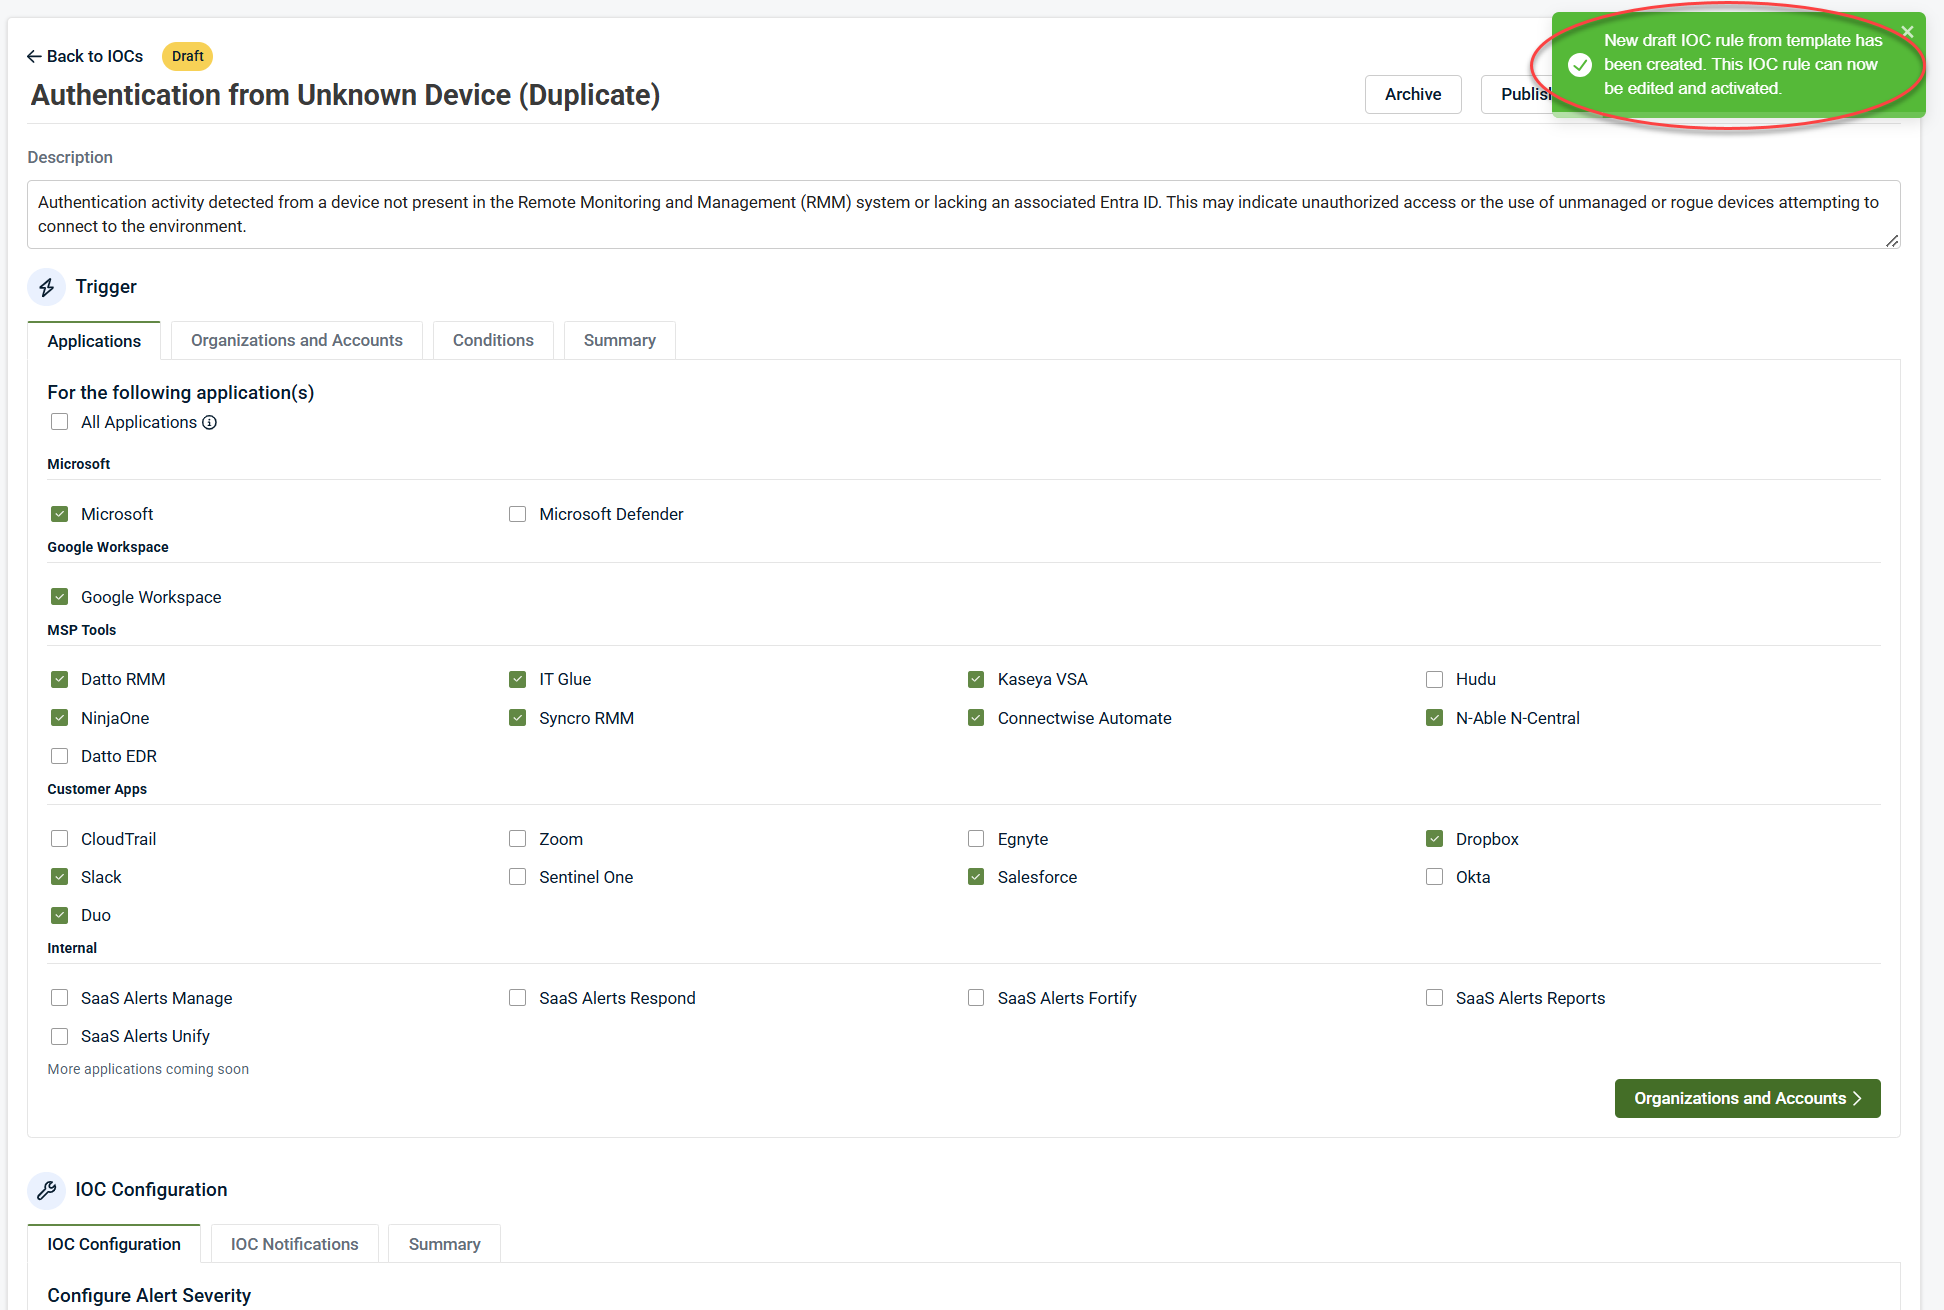
Once duplicated, the IoC behaves like any custom rule you create.
IoC lifecycle management
-
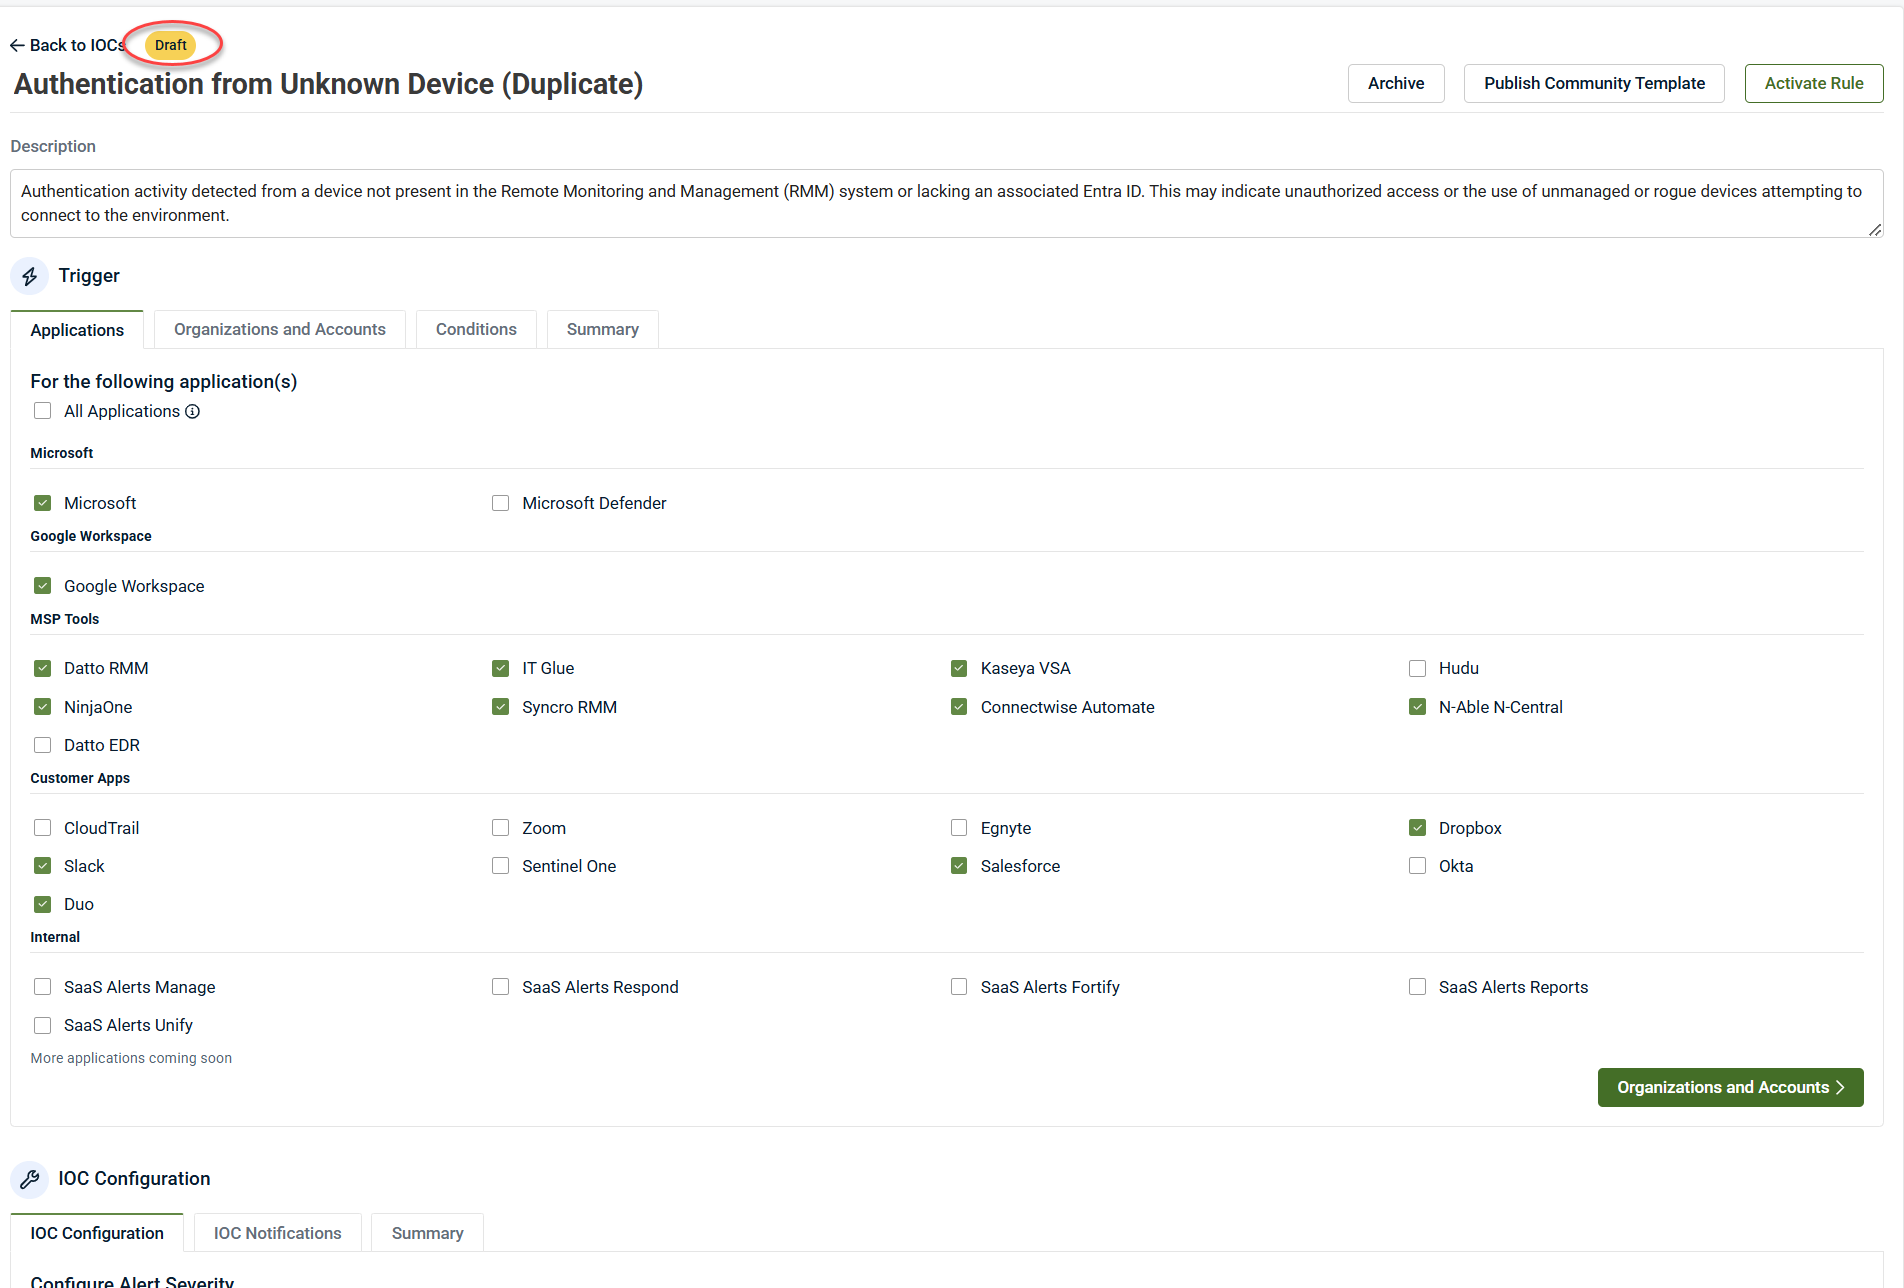
Draft: Work in progress; does not trigger.
-
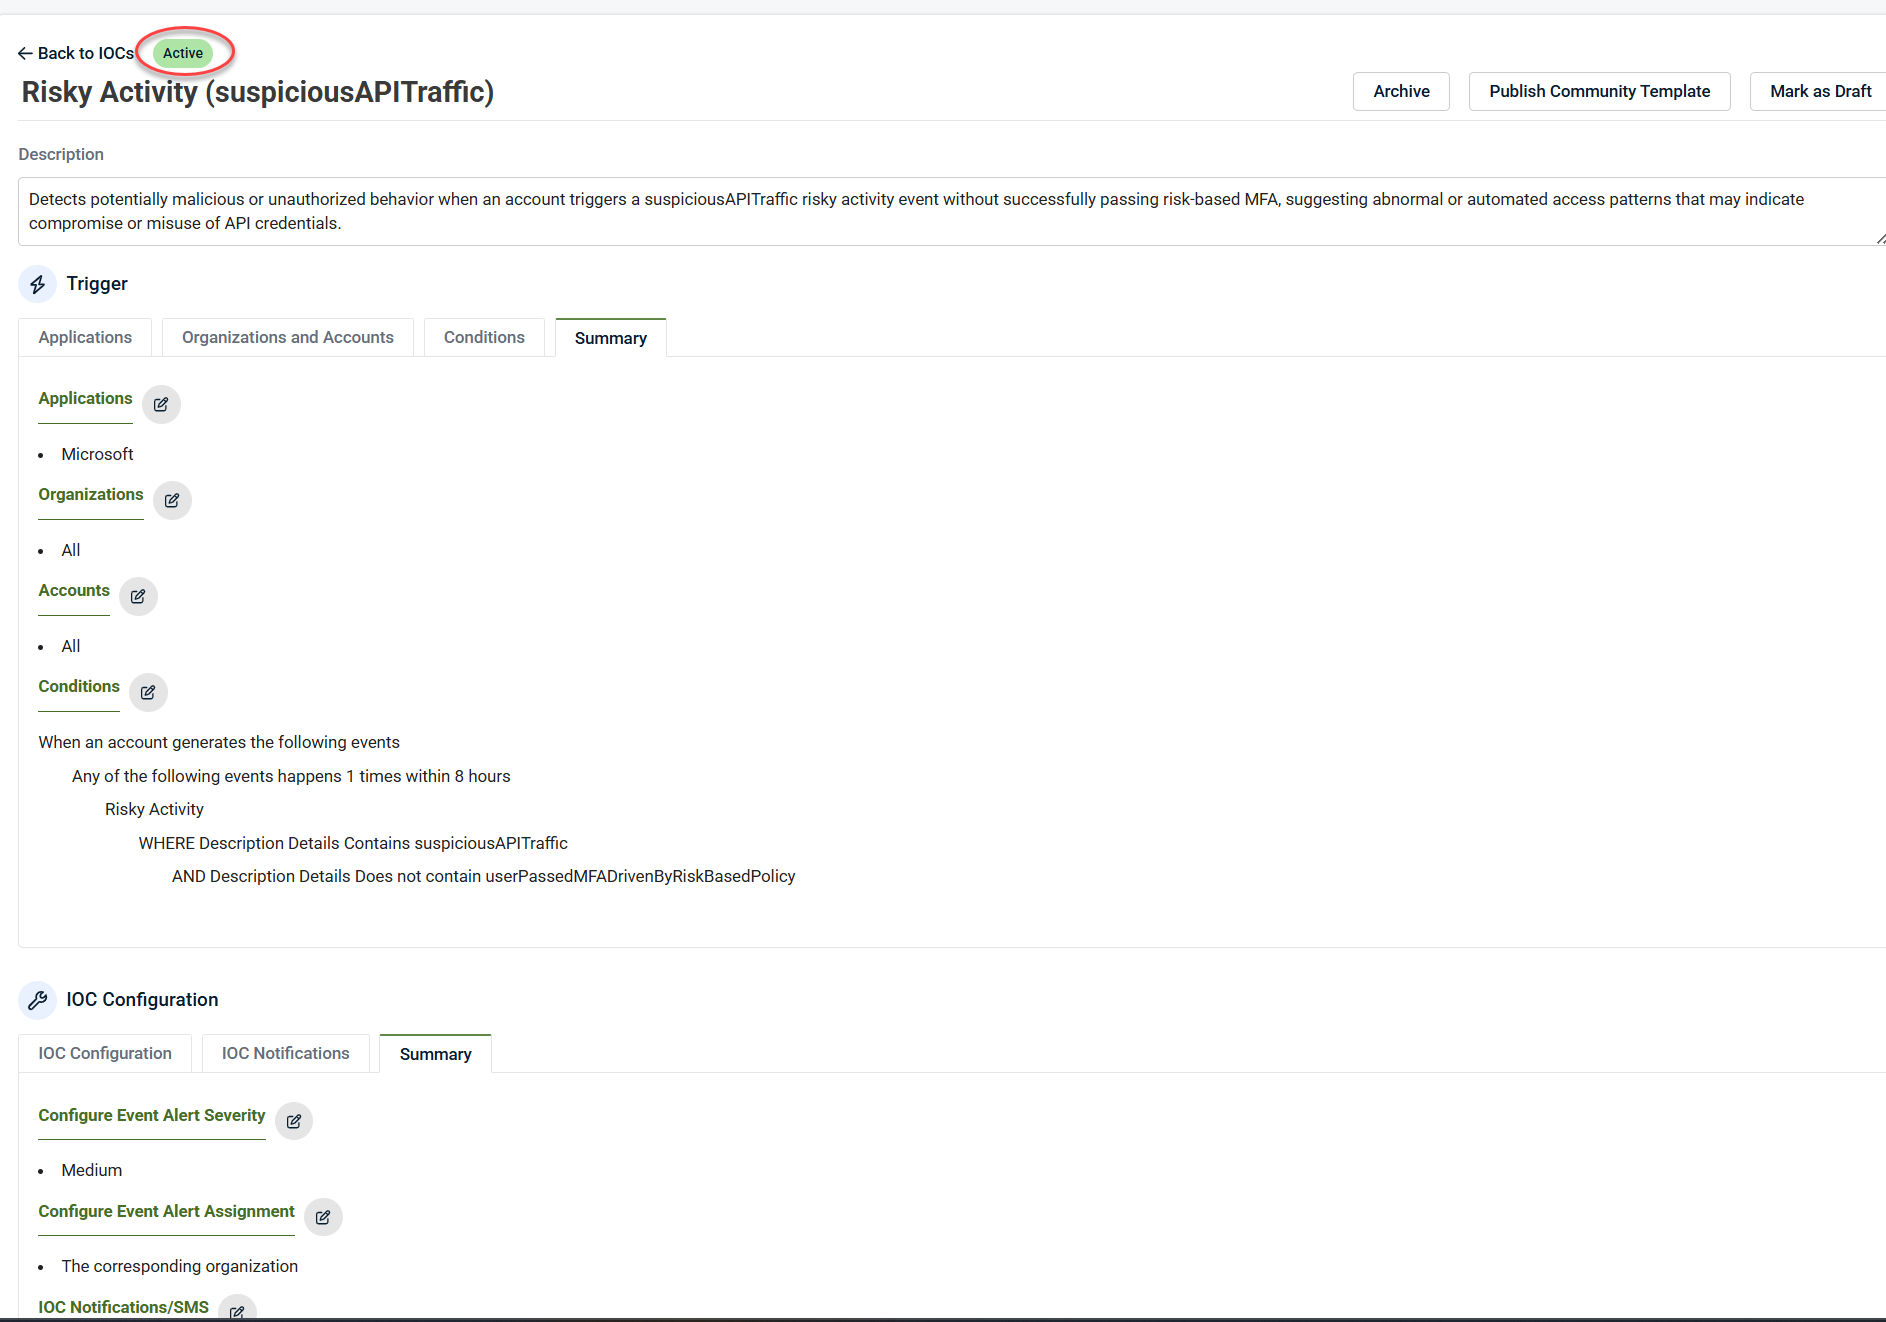
Active: Enabled and evaluated every five minutes.
-
Archived: Click the Archived Rules tab. These rules are disabled and hidden from active views (cannot be deleted). Click the Unarchive icon to restore them.
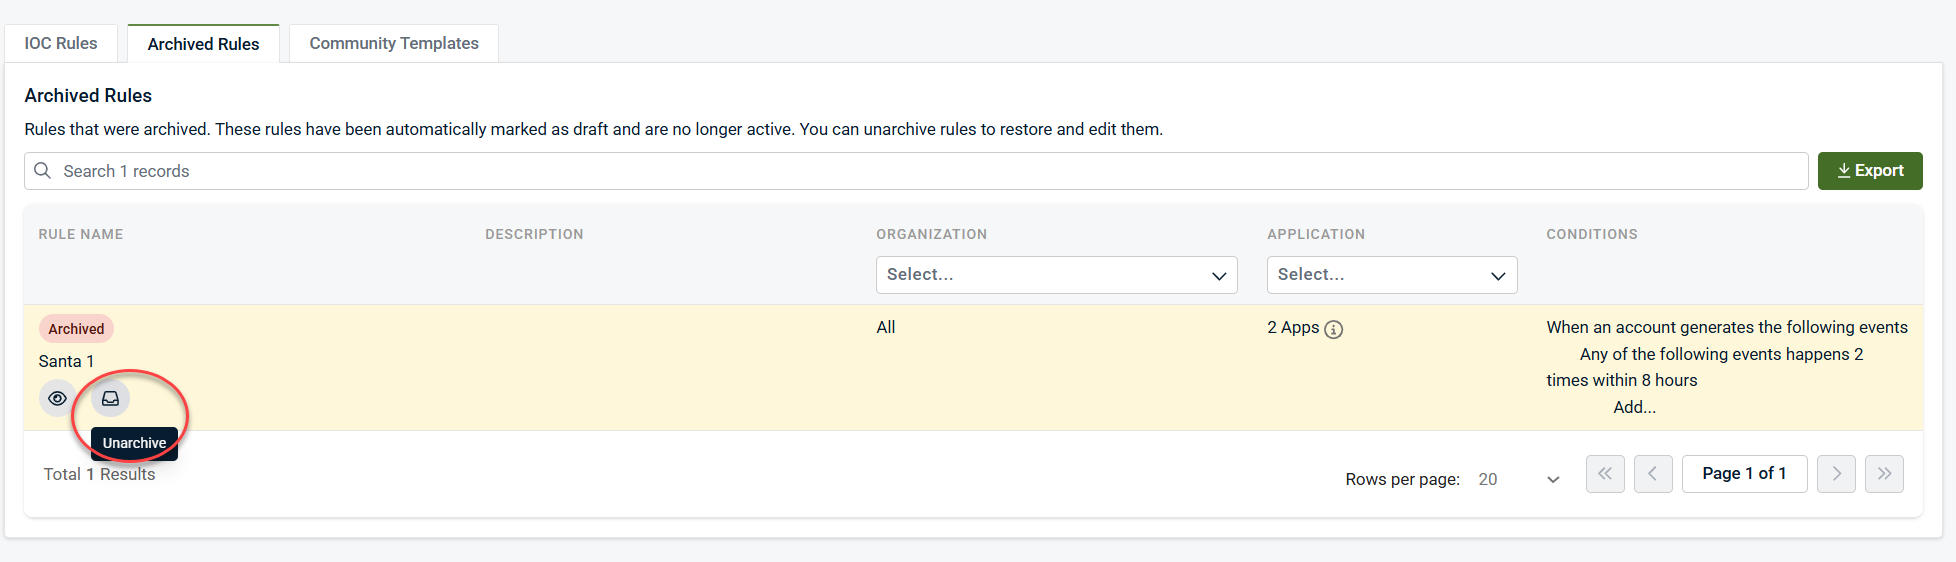
IMPORTANT IoCs cannot be deleted once created. Archiving effectively turns them off.
Creating an IoC
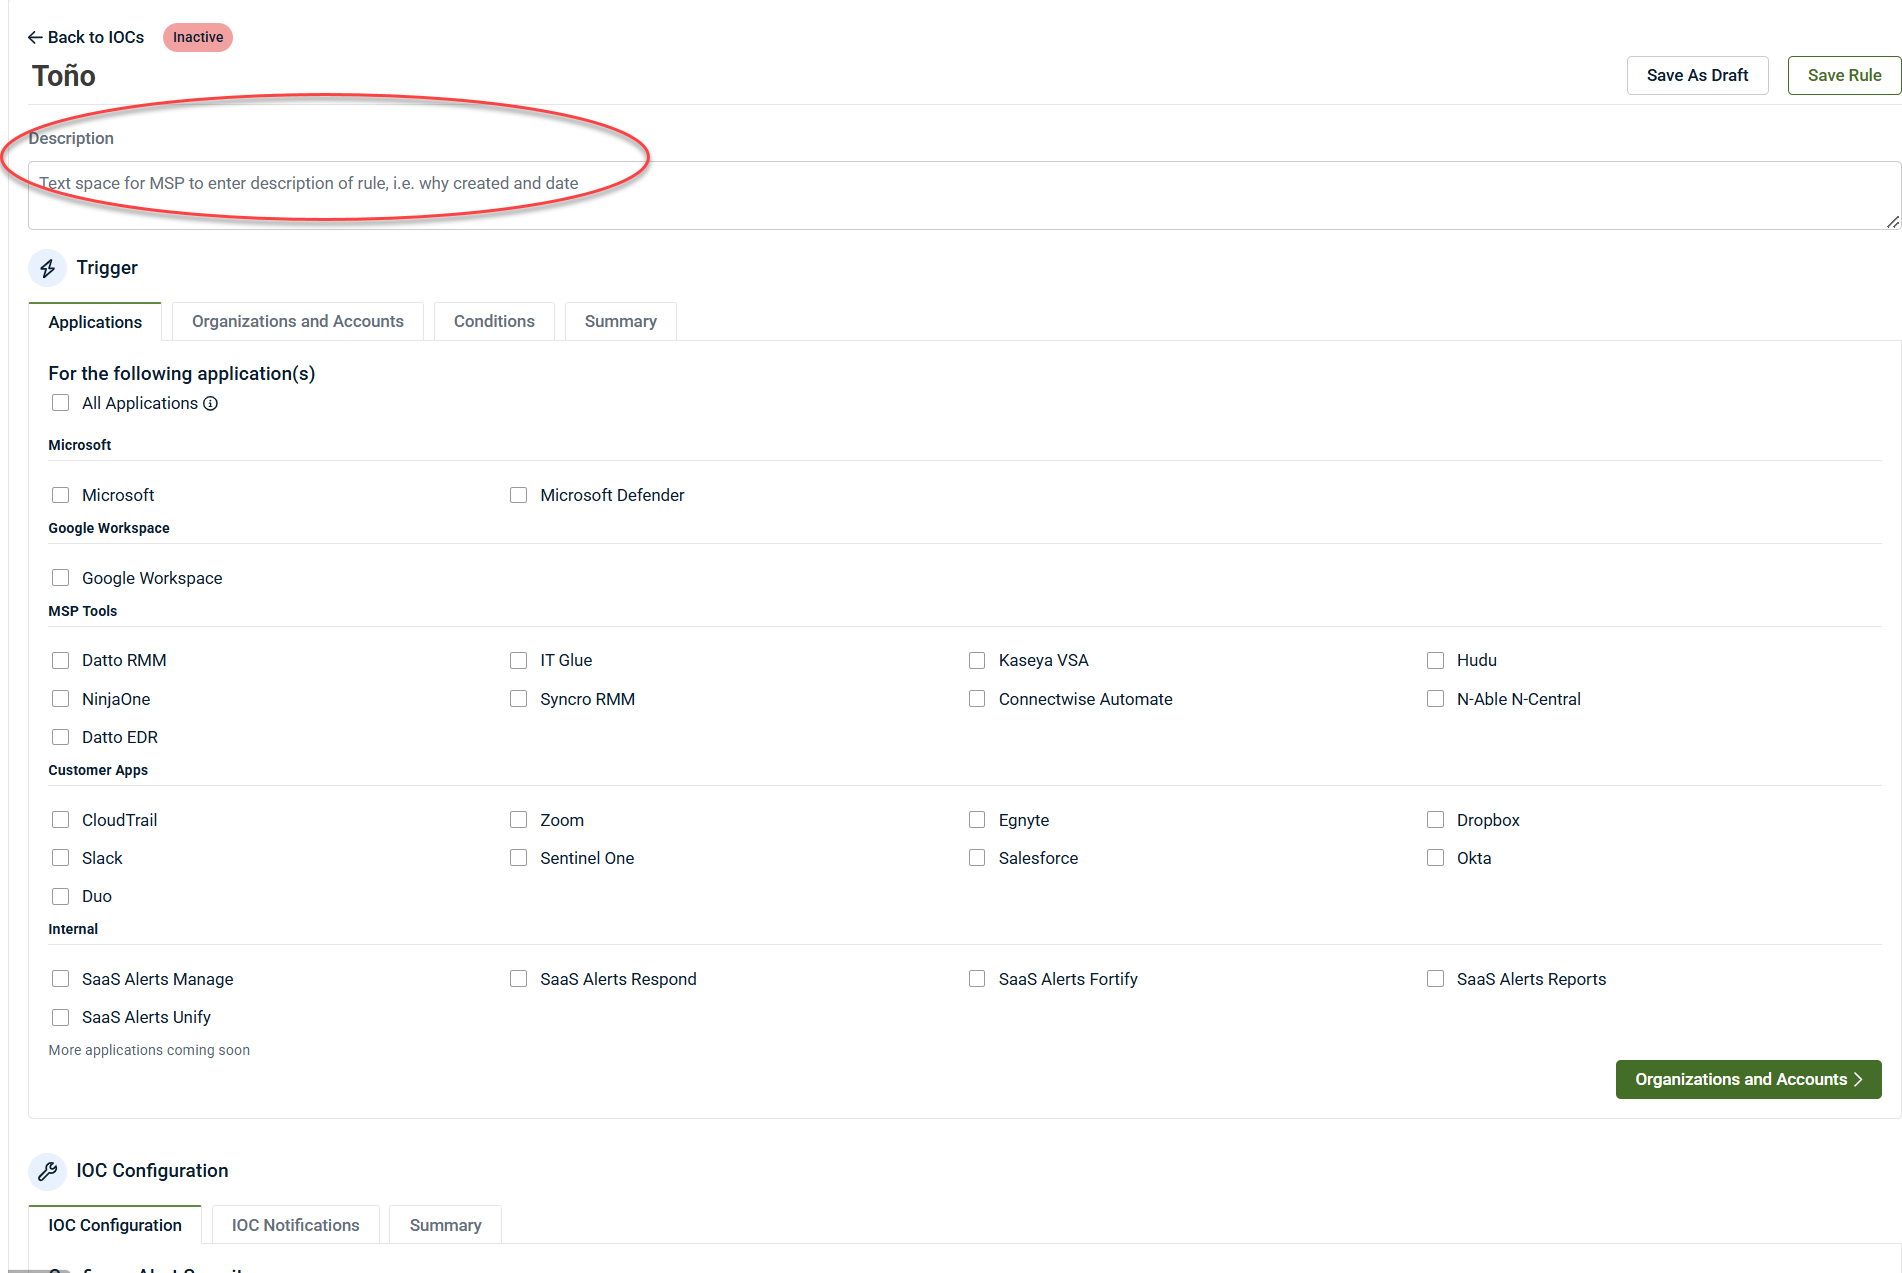
1. From the IoC Rules tab, click + New Rule.
2. Click Untitled Rule to name the IoC.
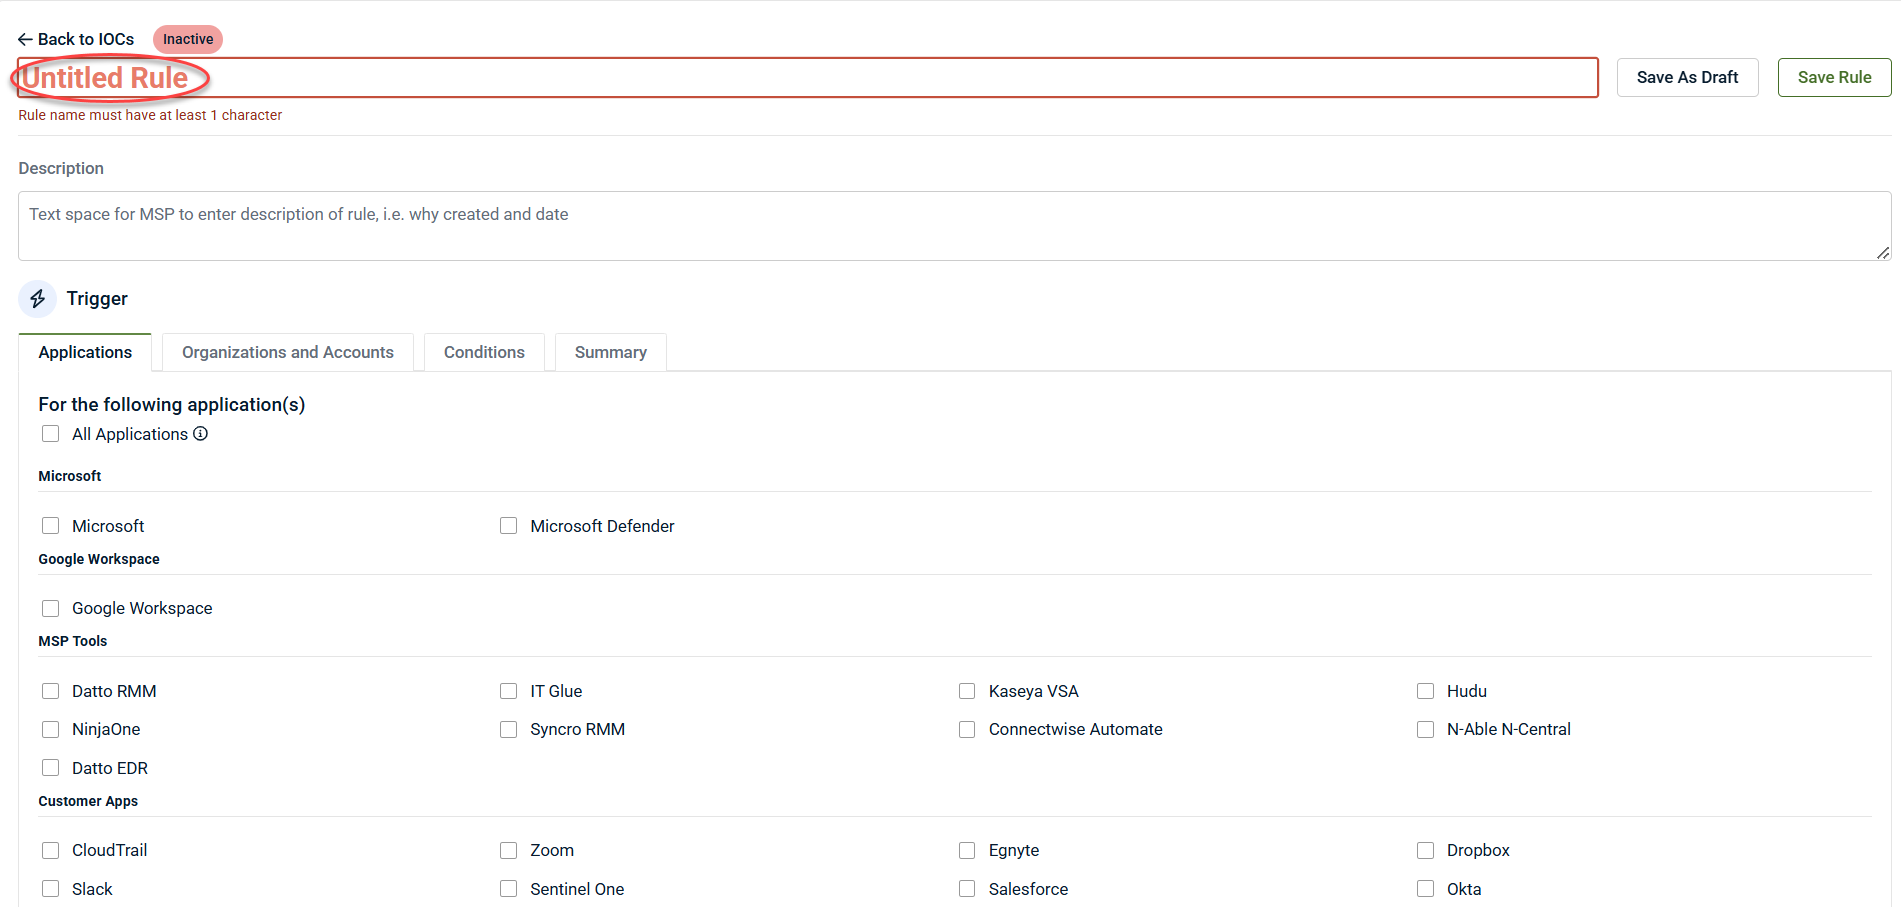
3. (Optional) Add a description.
-
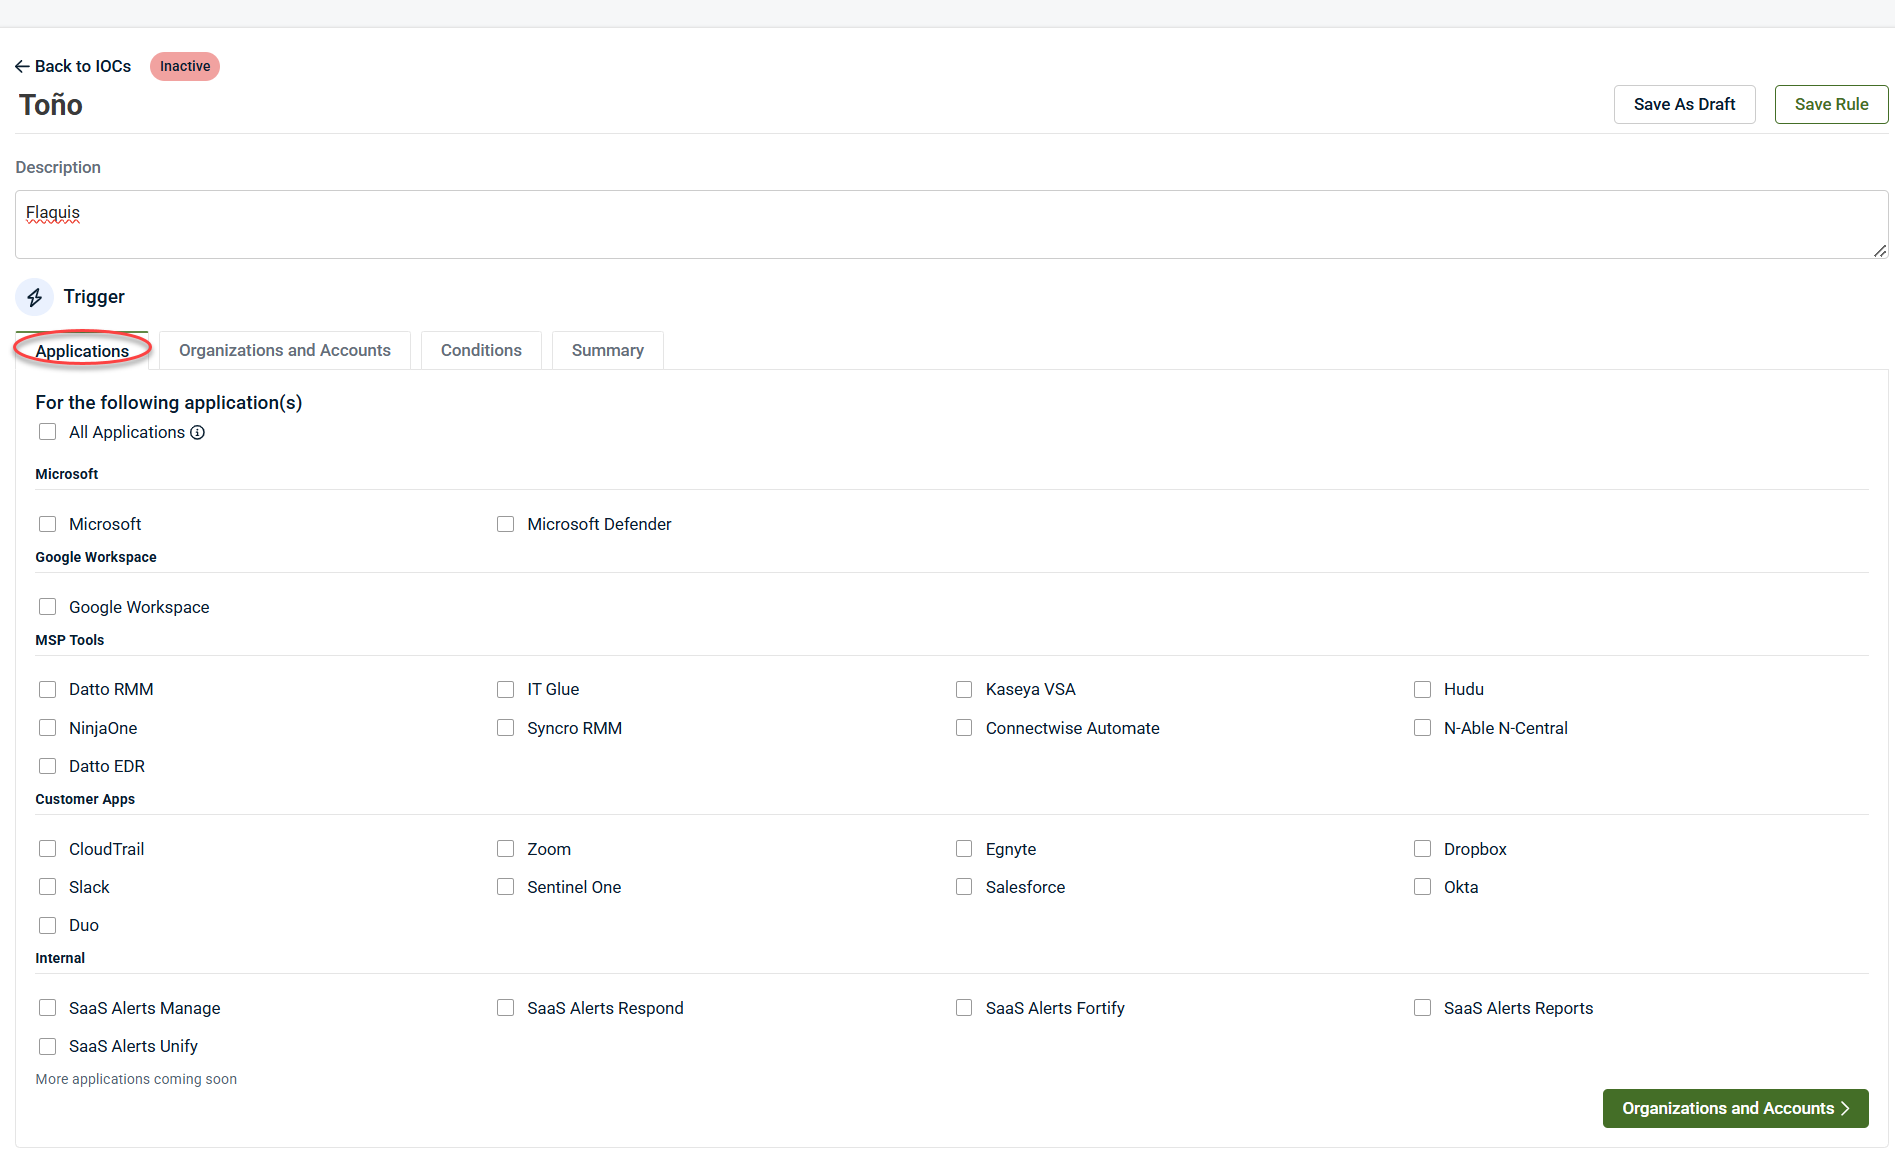
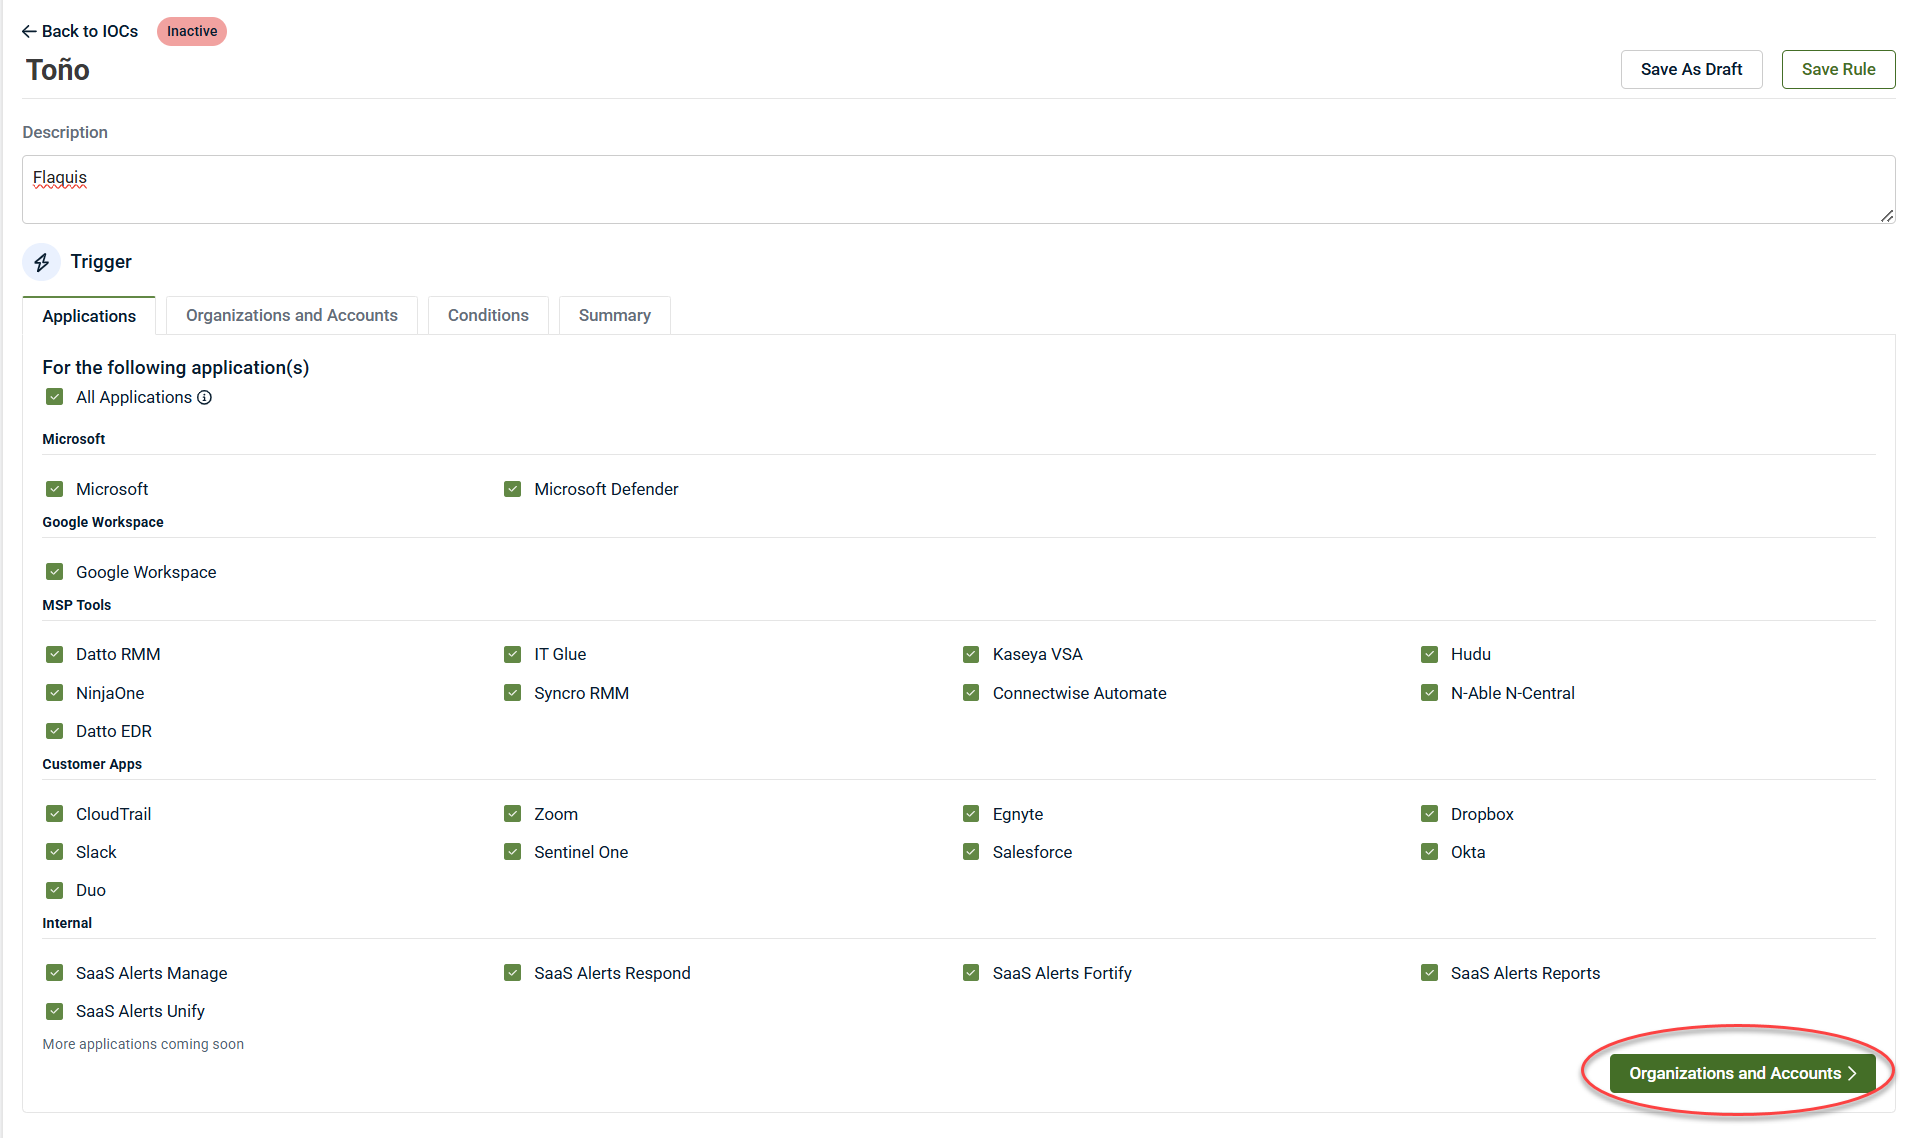
Under the Trigger section, in the Applications tab, select the application that you want to monitor.
-
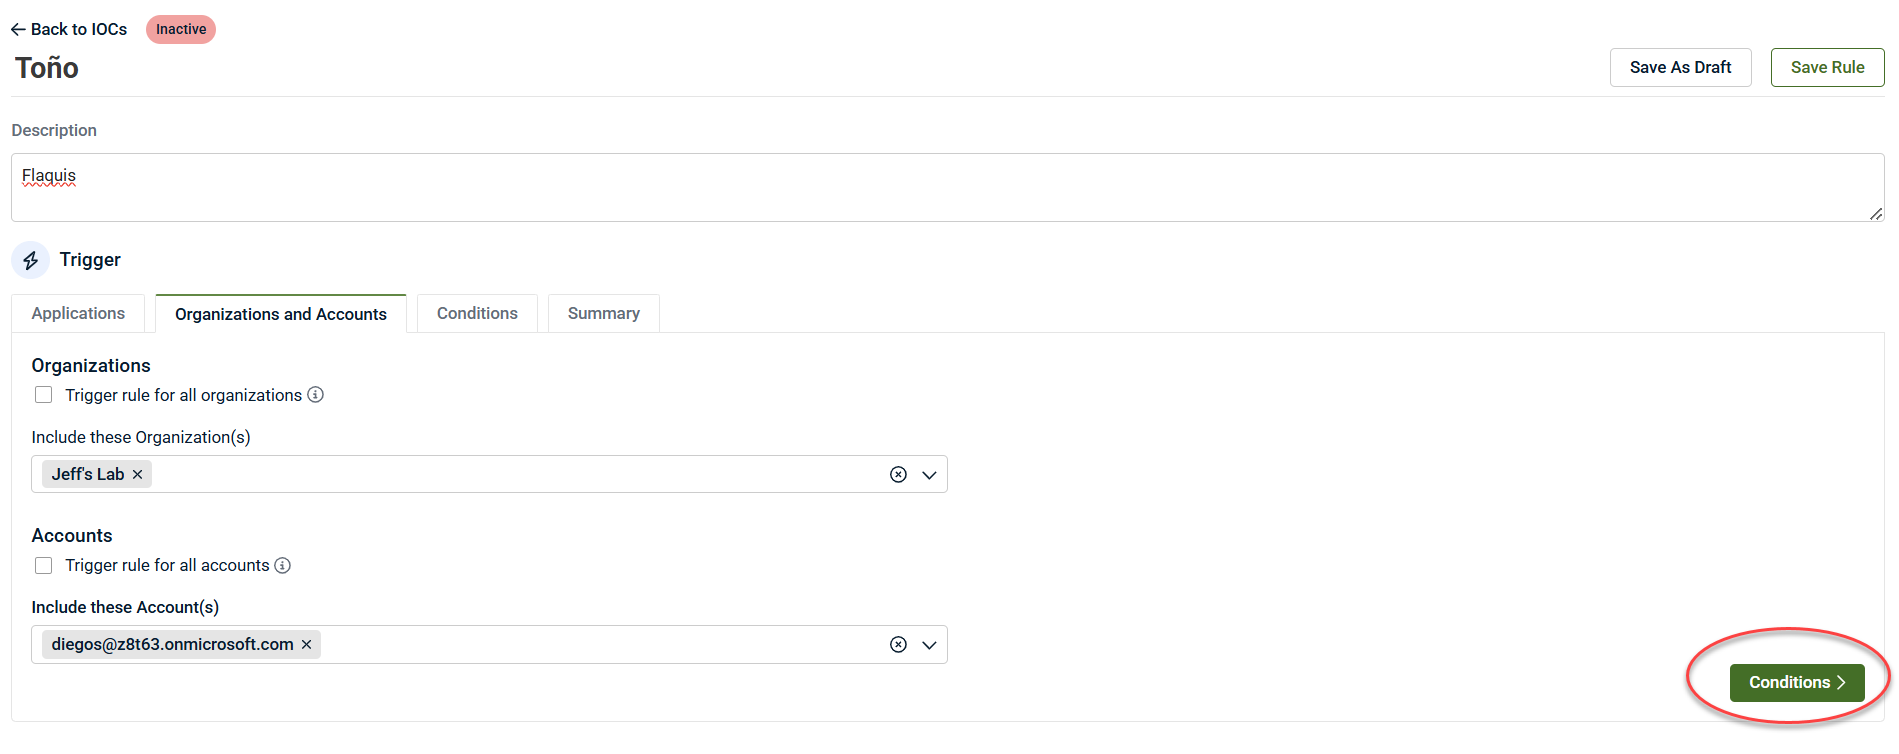
Click Organizations and Accounts.
-
Select the organizations and accounts to be monitored. Partners can choose one, all, or multiple organizations and accounts.
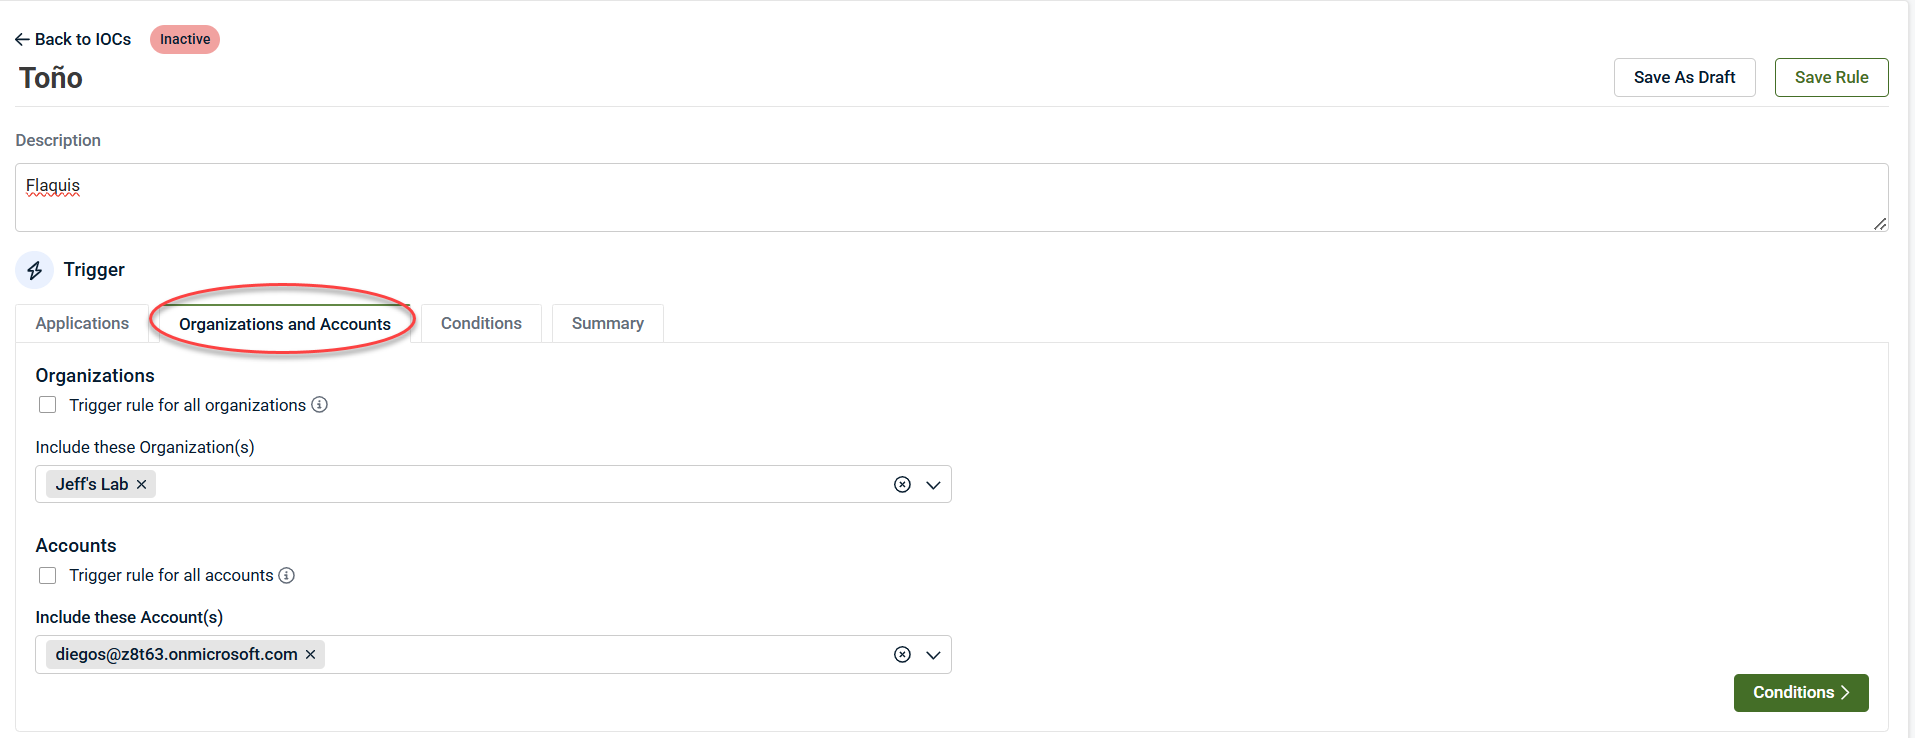
NOTE If the option Trigger rules for all organizations or Trigger rules for all accounts is active, it will apply to all current and future organizations and accounts. By selecting the Trigger rule for all organizations checkbox, you will also have the ability to exclude specific organizations.
-
Click Conditions to proceed.
Conditions define what must happen for the IoC to trigger.
-
Select one or more events.
-
Specify:
-
Number of occurrences
-
Timeframe (minimum: 1 event in 15 minutes)
-
-
Combine events using AND / OR logic.
-
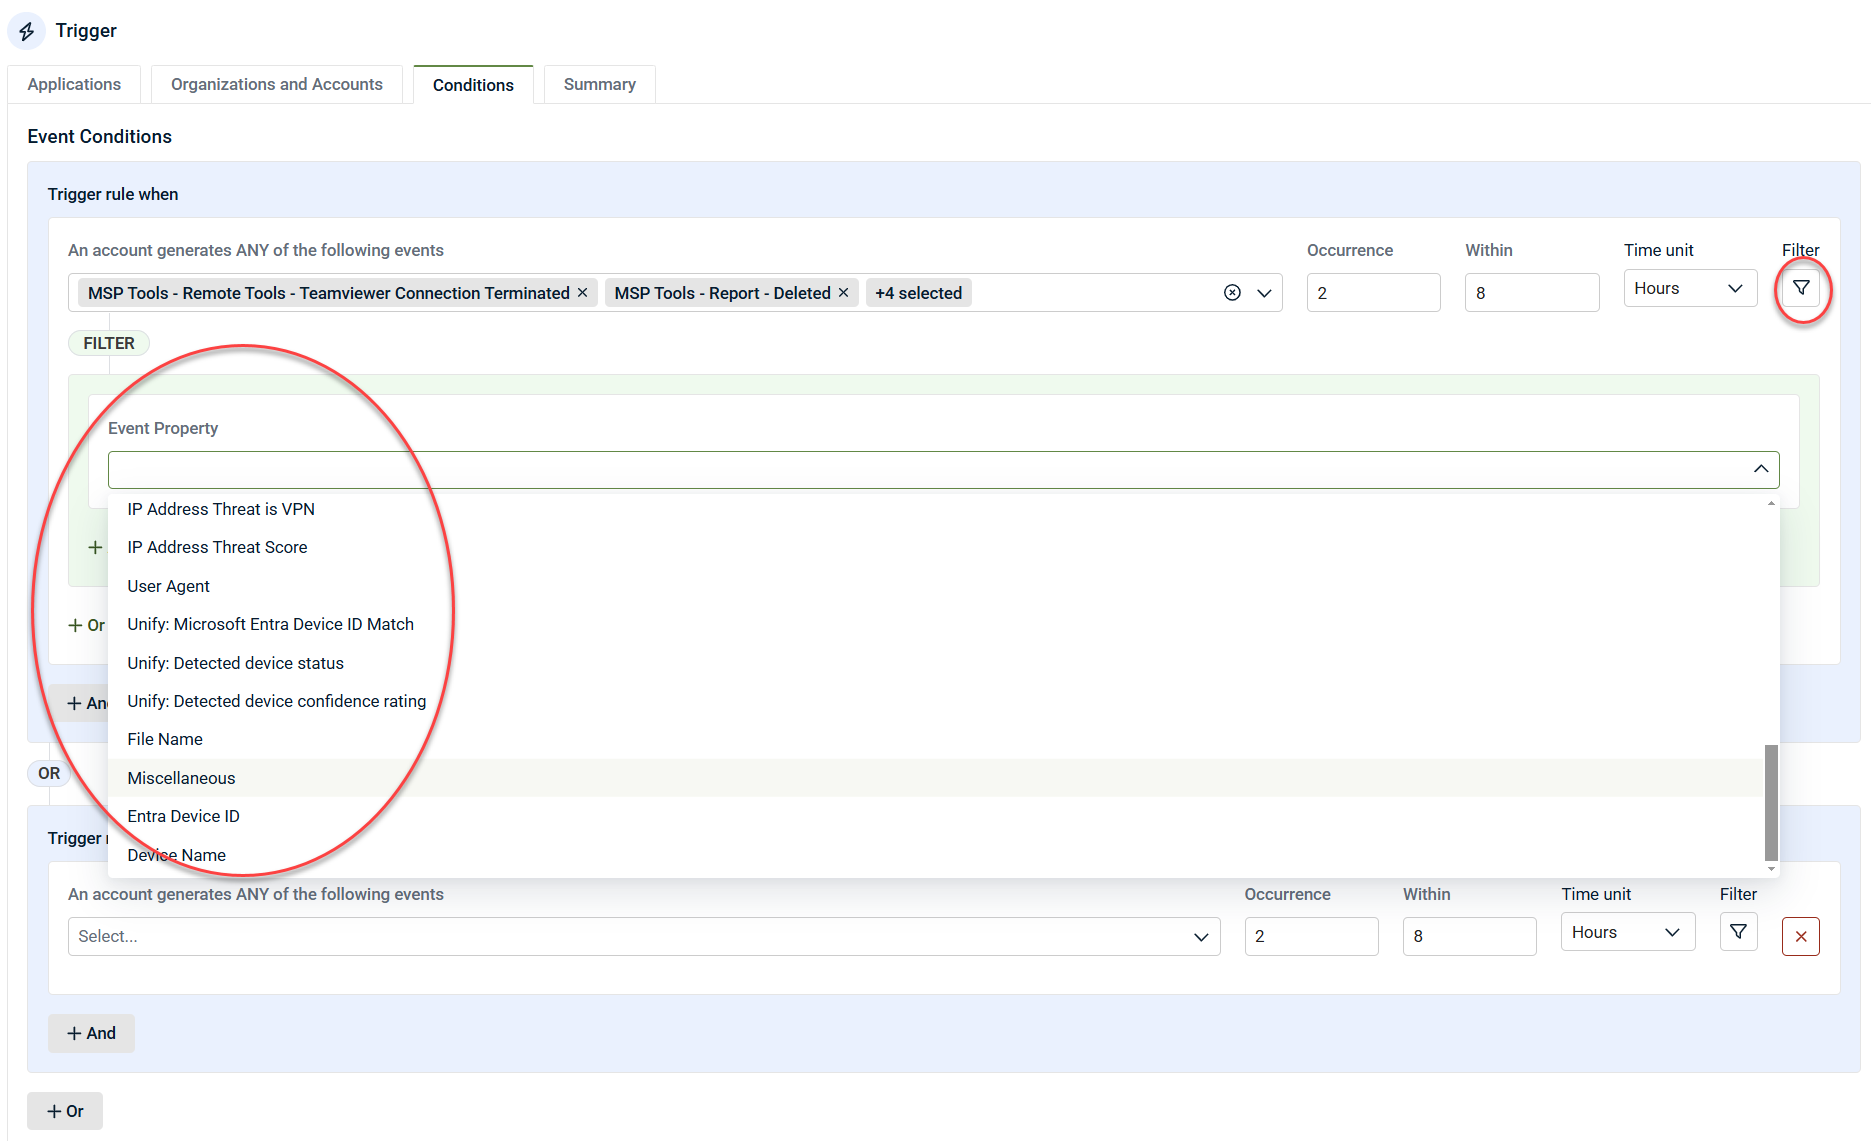
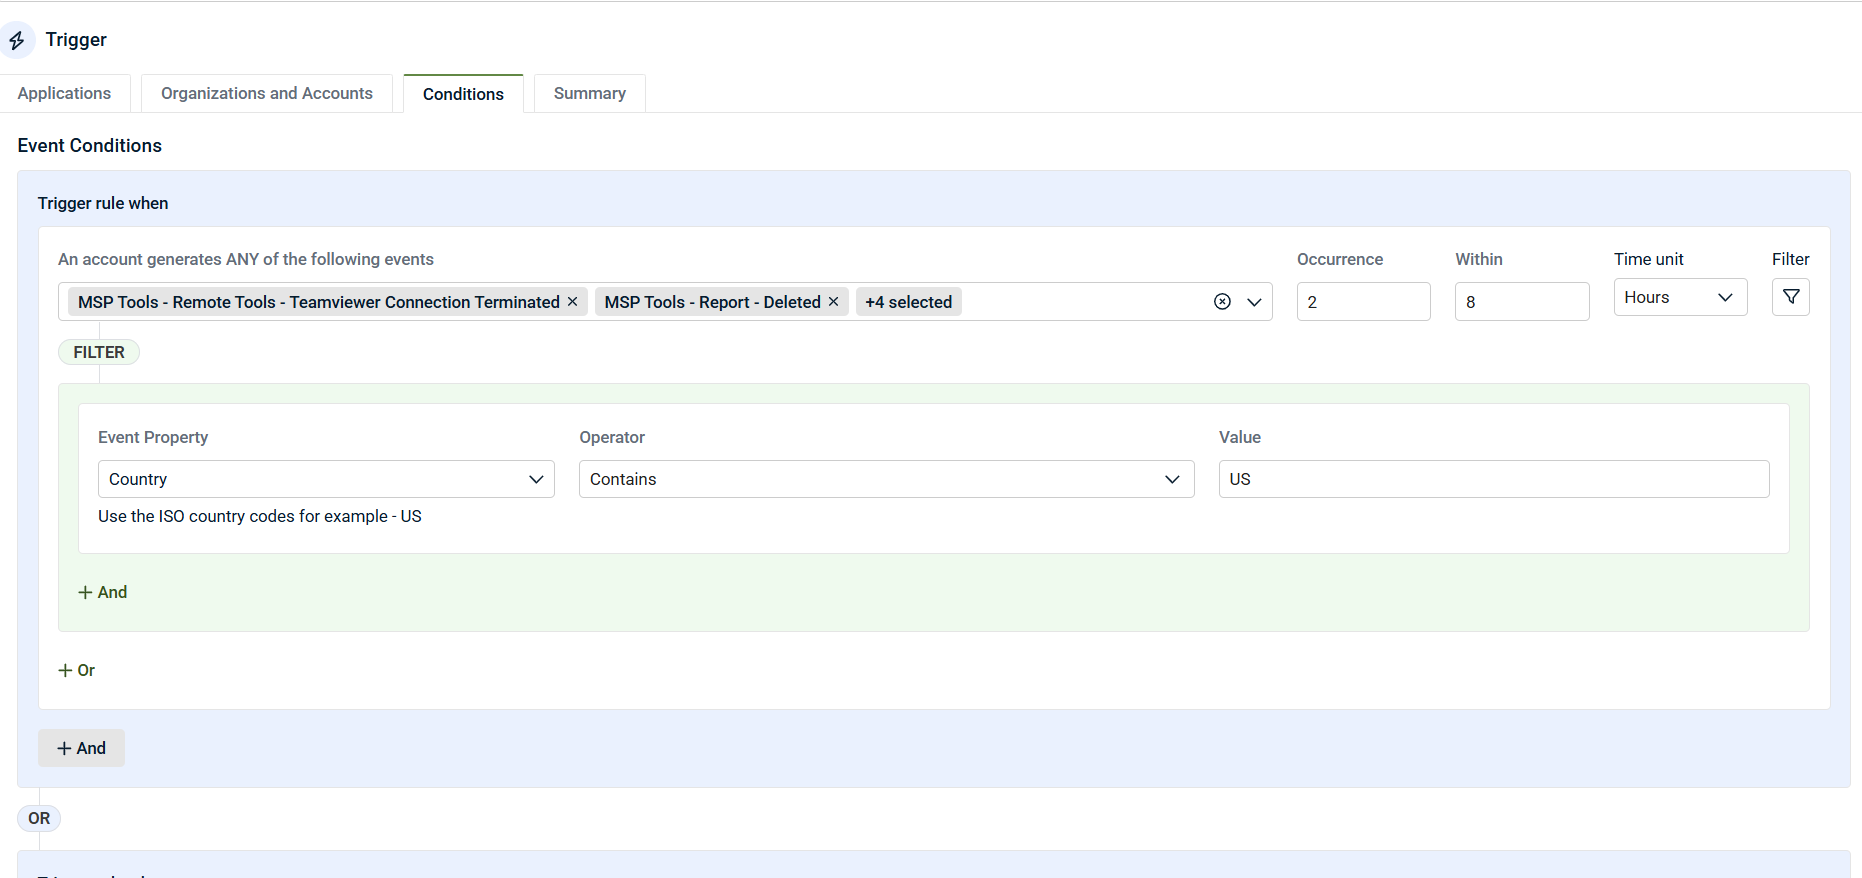
Apply filters to individual events (for example: Country, Device Type, User, IP).
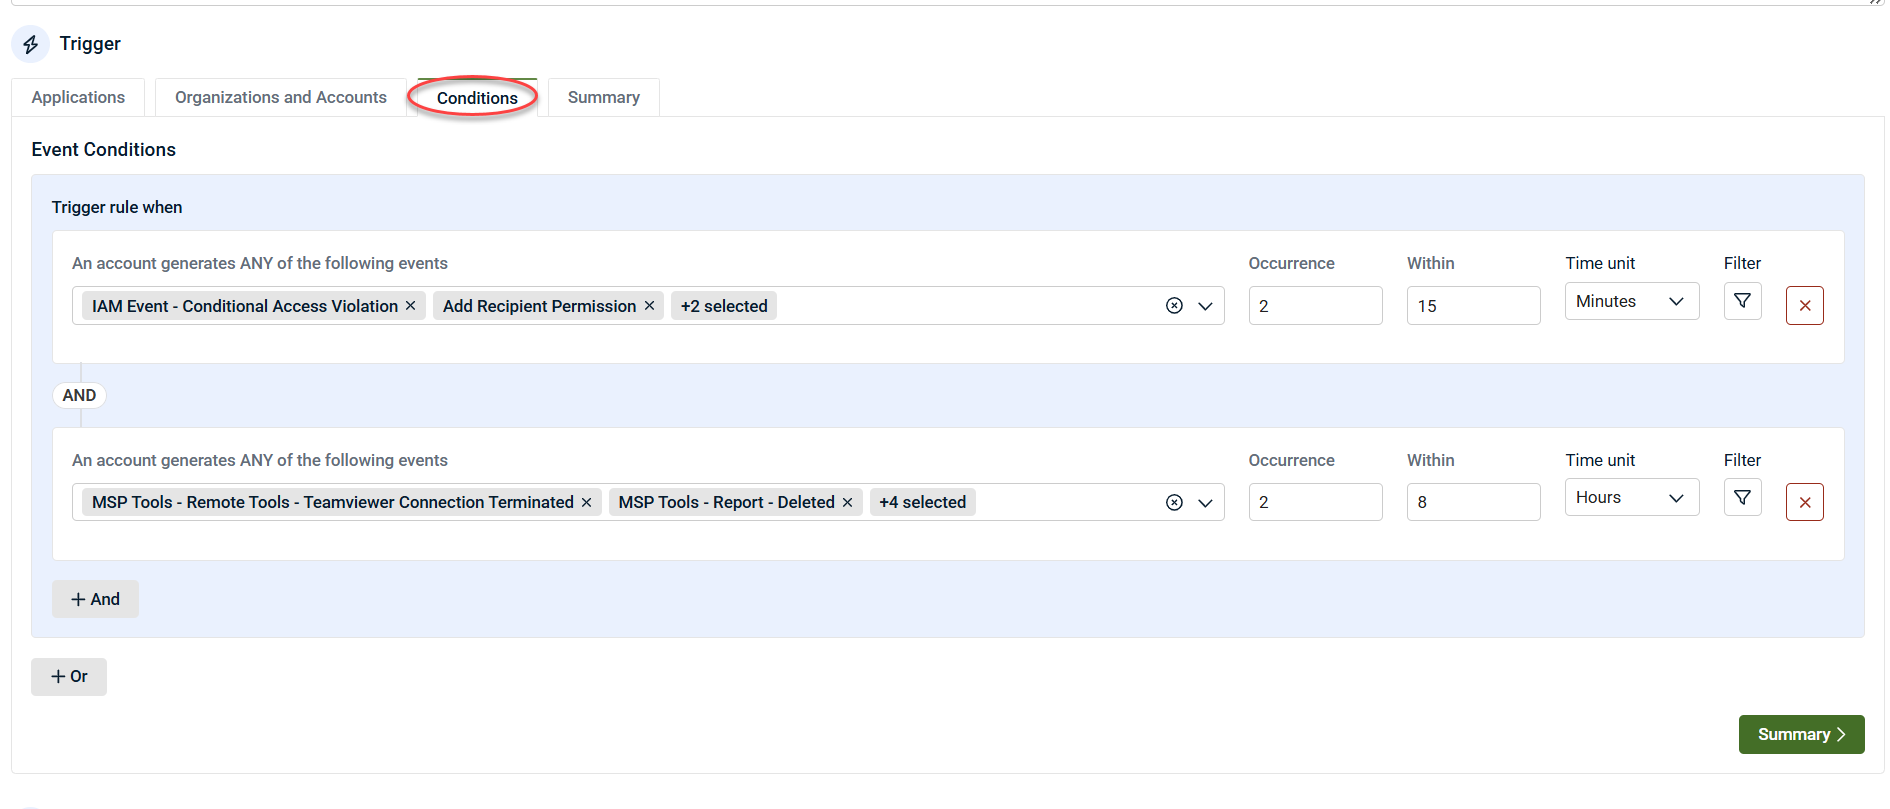
NOTE IoCs are scanned every five minutes to evaluate rule conditions.
For each event selected in the rule, a filter can be applied. Filters enable the establishment of additional criteria based on specific event details. For example, you might use a filter such as Country contains US or Country does not contain US. This will determine whether instances of an event are included or excluded based on the specified filter.
-
Click Summary to proceed.
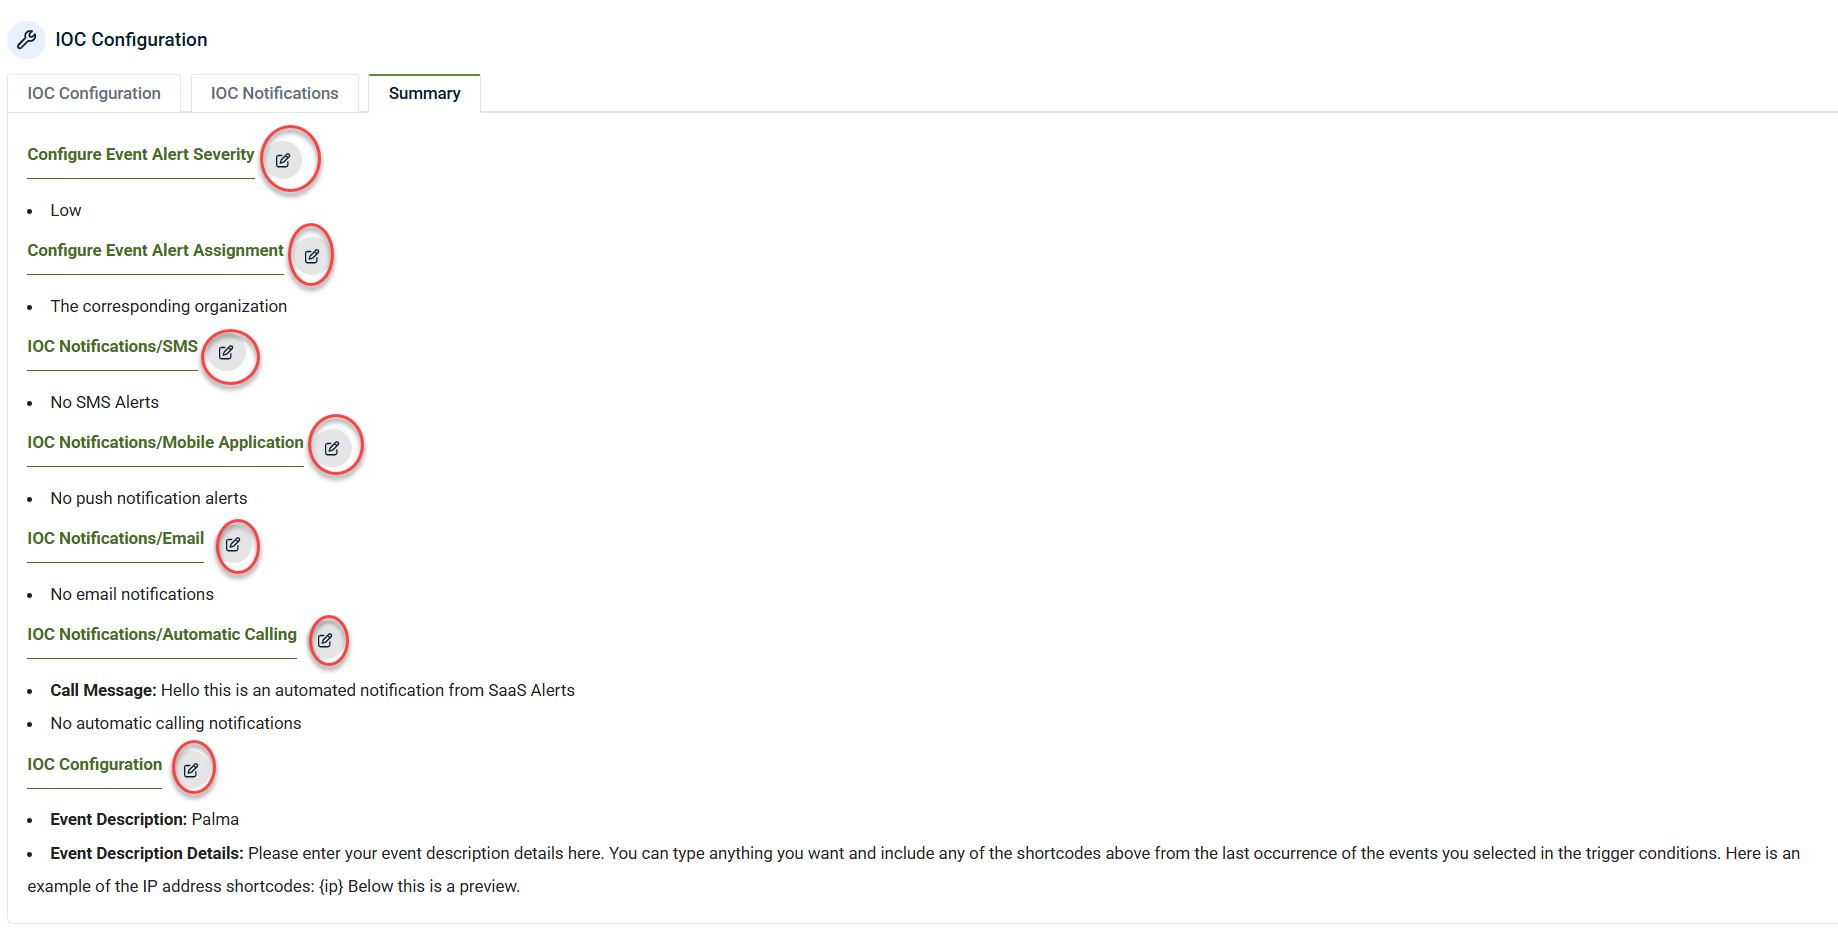
The Summary screen displays:
-
Selected applications
-
Organizations and accounts
-
Events, filters, and logic
You can return to any previous step using the edit icons.
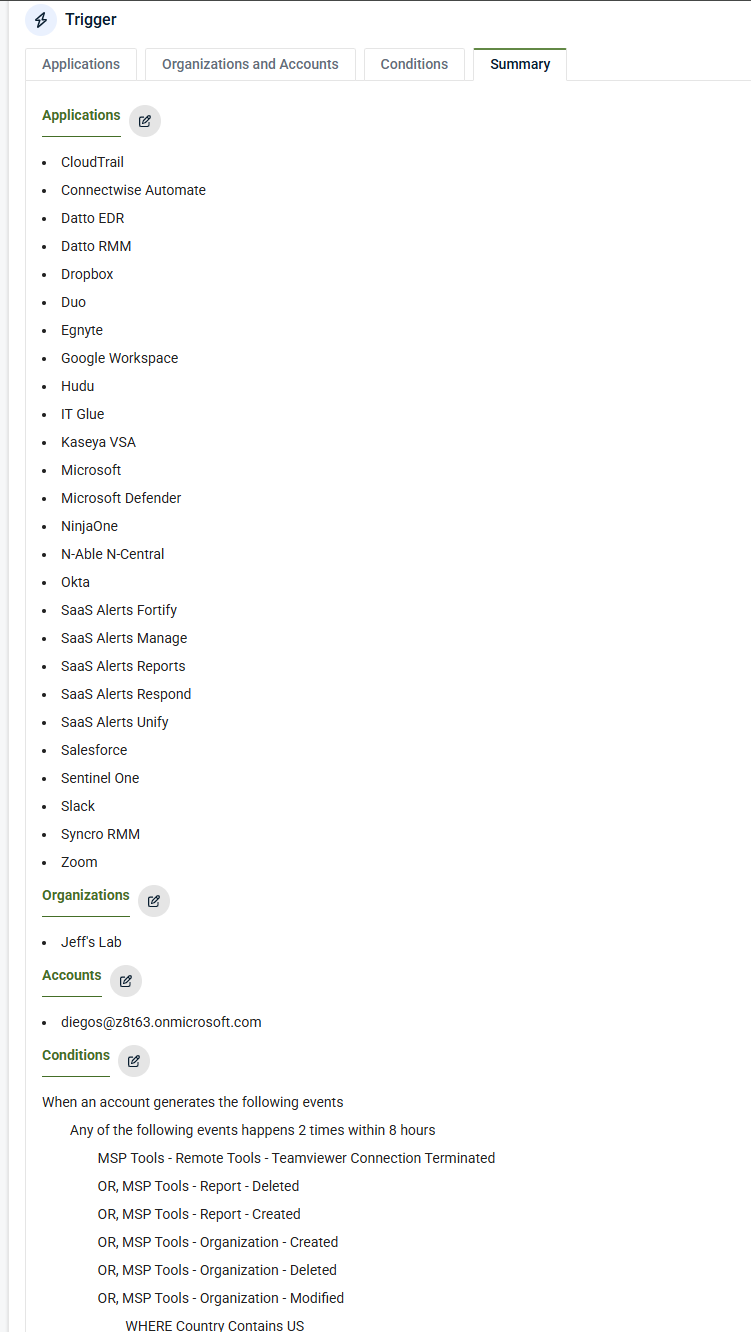
If everything appears to be correct, scroll down to proceed to the IoC Configuration section.
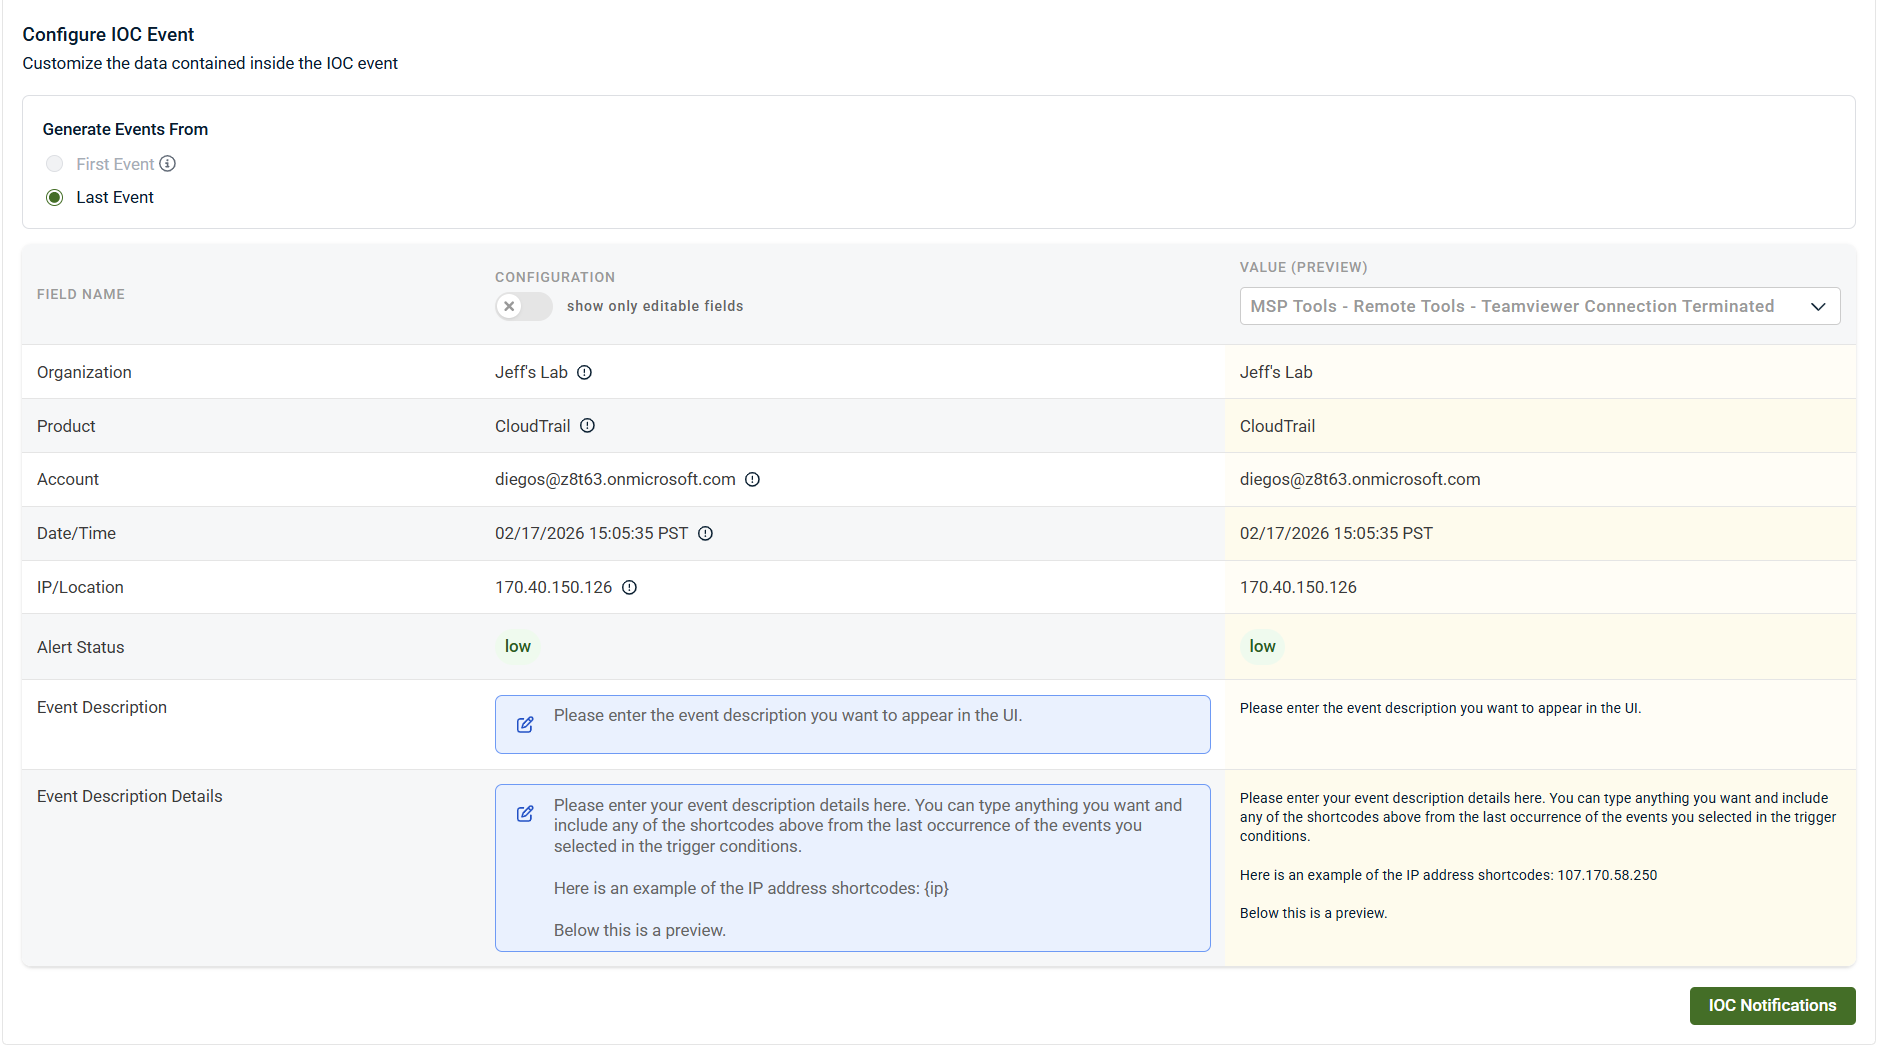
IoC configuration
Alert severity
Set the severity of the IoC event in the IoC Configuration tab:
-
Low: Informational, no PSA ticket by default
-
Medium: Creates PSA tickets and notifications
-
Critical: High‑priority alerting
Many partners set individual IoCs to Low and rely on Respond rules to escalate severity when combined with other activity.

Custom IoC event fields
IoCs support full customization of event fields:
-
Event name
-
Event description
-
Event description detail
-
Event assignment
Click the blue field boxes to customize.
Short codes
Short codes allow you to dynamically pull values from triggering events, such as:
-
Username
-
Email address
-
Device information
-
Operating system
-
IP address
-
User agent
These can be embedded into:
-
Event names
-
Descriptions
-
Detailed descriptions
This enables highly descriptive, filterable events.
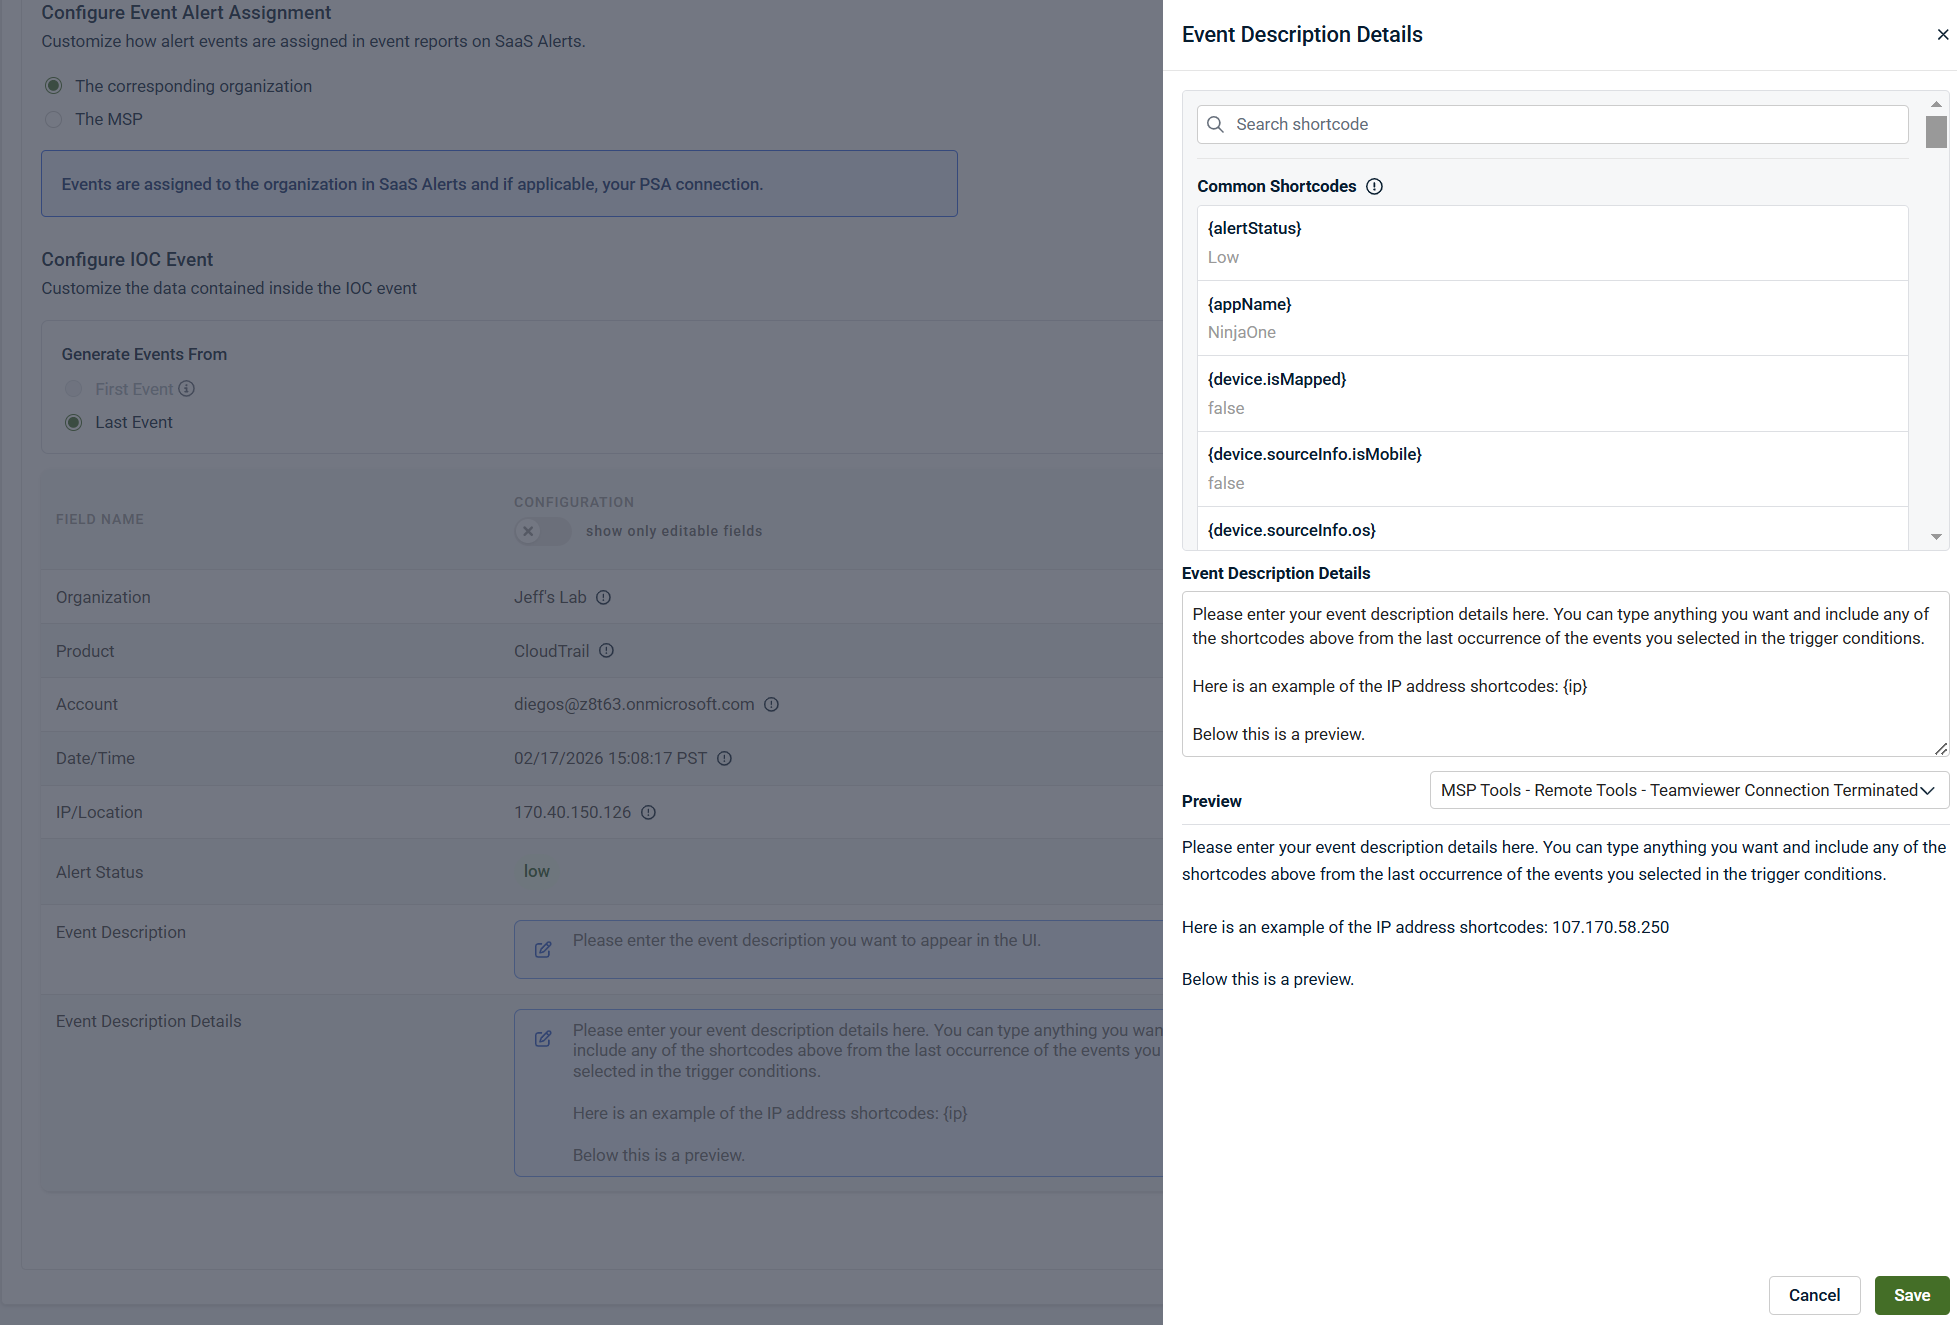
Event Description Detail (Advanced)
The Event Description Detail field is especially powerful:
-
Appears as the smaller detail text under the event in Analysis.
-
Can contain structured text and short codes.
-
Can be filtered against in Respond rules or other IoCs.
Example use cases:
-
Filtering on a specific user or email address
-
Including internal remediation instructions
-
Displaying device or tenant context
-
Adding analyst notes or playbook references
Notifications
IoCs support custom notifications:
-
Email
-
SMS
-
Mobile push notifications
Select one or more notification types, then click + Add to include recipients.
Multiple recipients can be configured.
Notifications are optional and independent of PSA ticket creation.
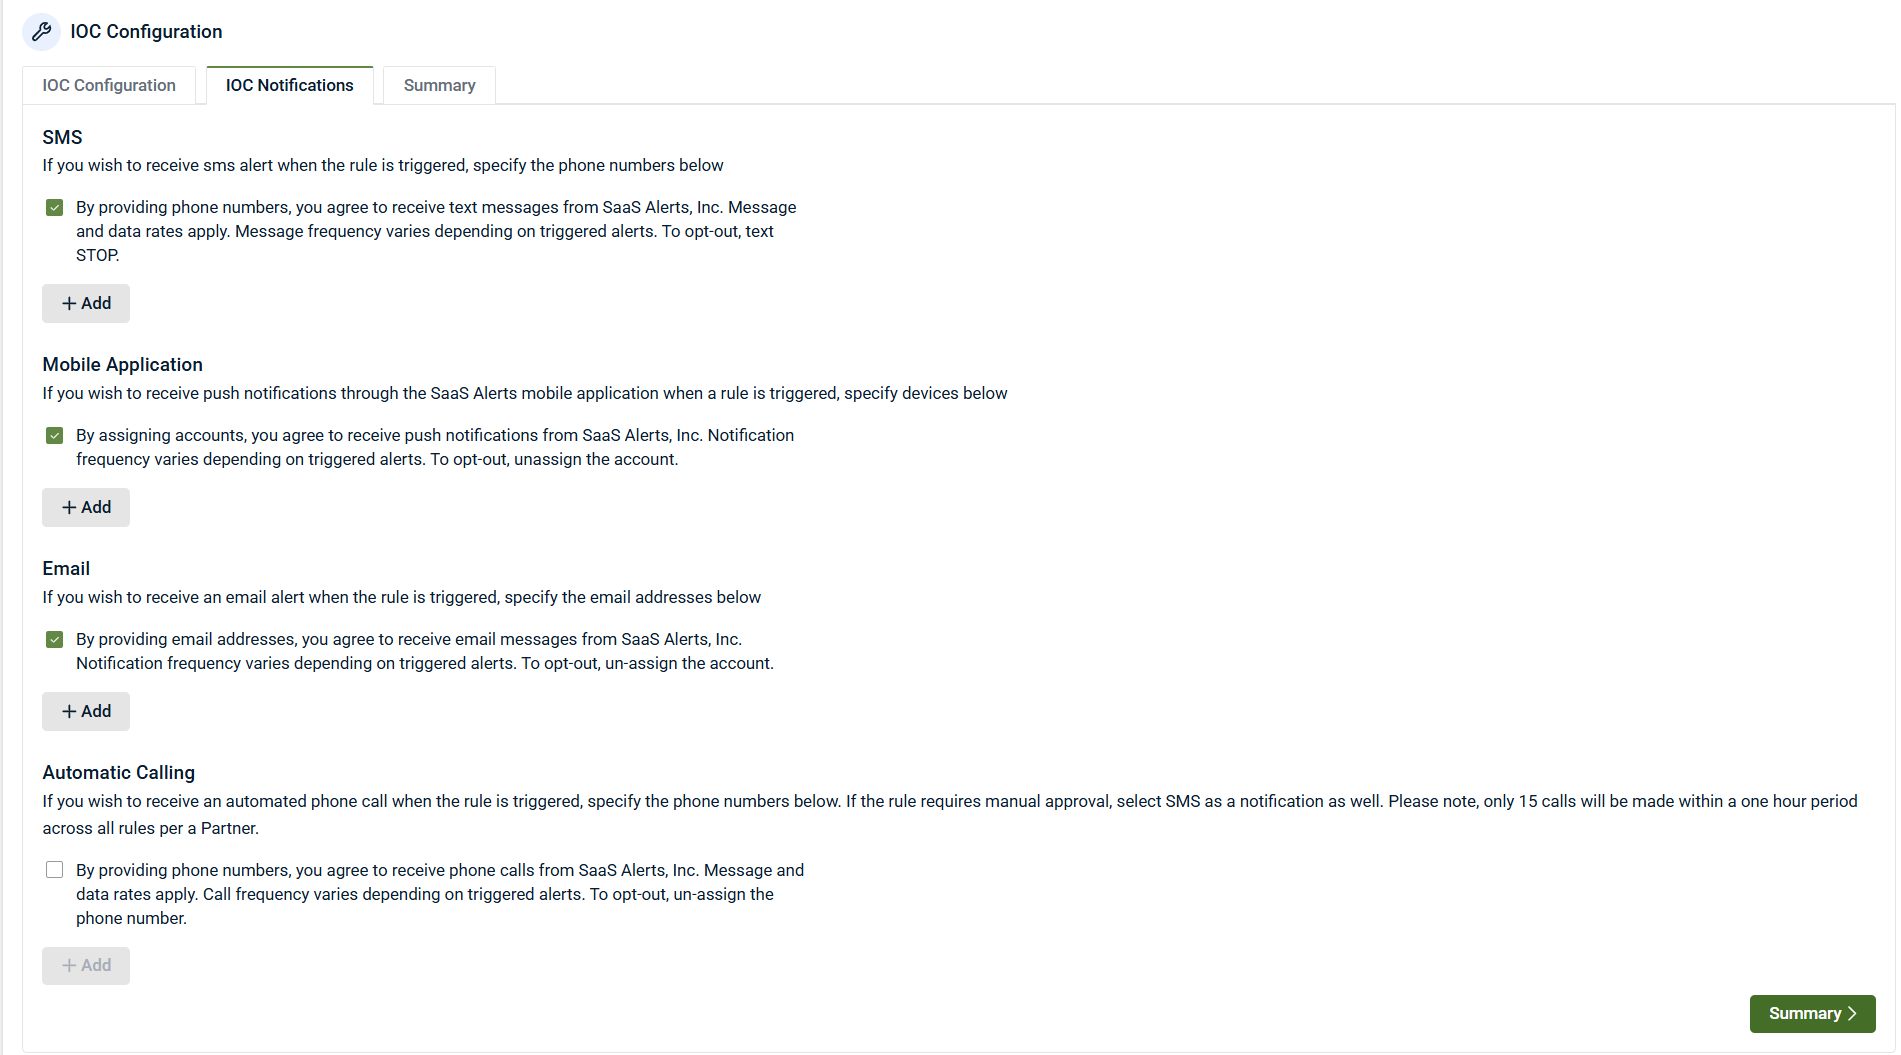
Click Summary to review the IoC Configurations section. Use the edit icons to make changes if needed.
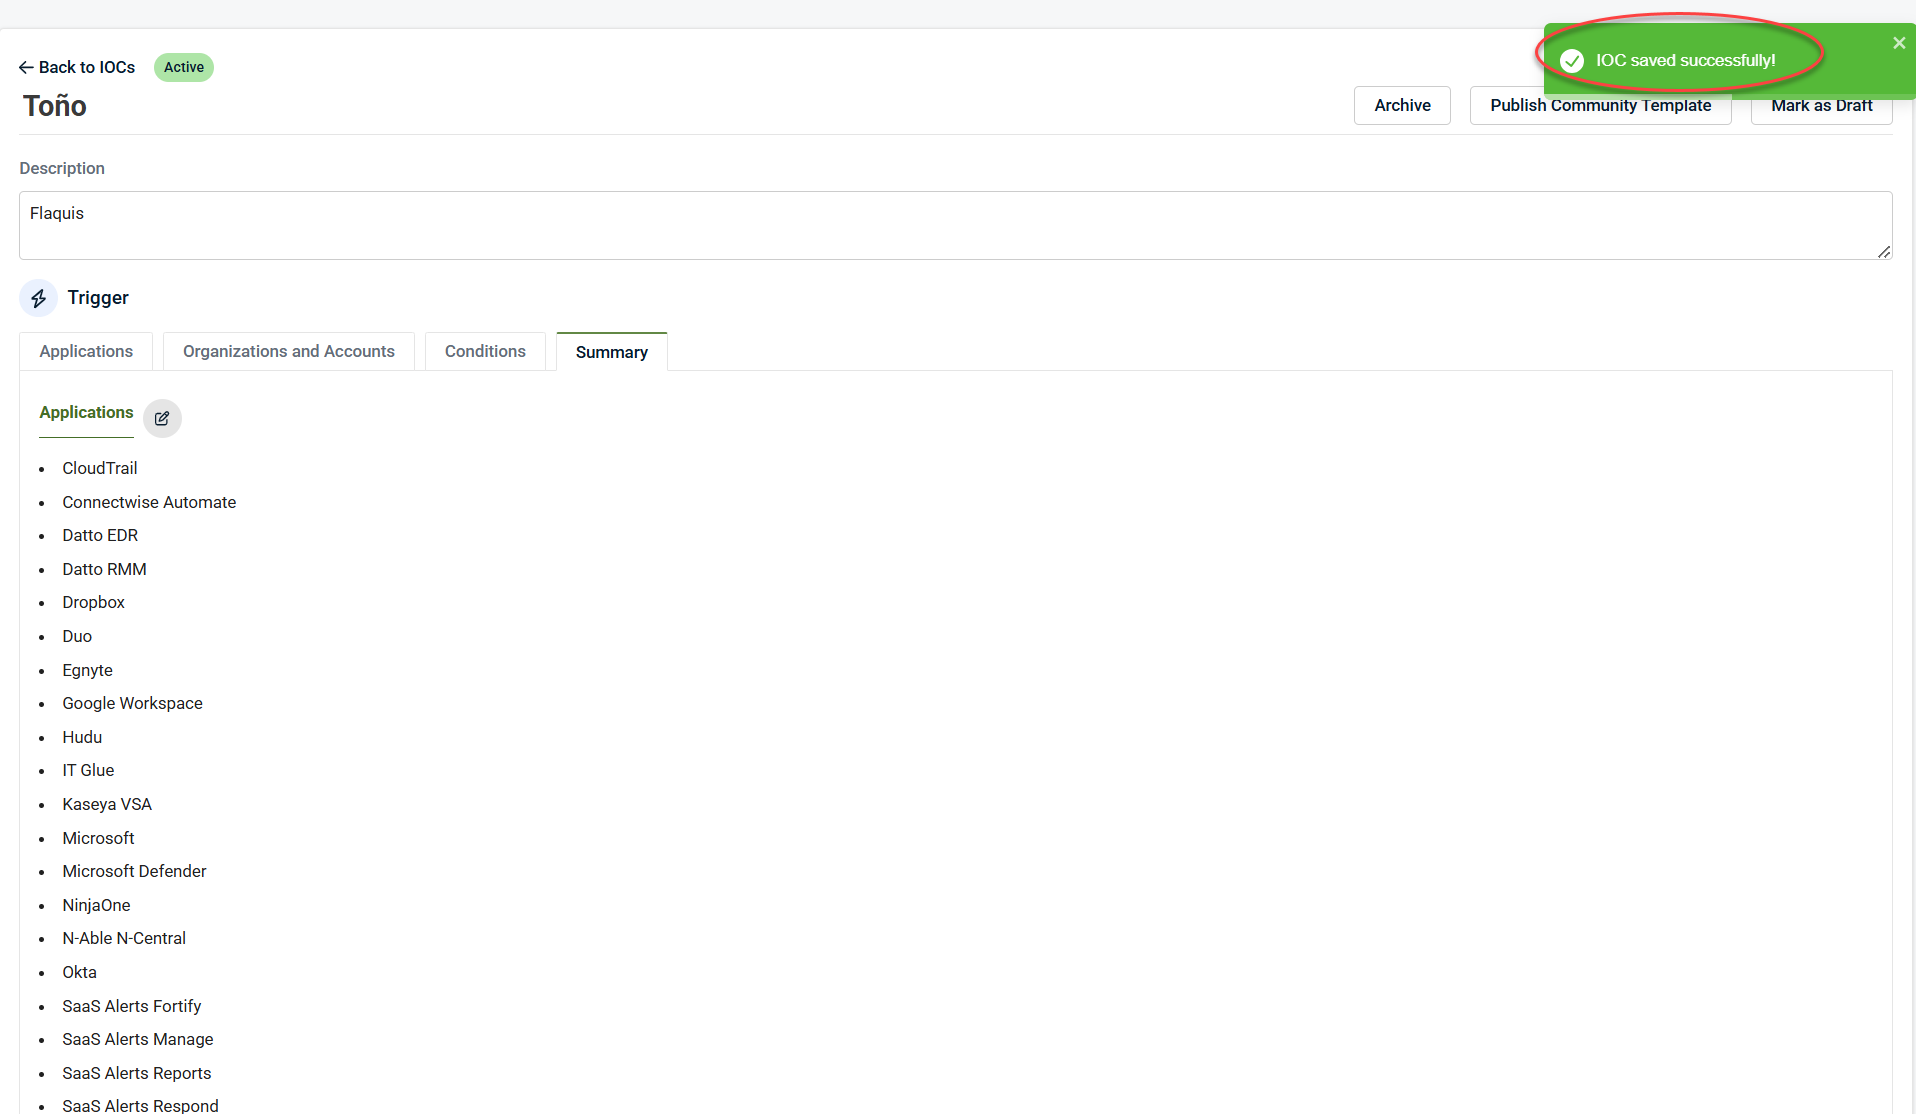
Saving the rule
If everything looks correct, click Save Rule in the upper-right corner.
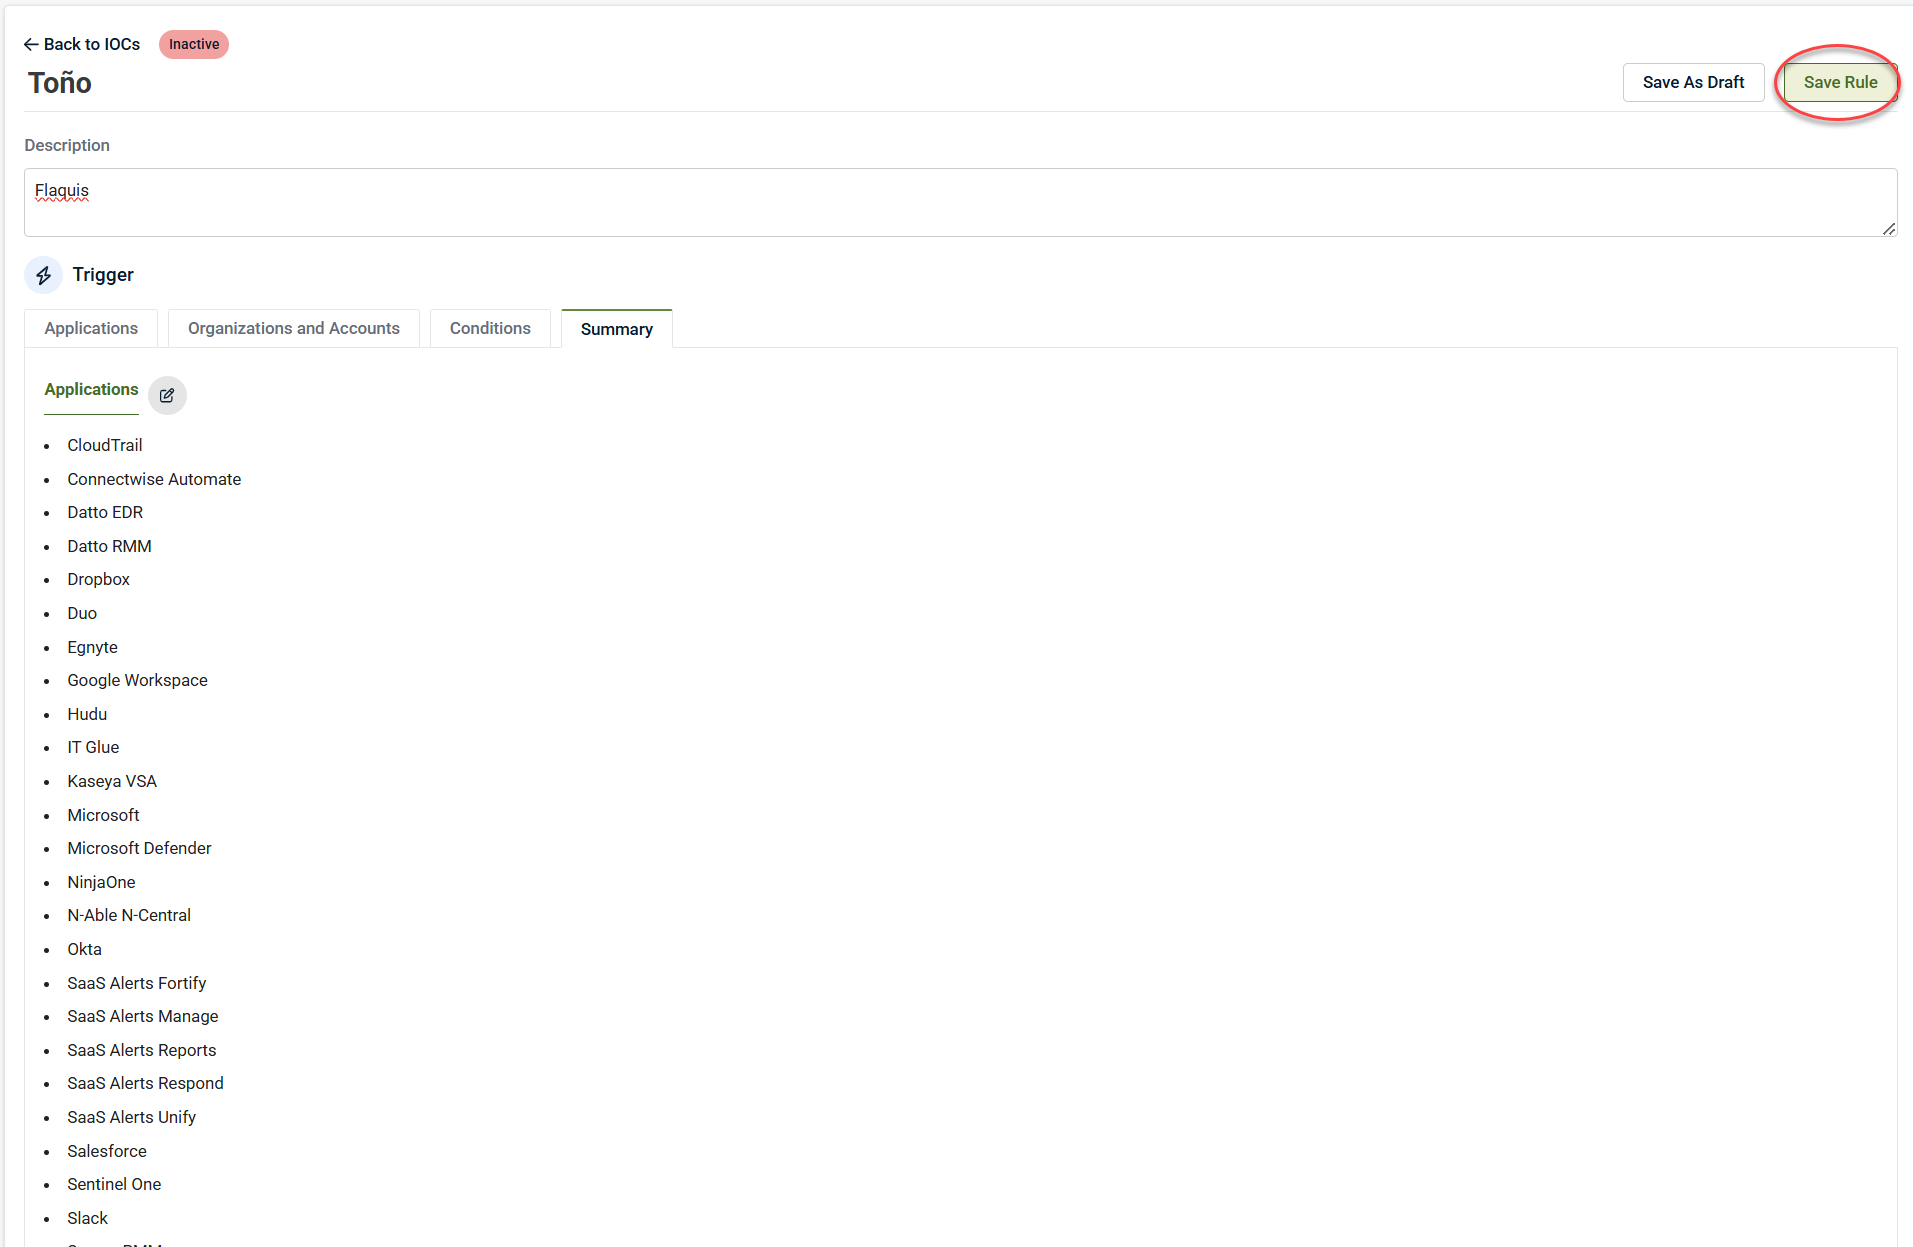
A success message appears confirming the rule was saved.
Publishing to Community Templates
If you create an IoC that may benefit others:
1. Open the IoC.
2. Click Publish Community Template.
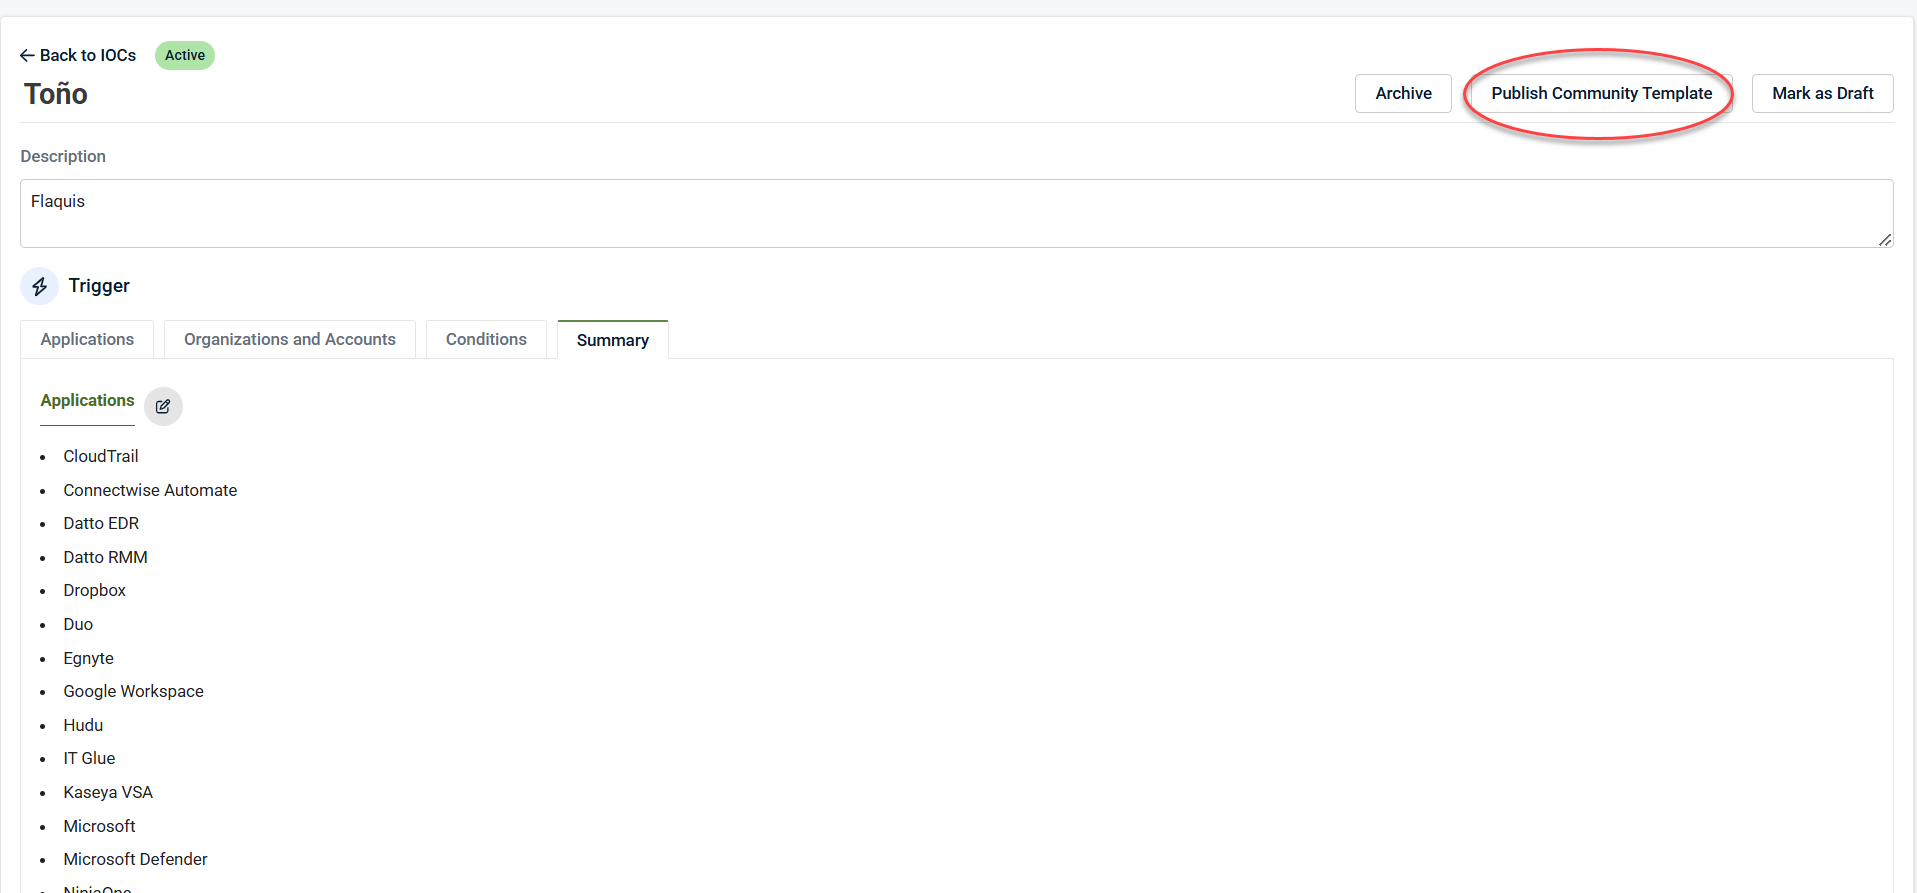
3. Click Publish to submit it for review.
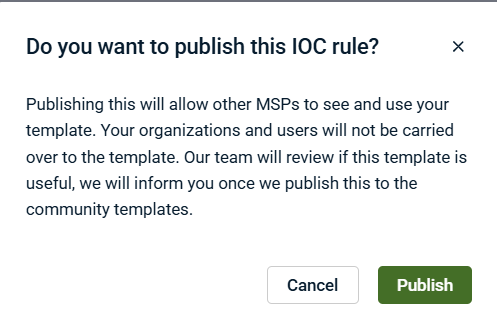
4. A success publish request will be displayed on the upper-right corner.
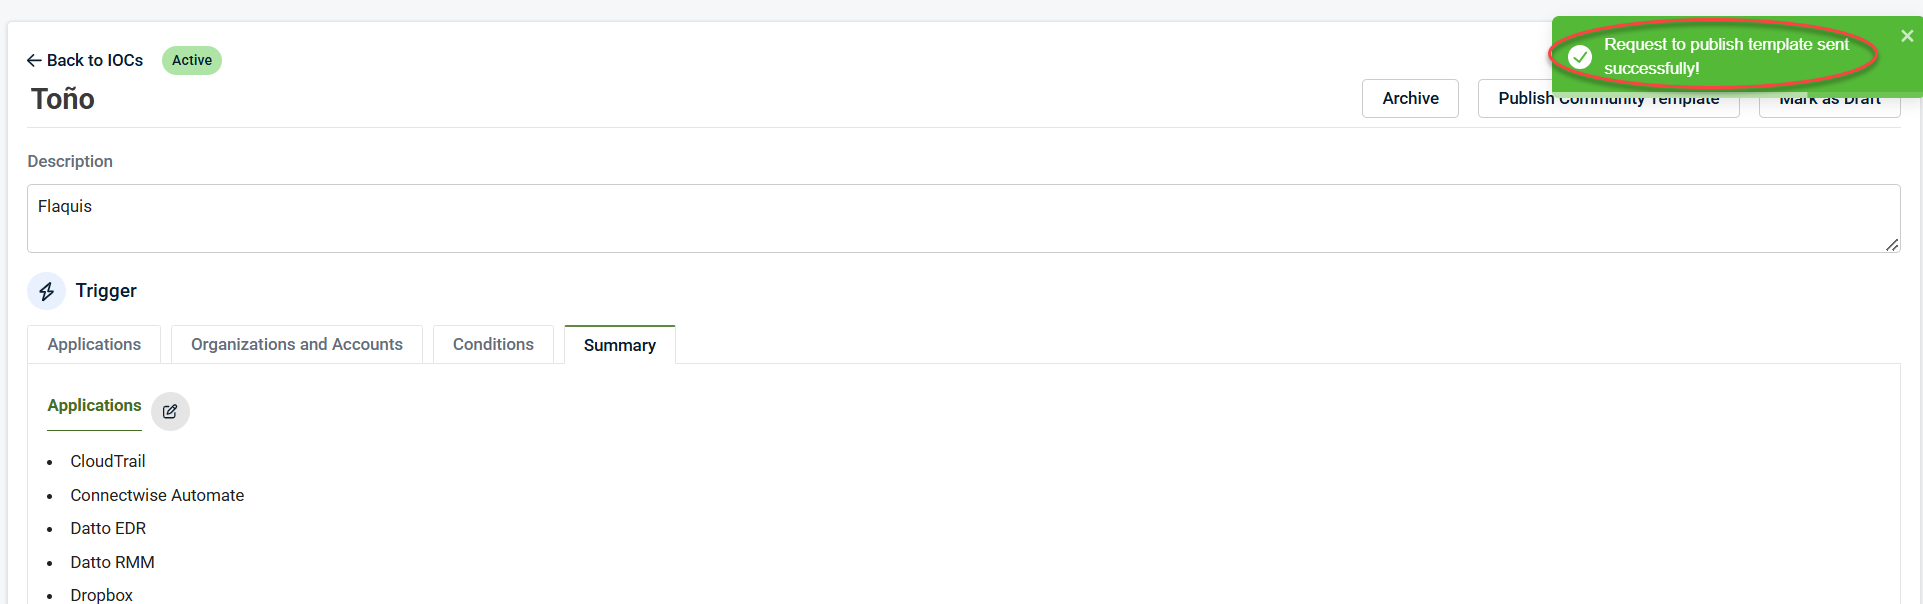
Approved IoCs may be added to the Community Templates library.
Using IoCs with Respond Rules
IoCs integrate directly with Respond.
Use IoCs in Respond to:
-
Avoid rebuilding complex filters
-
Reuse detection logic across multiple rules
-
Combine low‑risk signals into high‑confidence detections
Example workflow
1. IoC: Authentication from unknown device (Low severity)
2. Respond Rule:
-
Event 1: IoC – Unknown Device Authentication
-
Event 2: Mailbox rule created
-
Timeframe: 1 hour
3. Action: Trigger response, escalation, or automation
This approach reduces false positives while improving detection fidelity.
NOTE Newly created IoCs may take up to 15 minutes to appear in Respond due to caching.
Viewing IoC trigger details
1. Expand Indicators of Compromise.
2. Click Rules in the side navigation menu.
3. Select an IoC instance and click the Last 7 Days Triggered History icon.
This view shows:
-
All events that contributed to the IoC trigger
-
Event timing and context
-
Supporting forensic data
Converting Respond Rules to IoCs
Existing Respond rules can be converted into IoCs:
1. Expand Respond in the side navigation menu.
2. Click Rules.
3. Click the Convert to IoC icon.
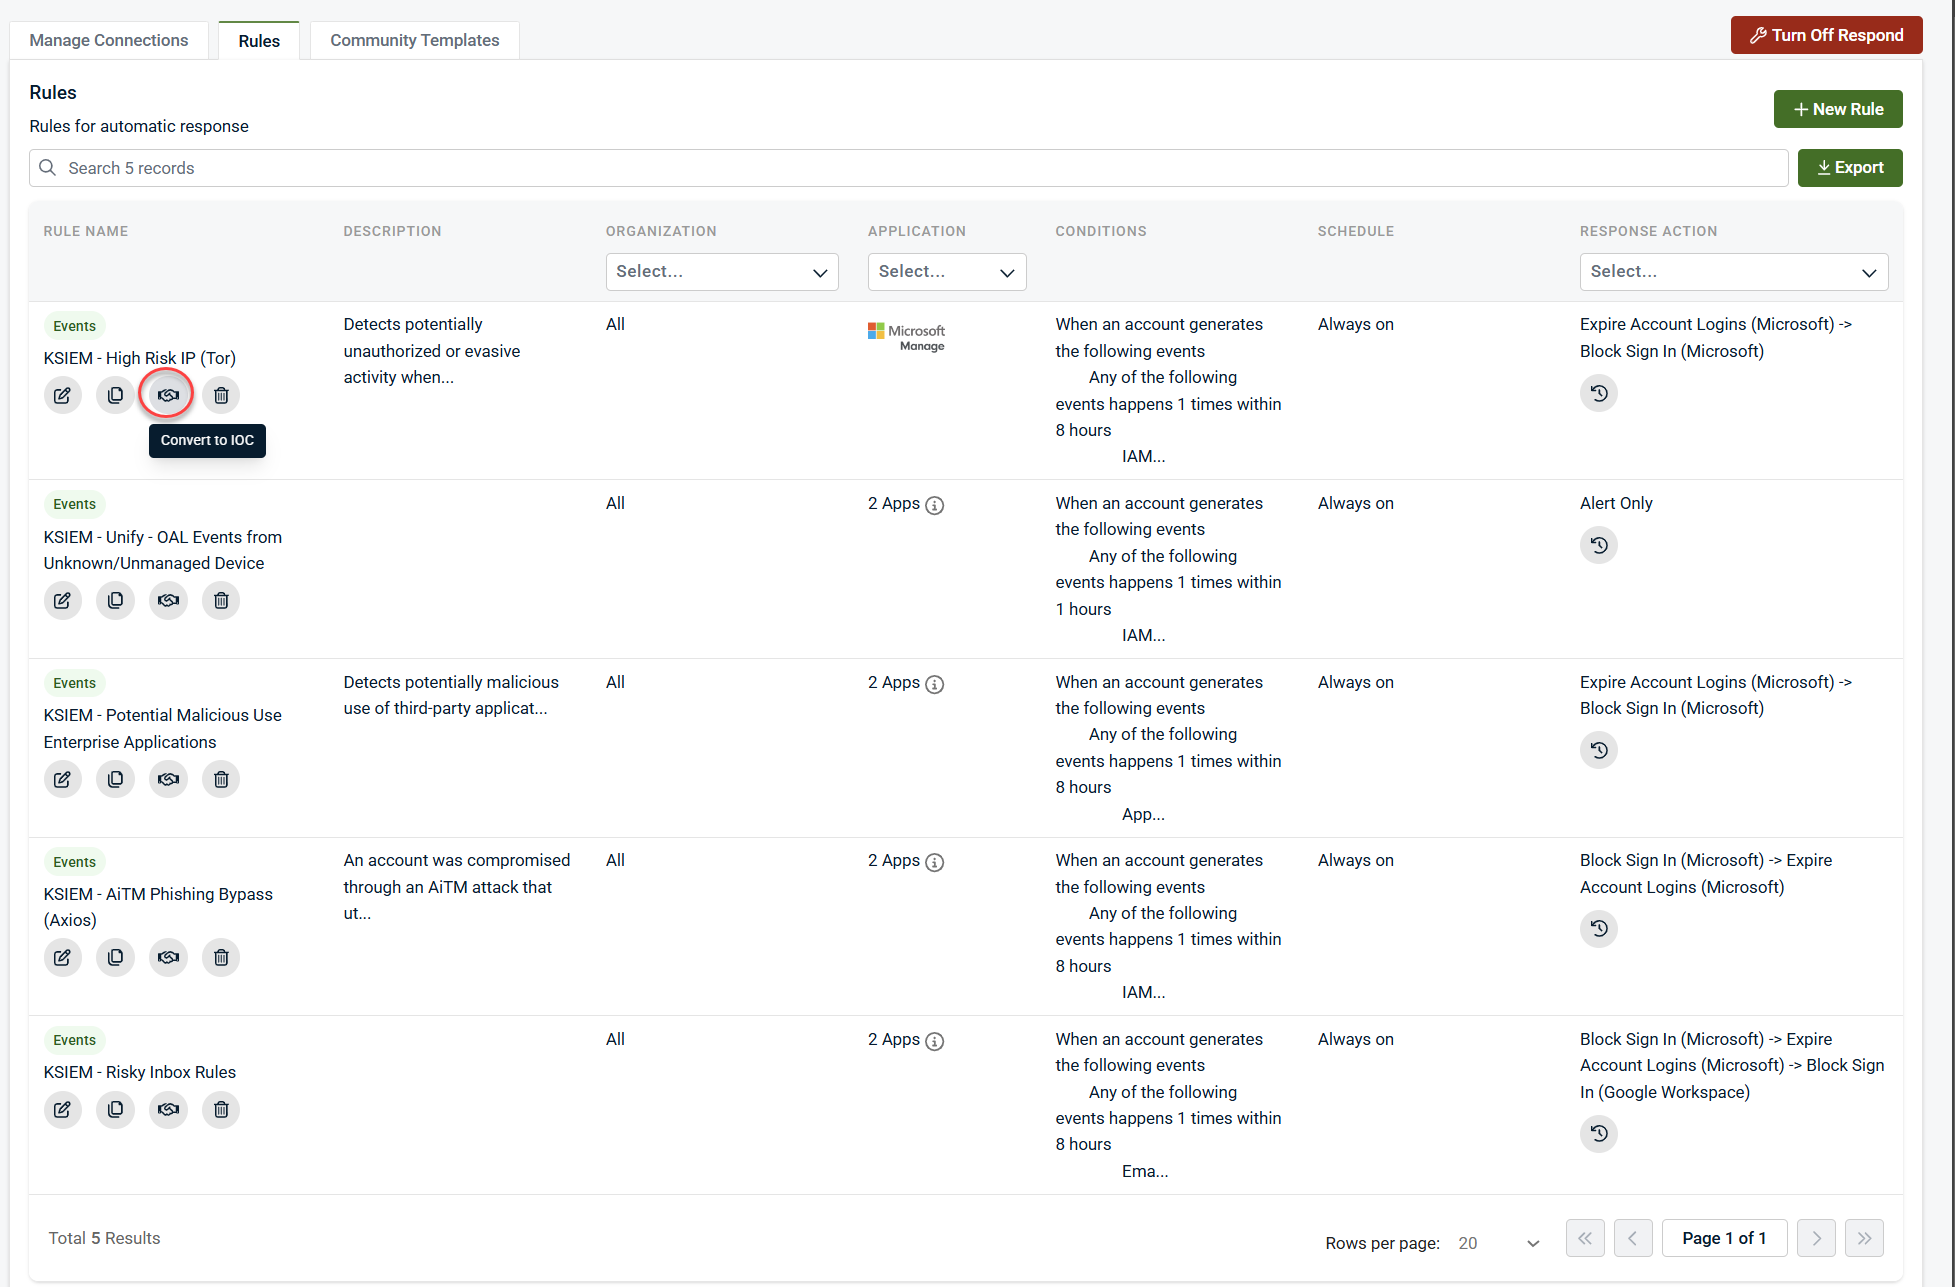
3. Click Convert to IoC when prompted.
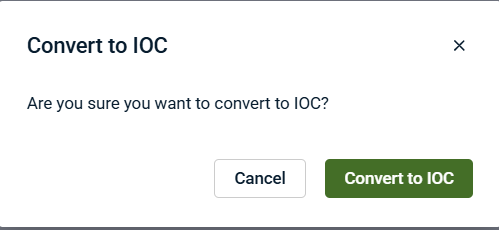
4. A success message will display in the upper-right corner.
This is useful for turning alert‑only Respond logic into reusable IoCs.
Summary
Indicators of Compromise extend SaaS Alerts by enabling partners to:
-
Create custom, reusable detection logic
-
Build richer, context‑aware events
-
Reduce alert fatigue
-
Combine signals for higher‑confidence response
IoCs are a foundational tool for advanced detection strategies and work best when paired with Respond rules.


